Adding a discount or coupon code
You can add a discount coupon or voucher code on the results page and in the follow-up email for your customers to redeem. Bear in mind that discounts are managed on Shopify or WooCommerce, not our app.
Email Discount code
You can customize the follow-up email and the results page to include the code, so your customers can copy/paste it when they proceed to checkout.
Go to your quiz and navigate to the Notifications > TO RESPONDENT tab. You can edit the message there and include your coupon code.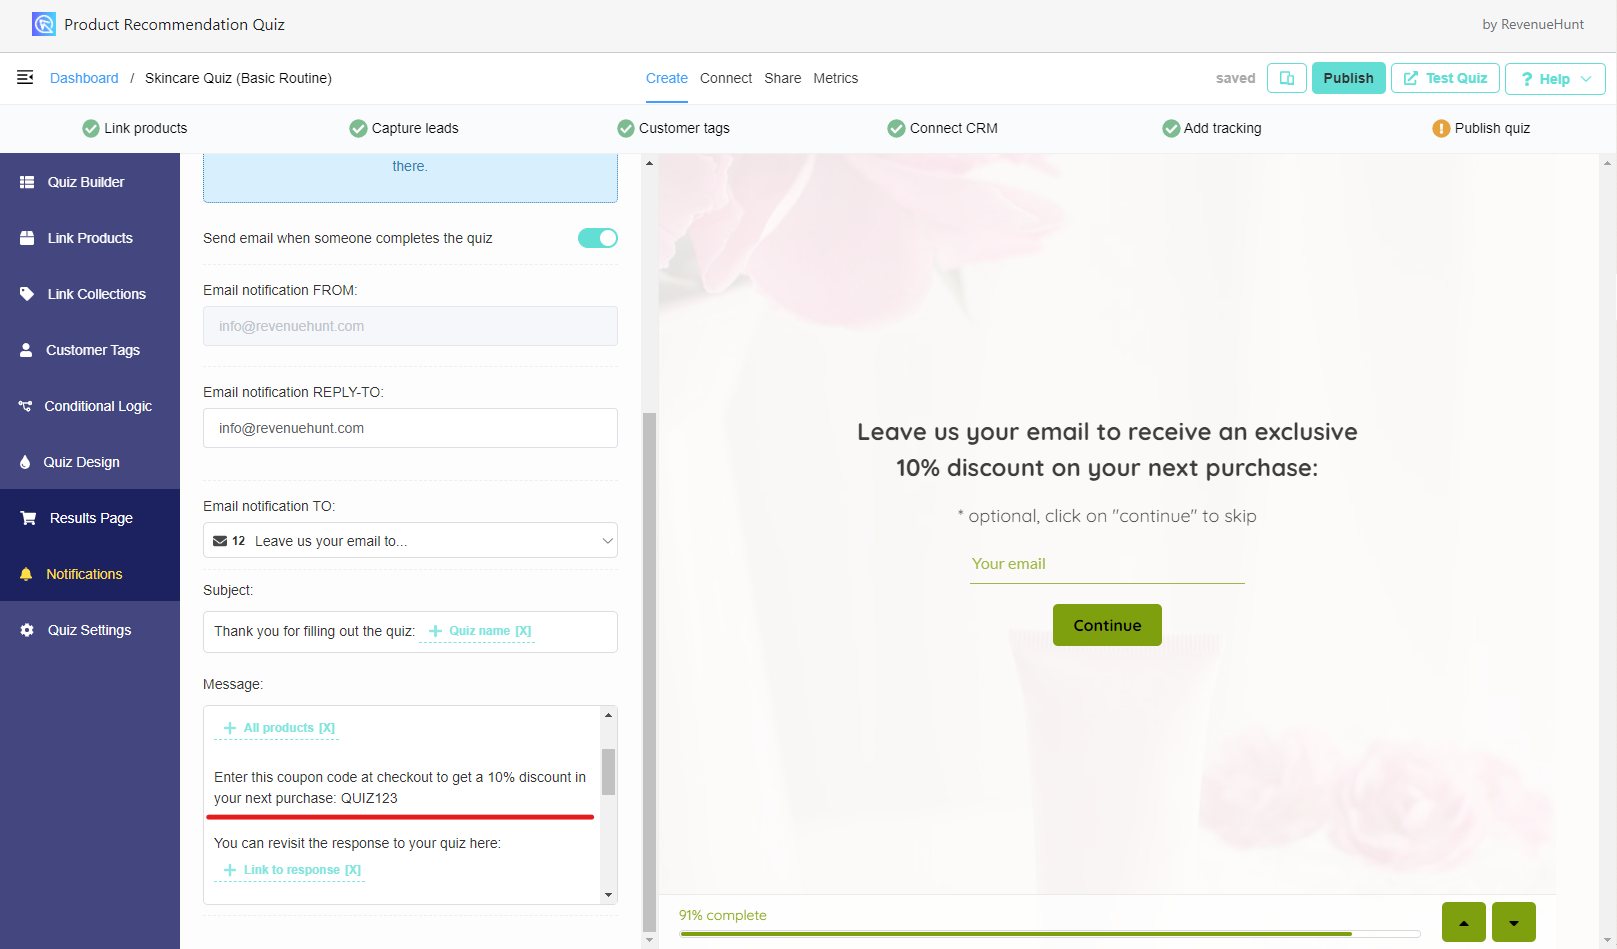
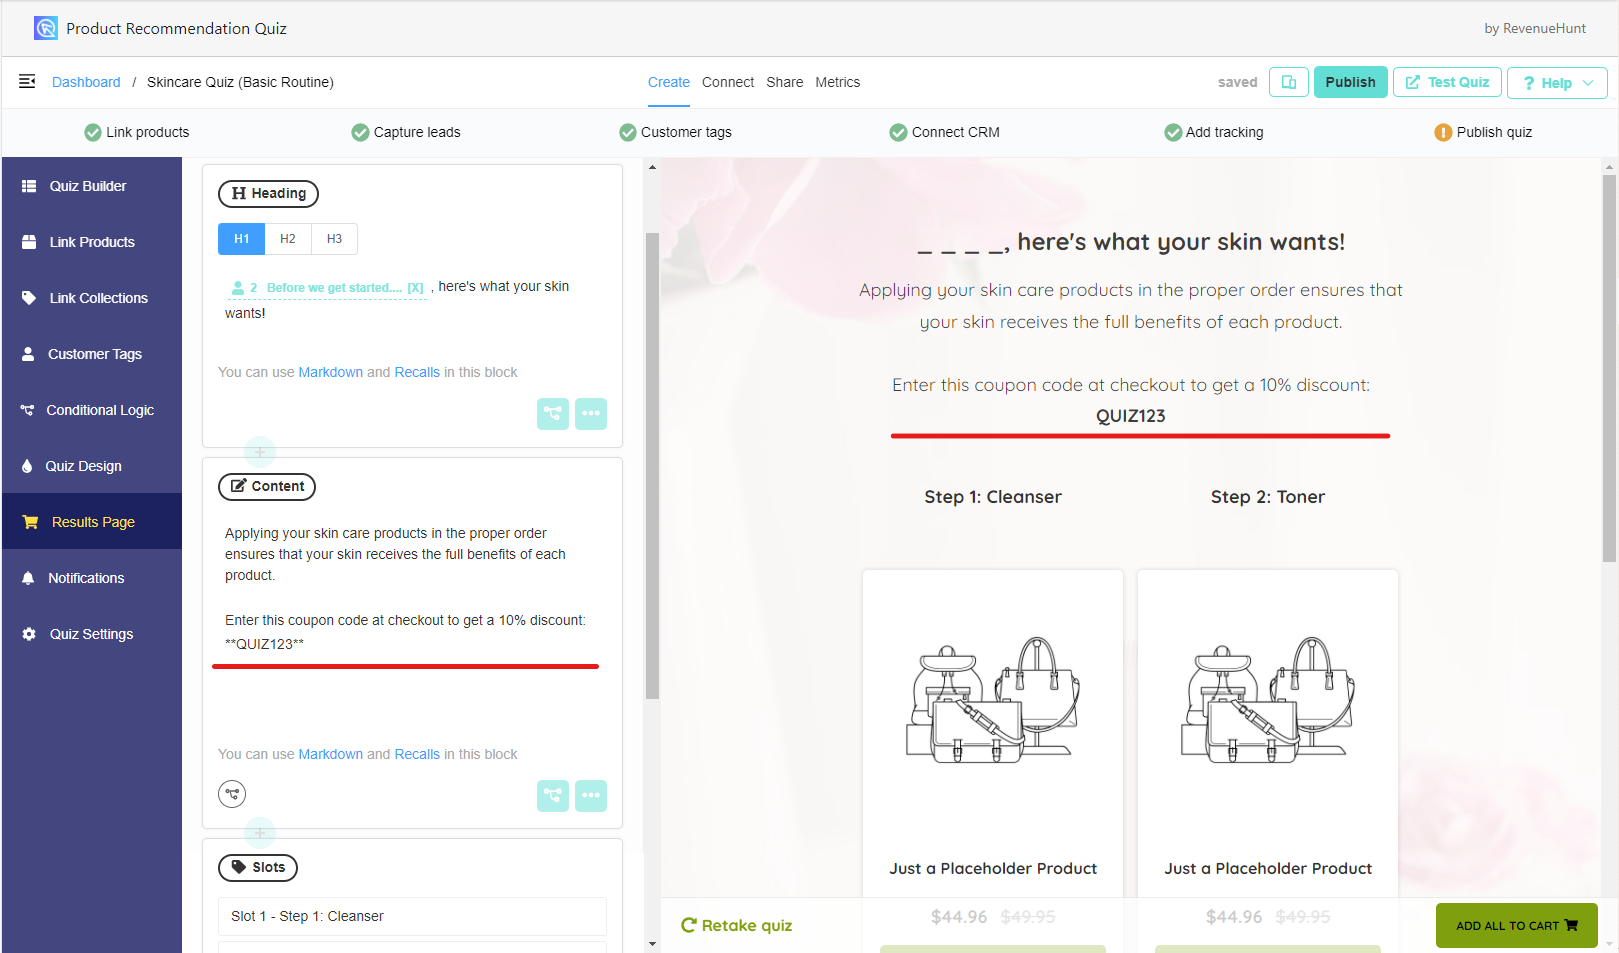
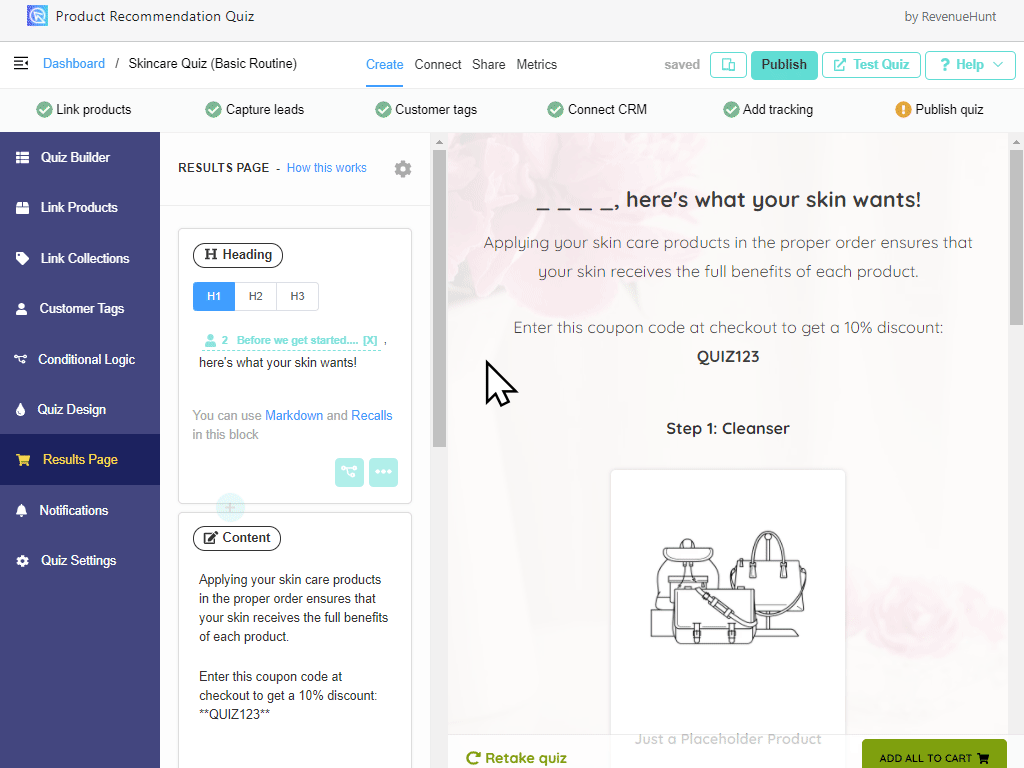
Results Page Discount Code
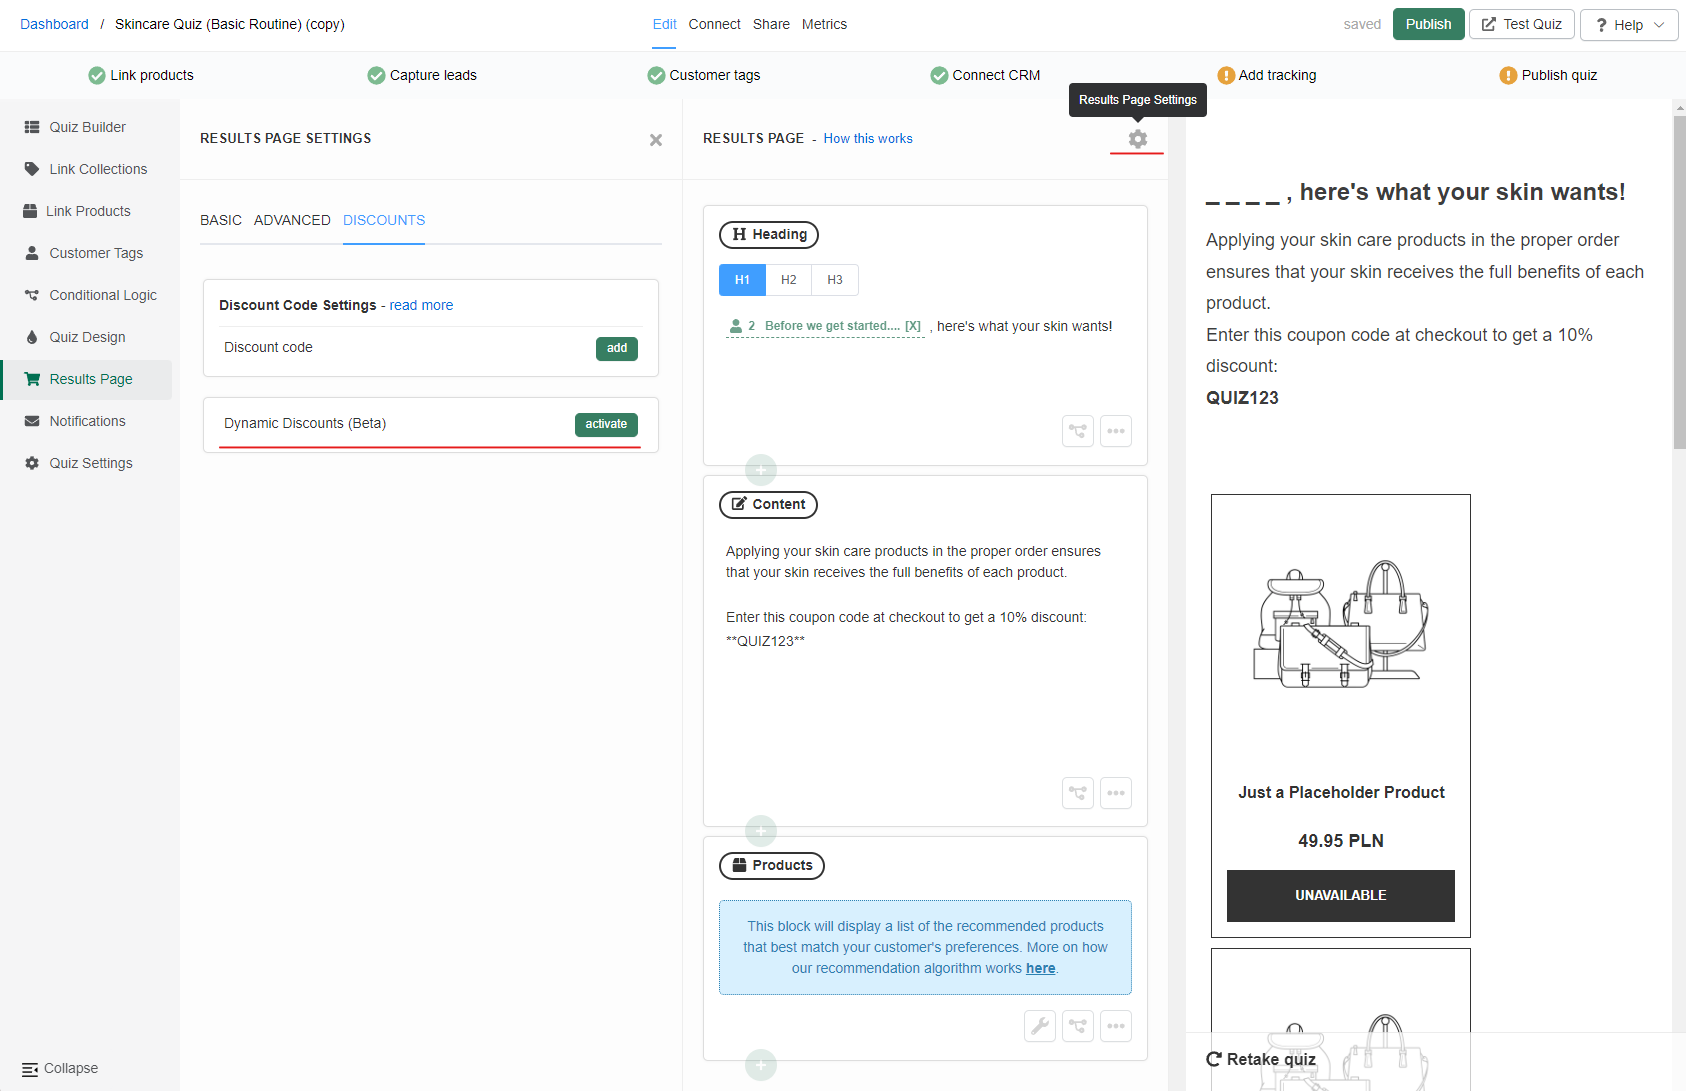
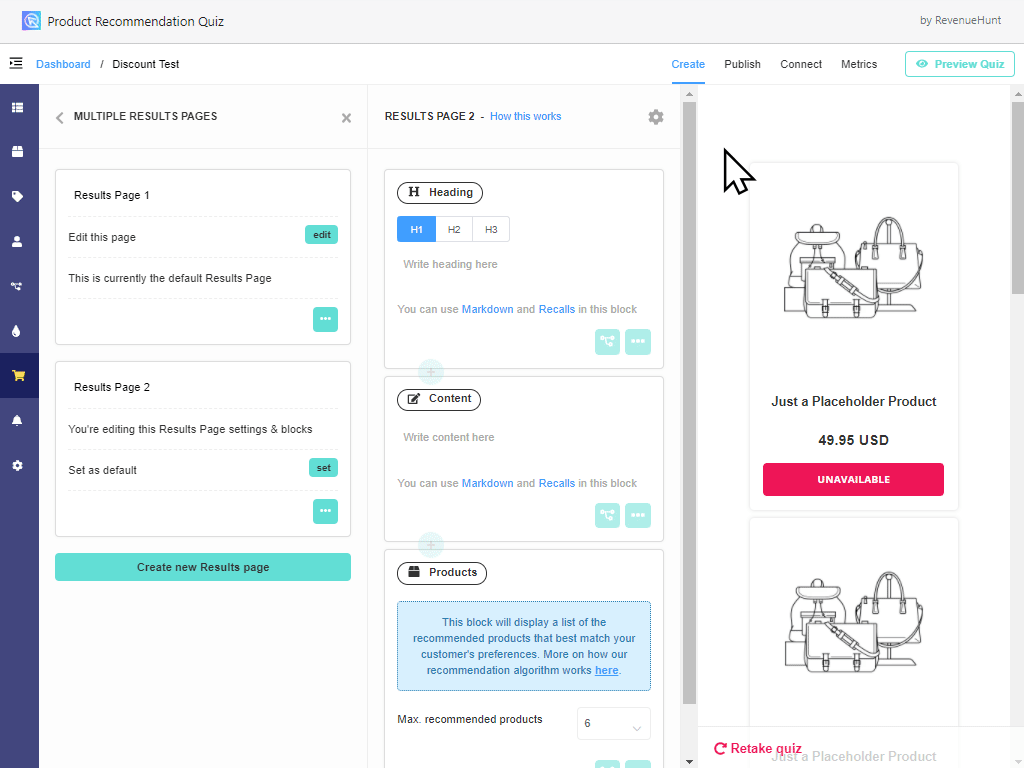
Now go to the Results Page section. Create a content block which includes a coupon code that users can copy and redeem during their purchase.
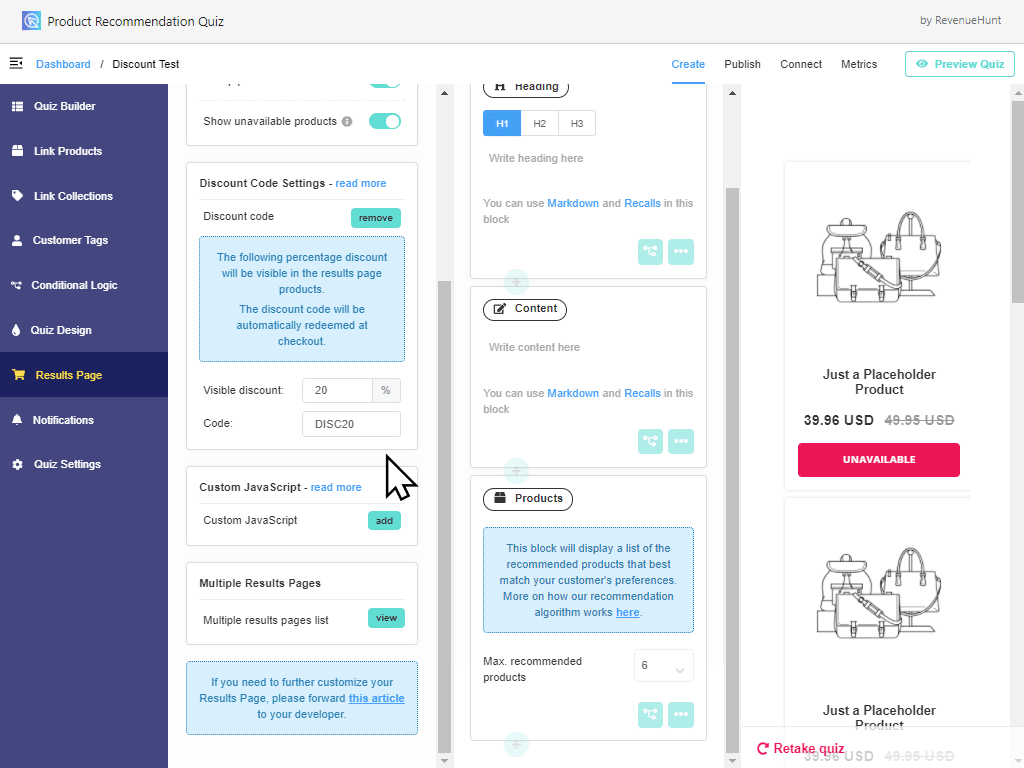
Now go to the Results Page Settings > Advanced Settings and find the “Discount Code Settings” section.
The “visible discount” field is the % discount that will be shown in the results page, with the original price displayed with strikethrough text.
Shopify
Automatically apply coupon at checkout in Shopify stores
If your store is built on Shopify, in the Results Page Settings > Discounts > Discount Code Settings section you’ll also see a “code” field:
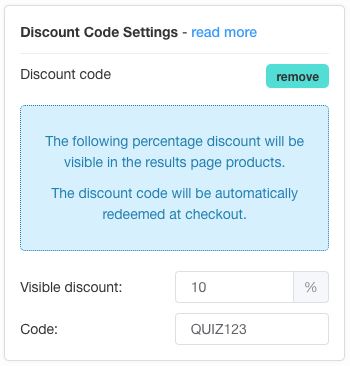
This is the discount code that will be applied automatically during checkout:
Here’s how to create discount codes in Shopify. You’ll have to activate the code before adding it to our quiz so it works when your customers get to the checkout page.
Note that only manual Shopify discount codes can be synced with the app (choose “manual” not “automatic” when creating a discount in Shopify).
If you want to display the reduced prices in your Shopify cart, follow these instructions.
(Beta) Apply dynamic discount at checkout in Shopify stores
You can now add multiple Shopify discount codes to your results page and have them applied dynamically based on the value of items added to the cart by the customer. To set this up you need to first create your discount codes in Shopify. This article explains how to do that.
Note that only manual Shopify discount codes can be synced with the app (choose “manual” not “automatic” when creating a discount in Shopify).
Next, open the quiz Results Page tab. In the Results Page Settings > Discounts activate the Dynamic Discounts.
Once active you’ll be able to set up multiple discount codes (add a new code by clicking “+”) and set up the threshold for each discount to be applied.
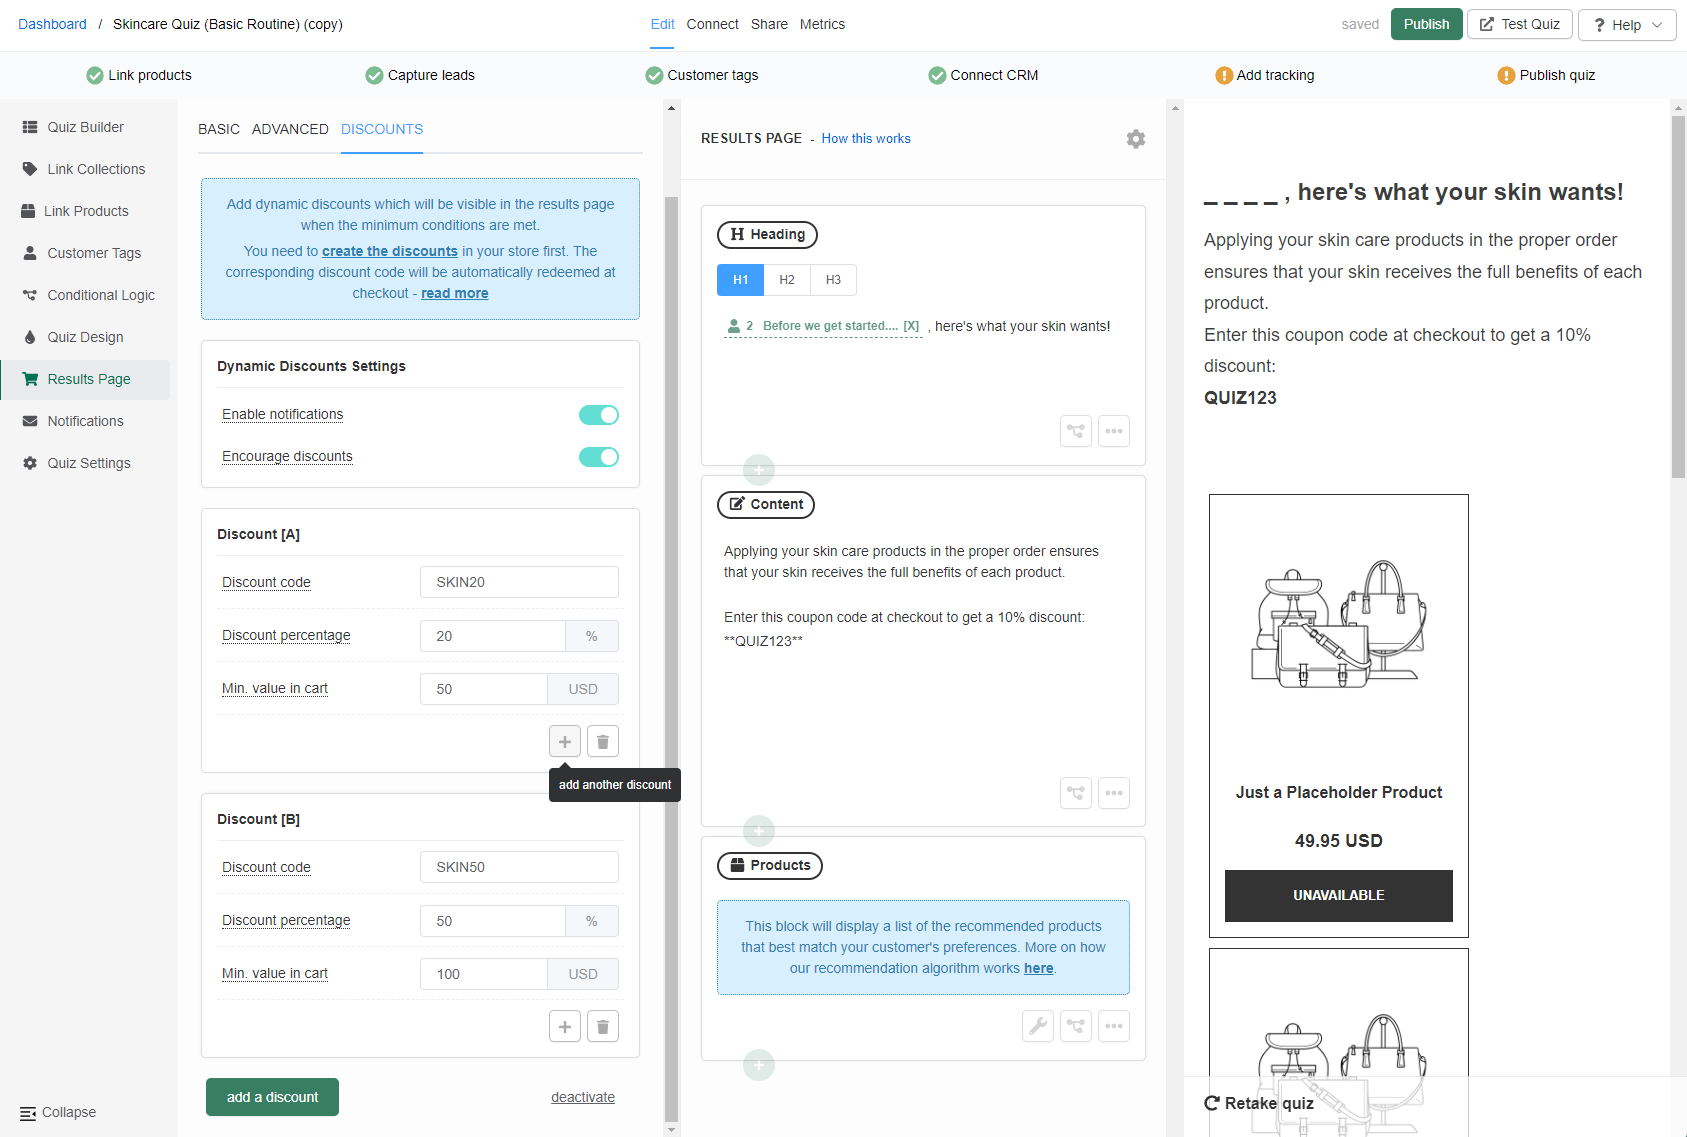
You’ll also have a choice to allow notifications shown on the results page.
You can also choose to :
- Enable notifications – a toast notification will appear once the customer qualifies for the discount
![]()
- Encourage discounts – the notification will also include a message saying how close the customer is to getting the next highest discount
![]()
Remember to publish the changes with the top-right button after the discounts are set.
WooCommerce
Automatically apply coupon at checkout in WooCommerce stores
If your store is built on WooCommerce, you’ll need the following plugin for this to work:
Advanced Coupons for WooCommerce
Advanced Coupons gives you extra features on your WooCommerce coupons so they can market your store better.
Free plan available
Create a coupon code, then navigate to the URL Coupons section. Make sure the Redirect To URL points to your cart page. Copy the URI (it’s the end part of the URL, excluding the https + your domain name):
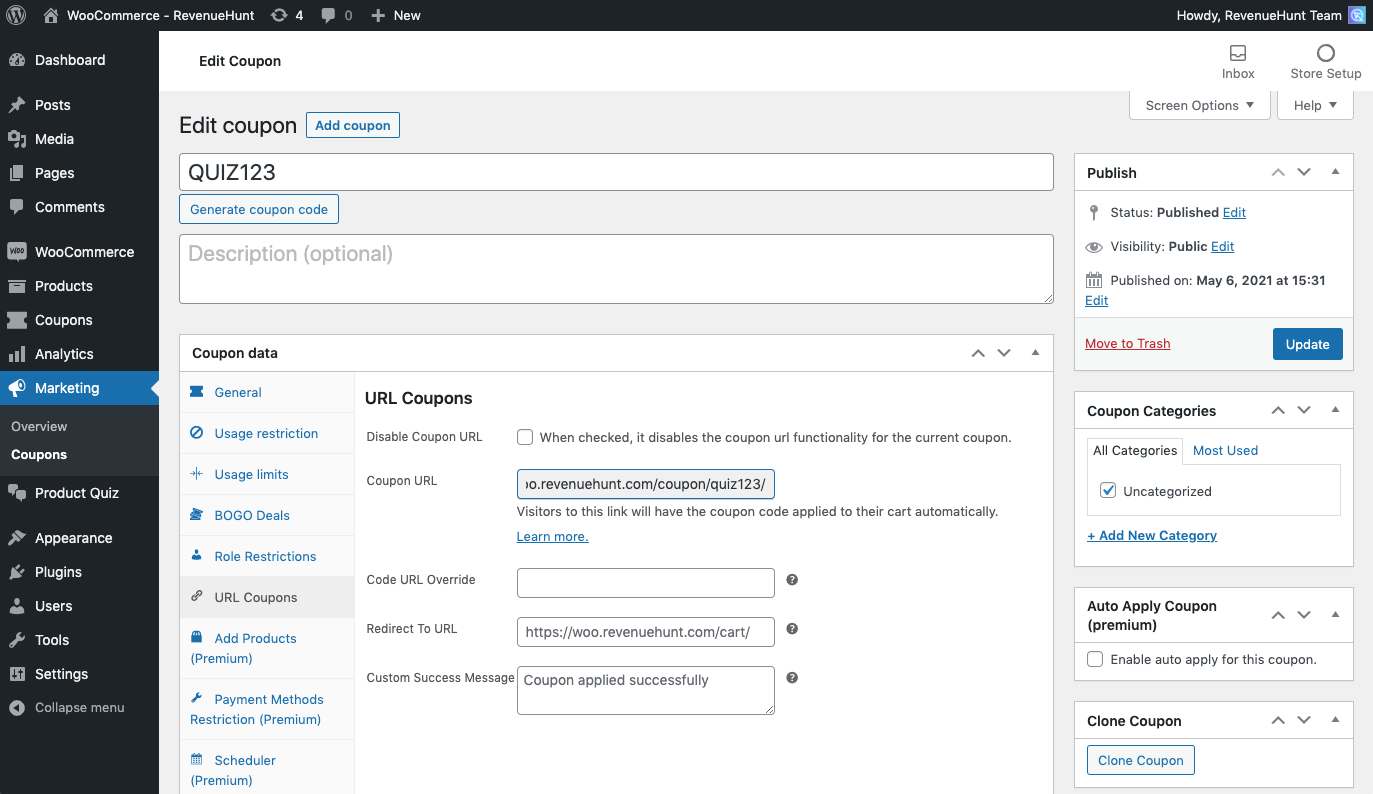
Example: if the Coupon URL which appears is https://yourdomain.com/coupon/codexyz/, then the part you need to copy is /coupon/codexyz/
Then in the Product Recommendation Quiz, go to the Results Page Settings > Checkout Settings and paste the copied URI in the “Cart URL” field.
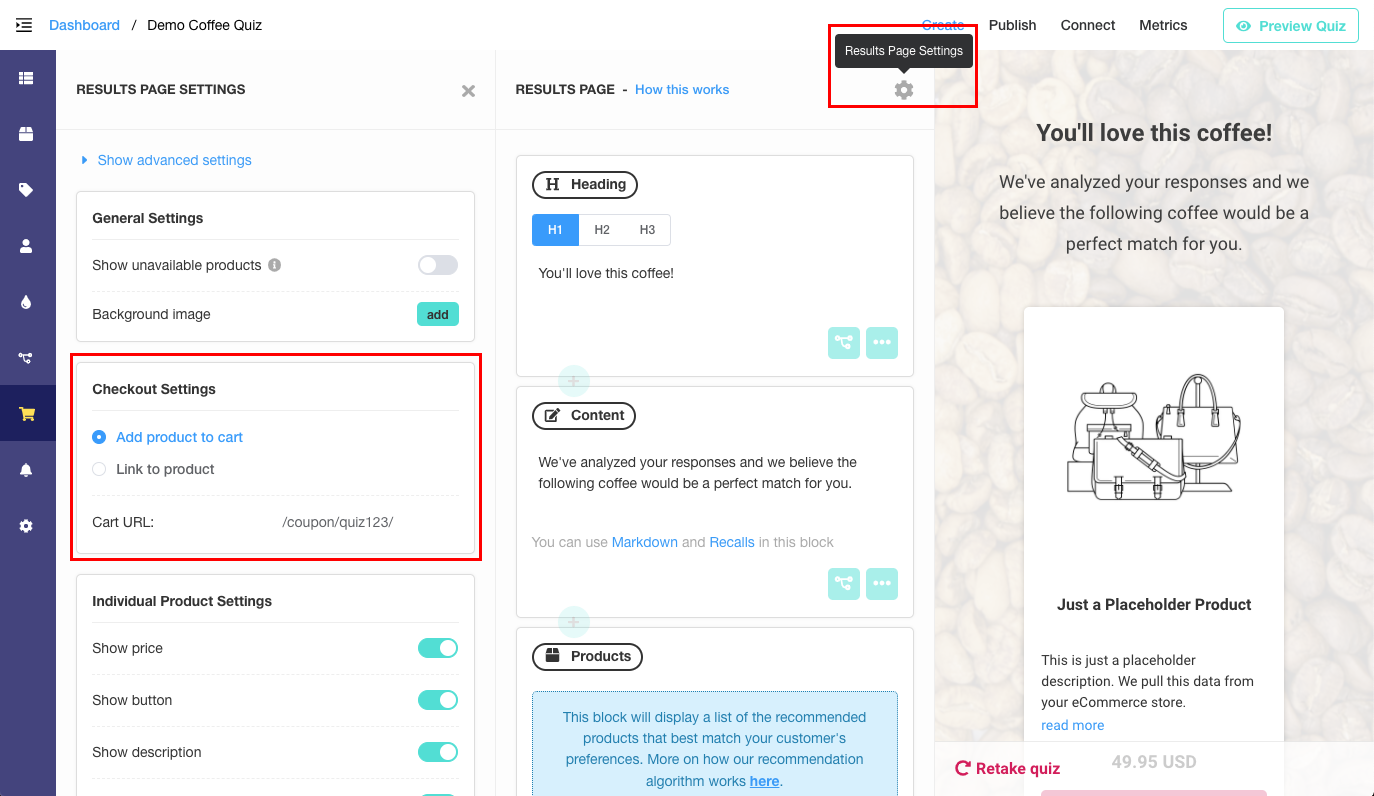
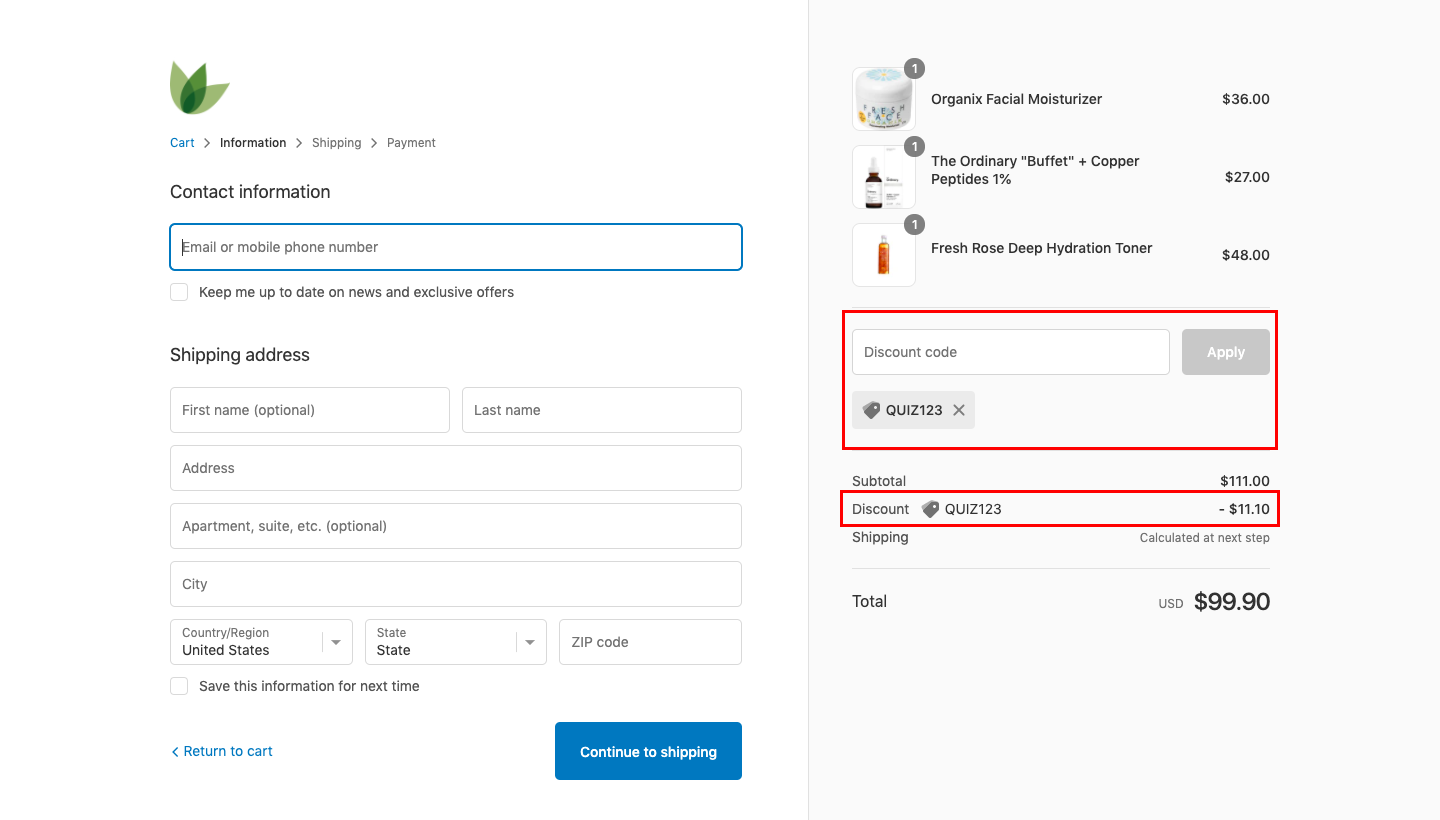
This will apply the coupon code when your customers finish the quiz and proceed to cart, then it will redirect them automatically to the cart page in your store.
Apply discount only if customer leaves their email
In Product Recommendation Quiz, it is possible to apply a discount at checkout only for the customers who leave their email in the quiz. To set this up you need to follow these steps:
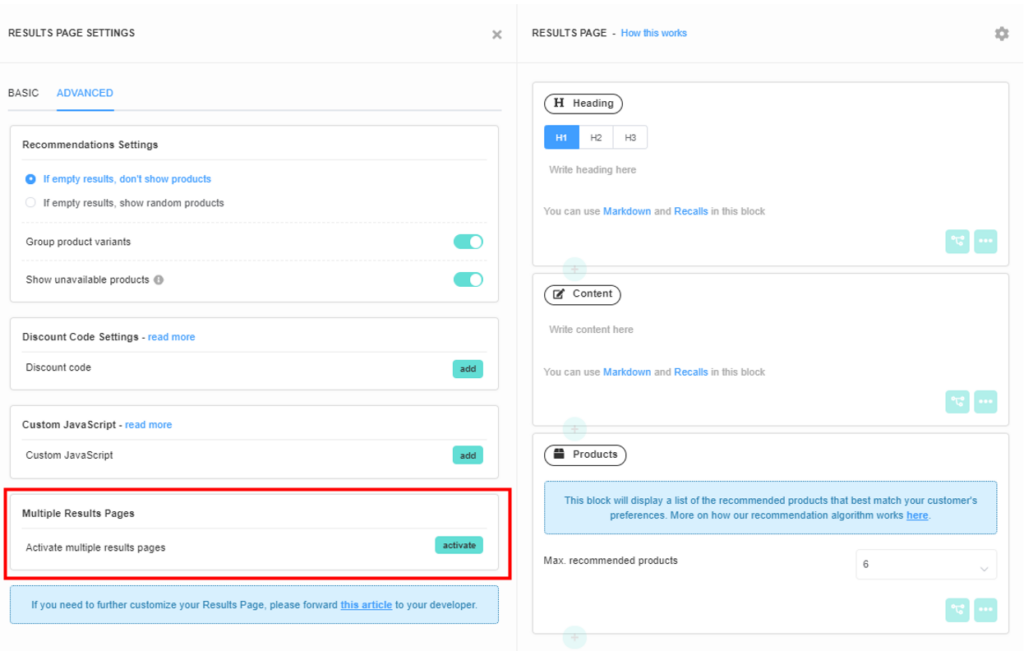
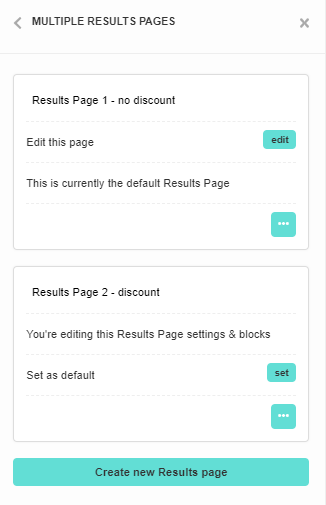
Step 1: Create multiple results pages
To do that, go to the Results Page Settings -> Advanced -> Multiple Results Pages and click ‘Activate’.
Multiple Results Pages Settings screen will appear and a second Results page will be added.
You can then rename the page and edit it by clicking ‘edit’.
Step 2: Add discount code
In this case, Results Page 1 will be left as default with no discount and the discount will be applied to Results Page 2. To do that, open the Results Page 2 Settings -> Discount code settings -> Discount code and click ‘add’. You can then edit the Visible % discount and add the Code.
For the discount to work, you need to set it up first in your Shopify /WooCommerce store. Check the first part of this article for instructions.
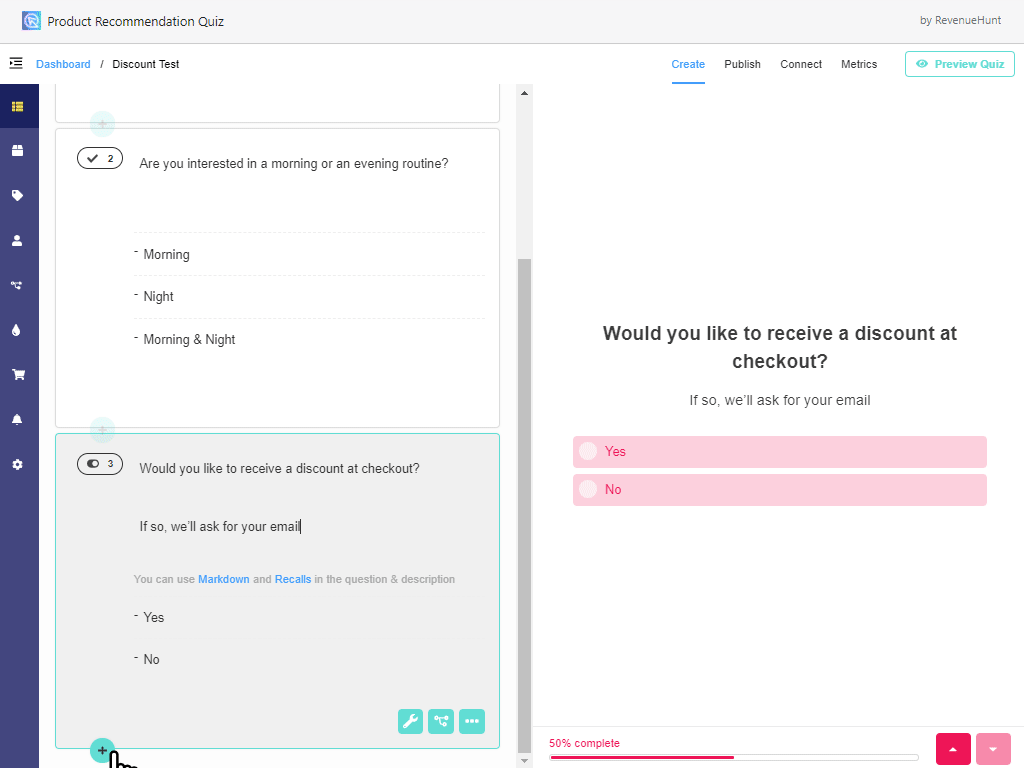
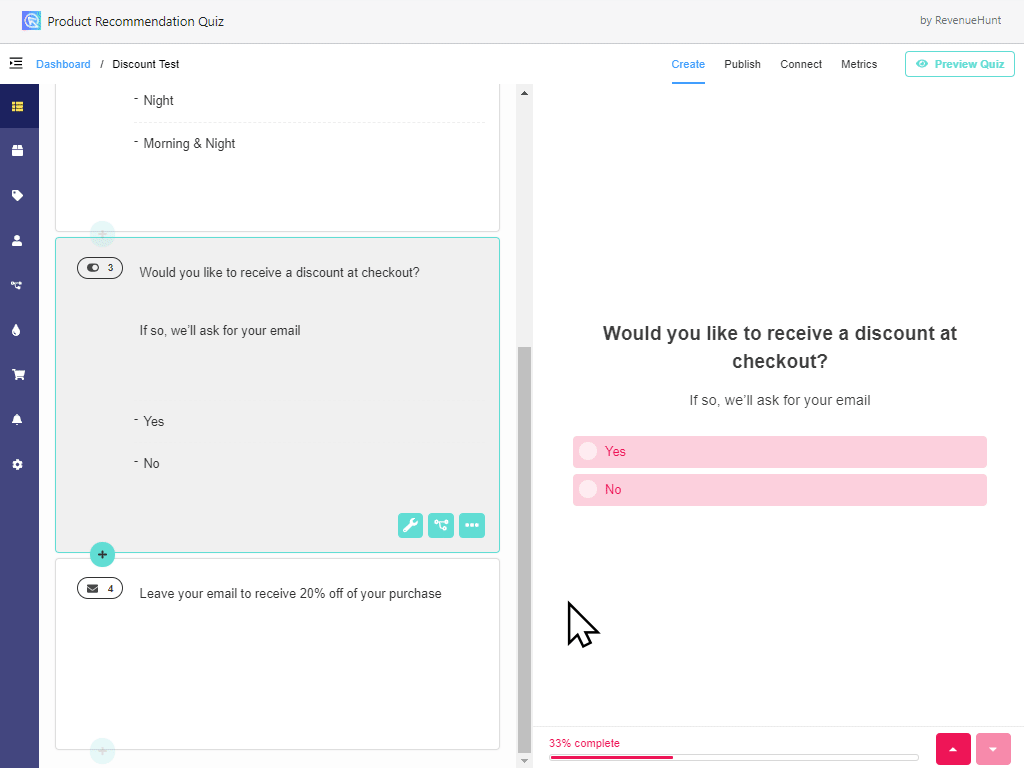
Step 3: Add a discount question and an email question
Next, navigate to the Quiz Builder and add a discount question and an email question.
Step 4: Add Jump Logic
Now you can redirect customers to either the Results Page 1 (no discount) or the Results Page 2 (discount) depending on their answer to the discount question. To do that you’ll need to add two Jump Logic statements.
To learn more about Jump Logic, check this article.
FIRST JUMP LOGIC – DISCOUNT QUESTION
To add Jump Logic to the discount question, click the conditional logic button. In the Jump Logic menu, select ‘Add Jump Logic’.
Add the following logic condition:
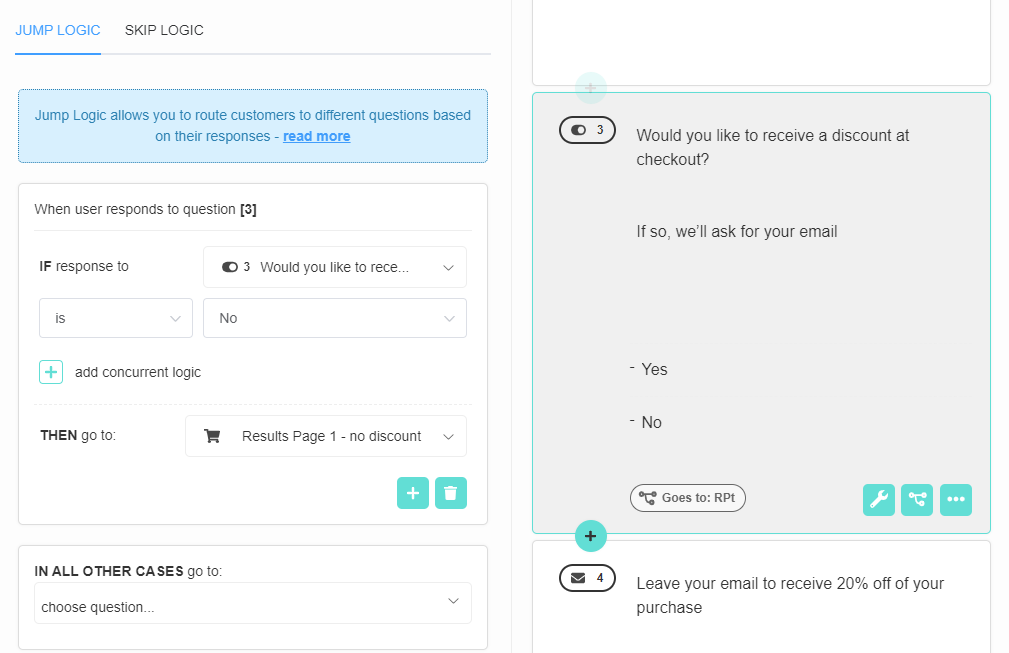
If the customer answers ‘Yes’ to the discount question, they will automatically go to the next question (the email question).
If the customer answers ‘No’ to the discount question, they will be automatically redirected to the Results Page 1 (no discount).
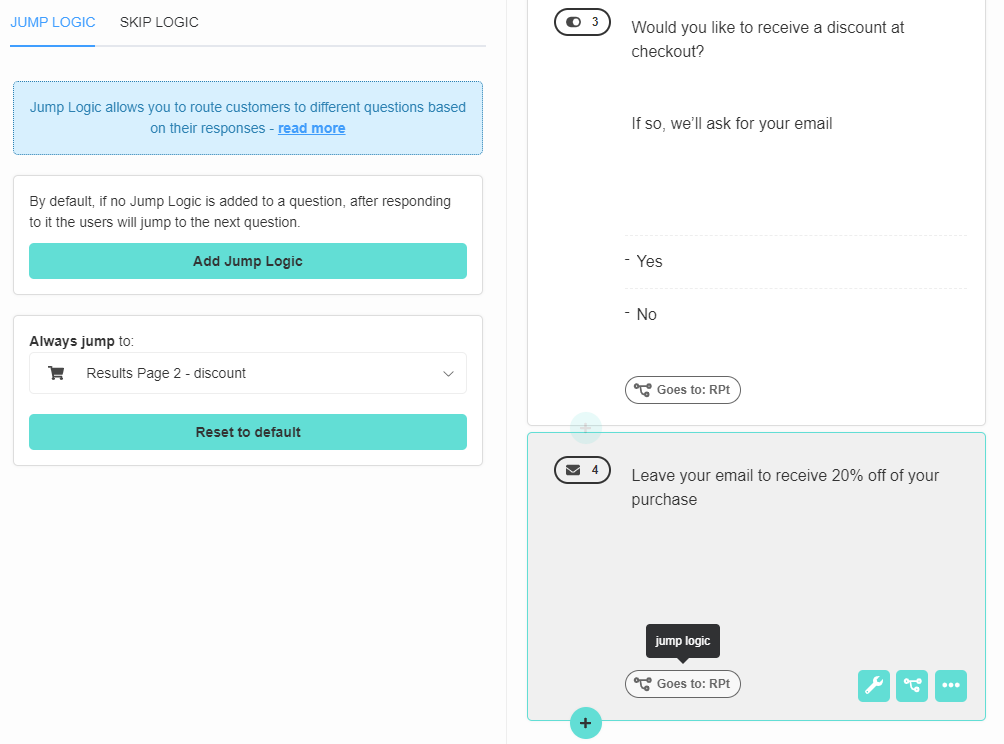
SECOND JUMP LOGIC – EMAIL QUESTION
Next, you’ll have to add Jump Logic to the email question. In this case, it is enough to always send the customer to the Results Page 2 (discount) with the Always Jump to function.

Step 5: Test the quiz
Once the discounts are set up, test the quiz by clicking the “Preview Quiz” button in the top right corner of the app.