How does Jump Logic work?
Jump Logic allows you to send the customer different answering paths or show/hide content based on customer choices.
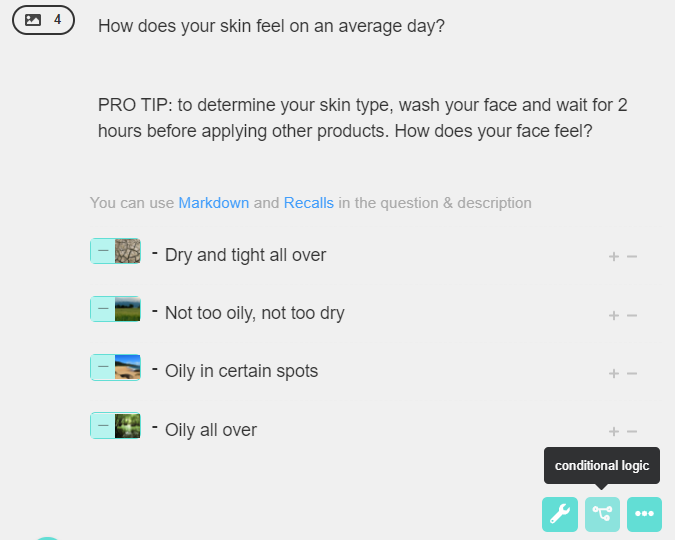
For example, imagine you want to create a skincare consult quiz for your store. First, you would ask a general question like, “What’s your age” or “What type of skin do you have?” and your customers would have to choose between the options you lay out for them (Dry, Normal, Combination or Oily skin).
A visual interface for creating IF-THEN-ELSE conditional statements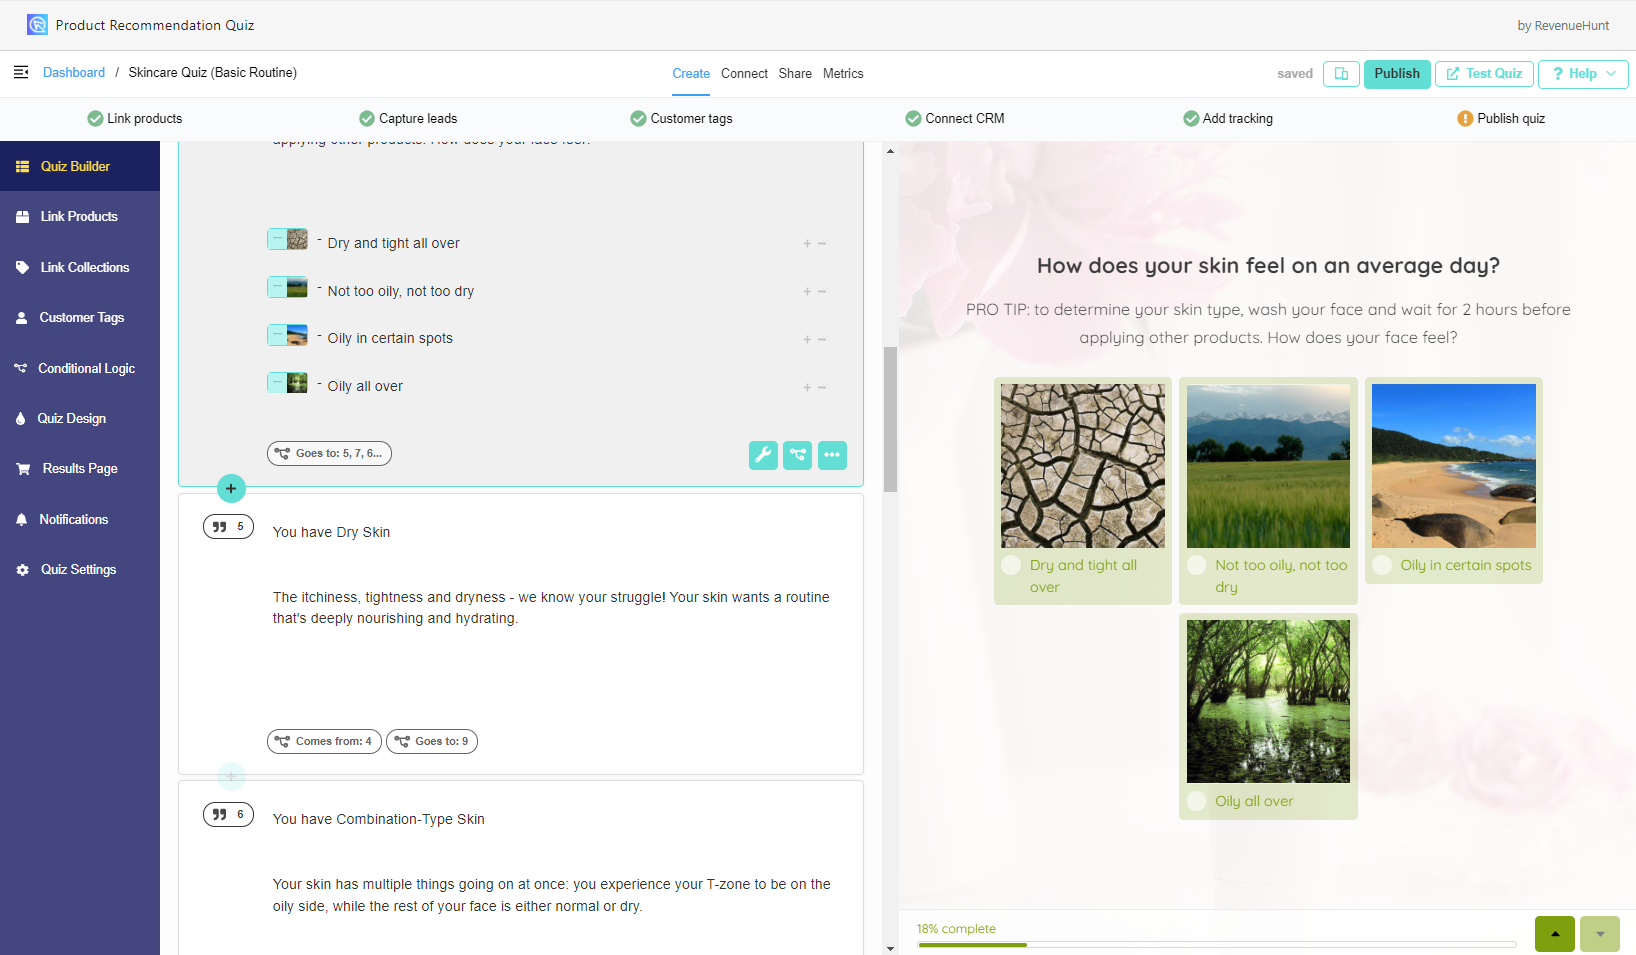
With Jump Logic, you can show customers with oily skin certain questions (specifically targeted for women with oily skins), while customers with dry skin would skip these questions. It’s like having a visual interface for creating IF-THEN-ELSE conditional statements, with the advantage of not needing to know how to code 😉
You can create multiple Jump Logic rules for one single question, so you can direct them to multiple target questions depending on what they respond.
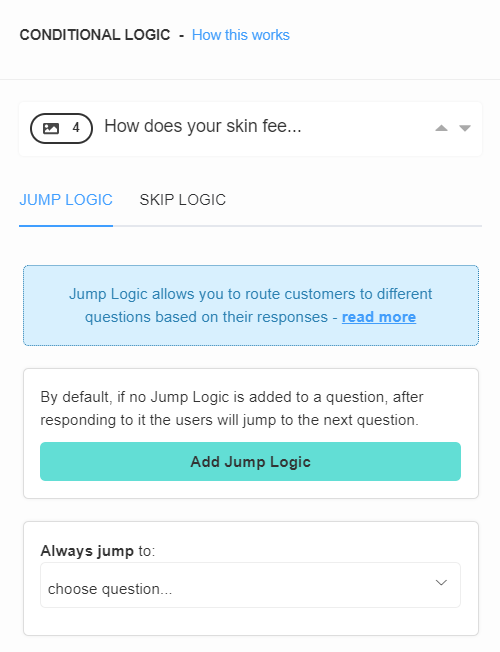
How to set up Jump Logic
Jump Logic makes your quiz smarter by sending customers down different question paths based on how they answered previous questions.
You can add Jump Logic to a question by clicking this button:
Or navigate to the Conditional Logic tab in the Quiz Menu:

On the right, you’ll see a preview of how your quiz logic is set up.
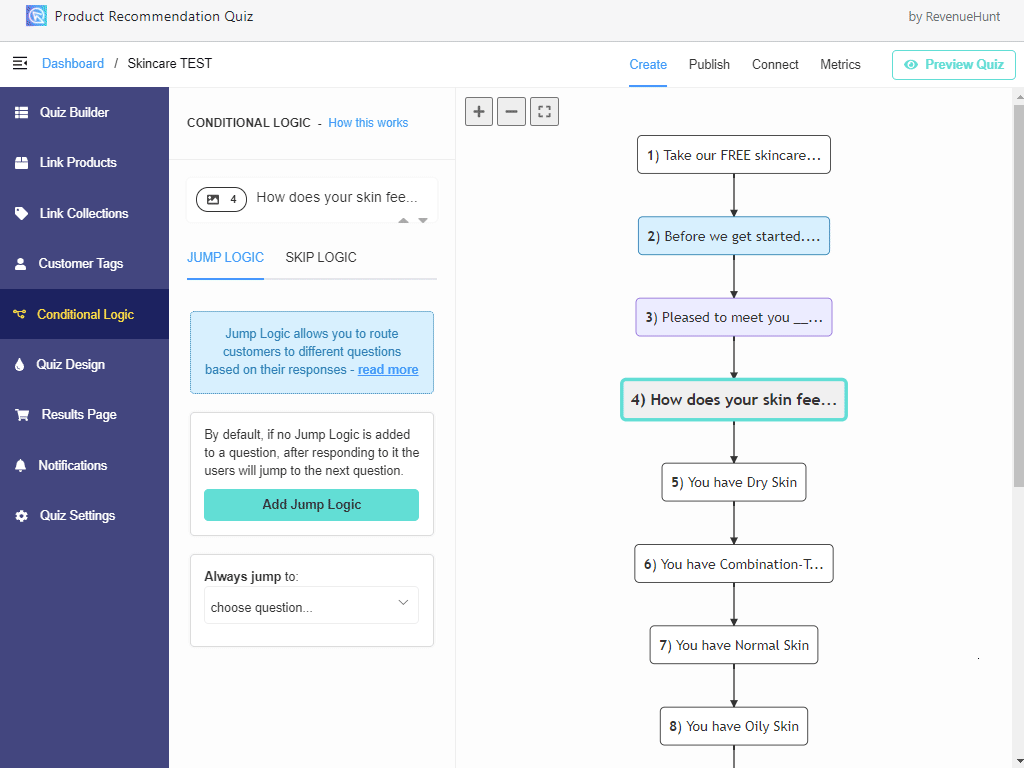
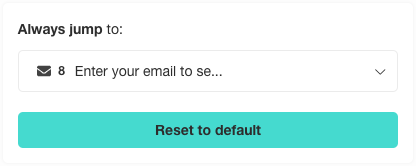
If no logic is added, the quiz will continue in a linear manner. The customer will jump directly to the next question after choosing an answer.
Then click on the “add Jump logic” button:
This will create a Jump Logic statement. Here, you can edit the statement to send customers to different follow-up questions based on their responses to previous questions:
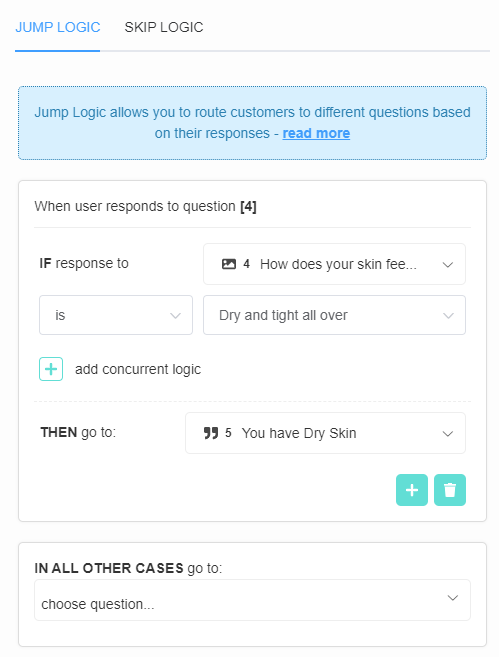
As you can see, the logic is very simple and follows this template:
IF the response to question X
IS EQUAL TO choice Y
THEN go to question Z
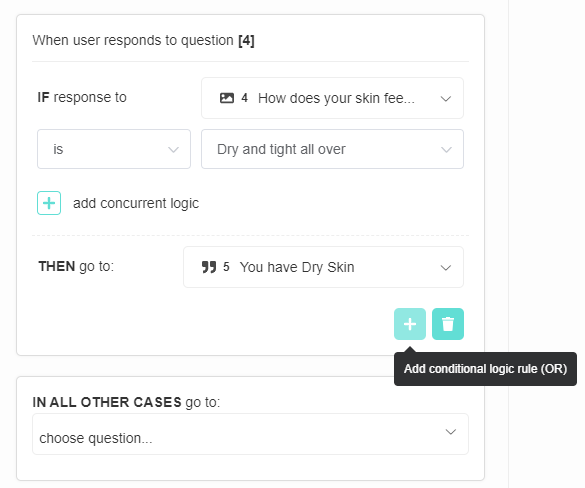
You can add multiple Jump Logic statements on any given question by clicking on the “+” button:
Make sure to add Jump Logic on follow up questions to jump other unrelated follow up questions:
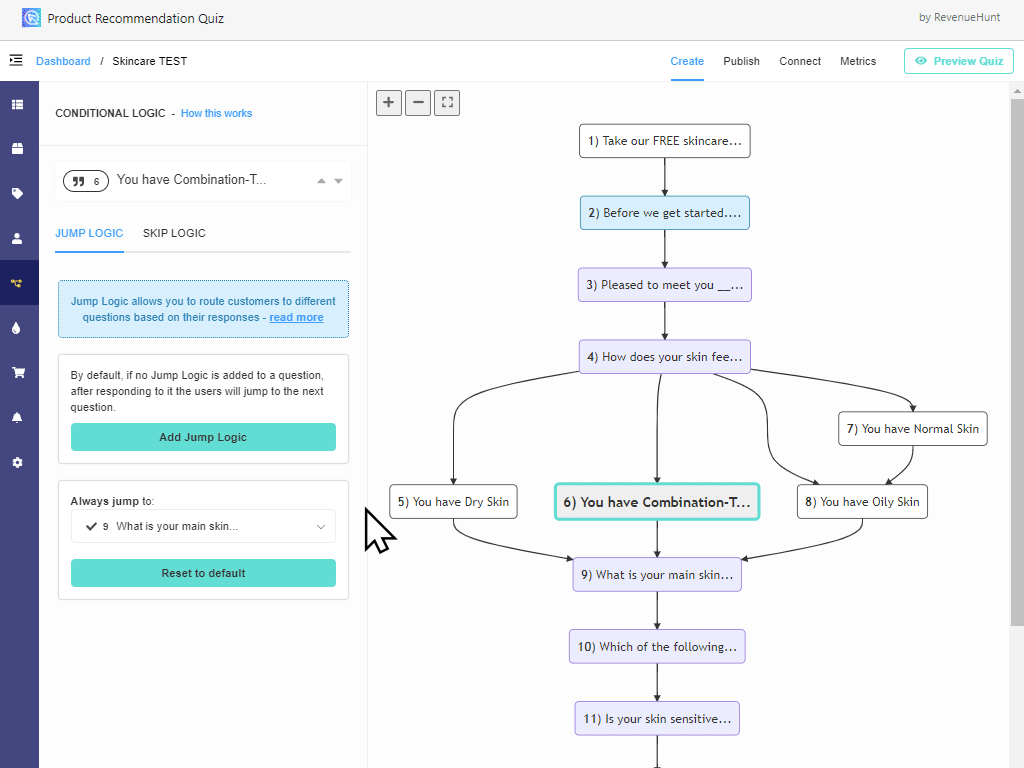
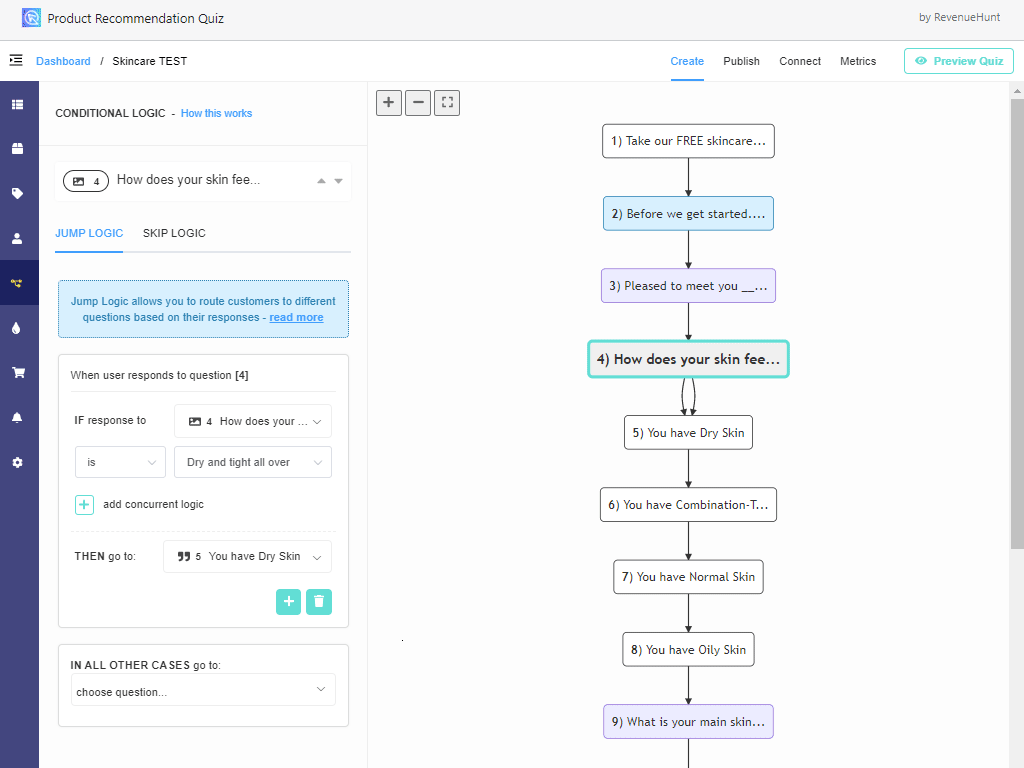
Jump Logic Quiz Example
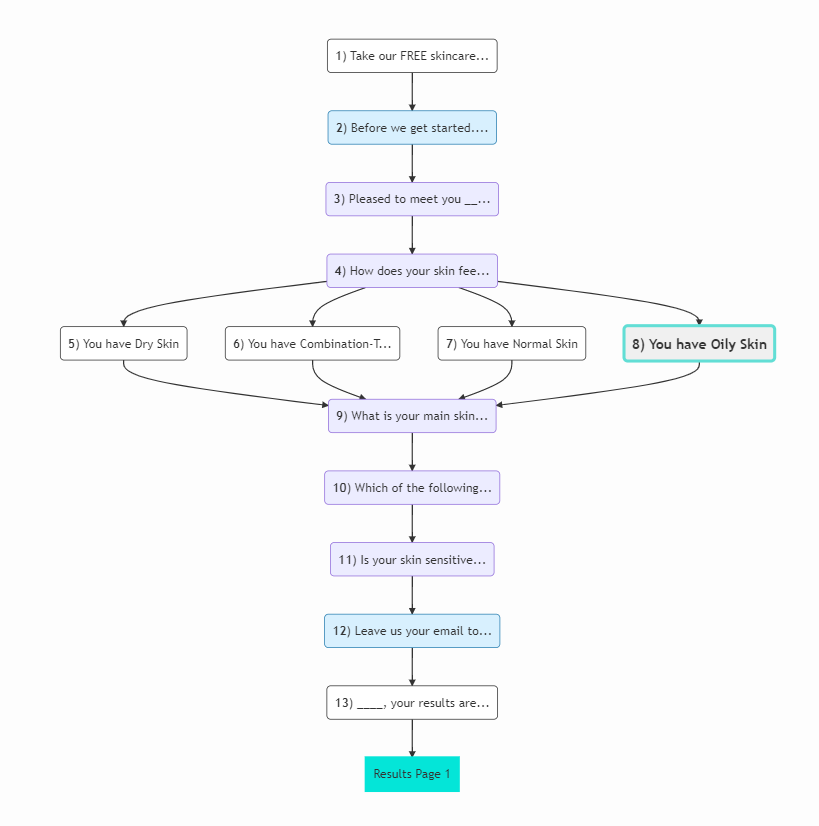
Let’s say you wanted to build a quiz that shows a different text to the customer depending on their skin type. With Jump Logic, you can build a quiz that is made up of the following flow:
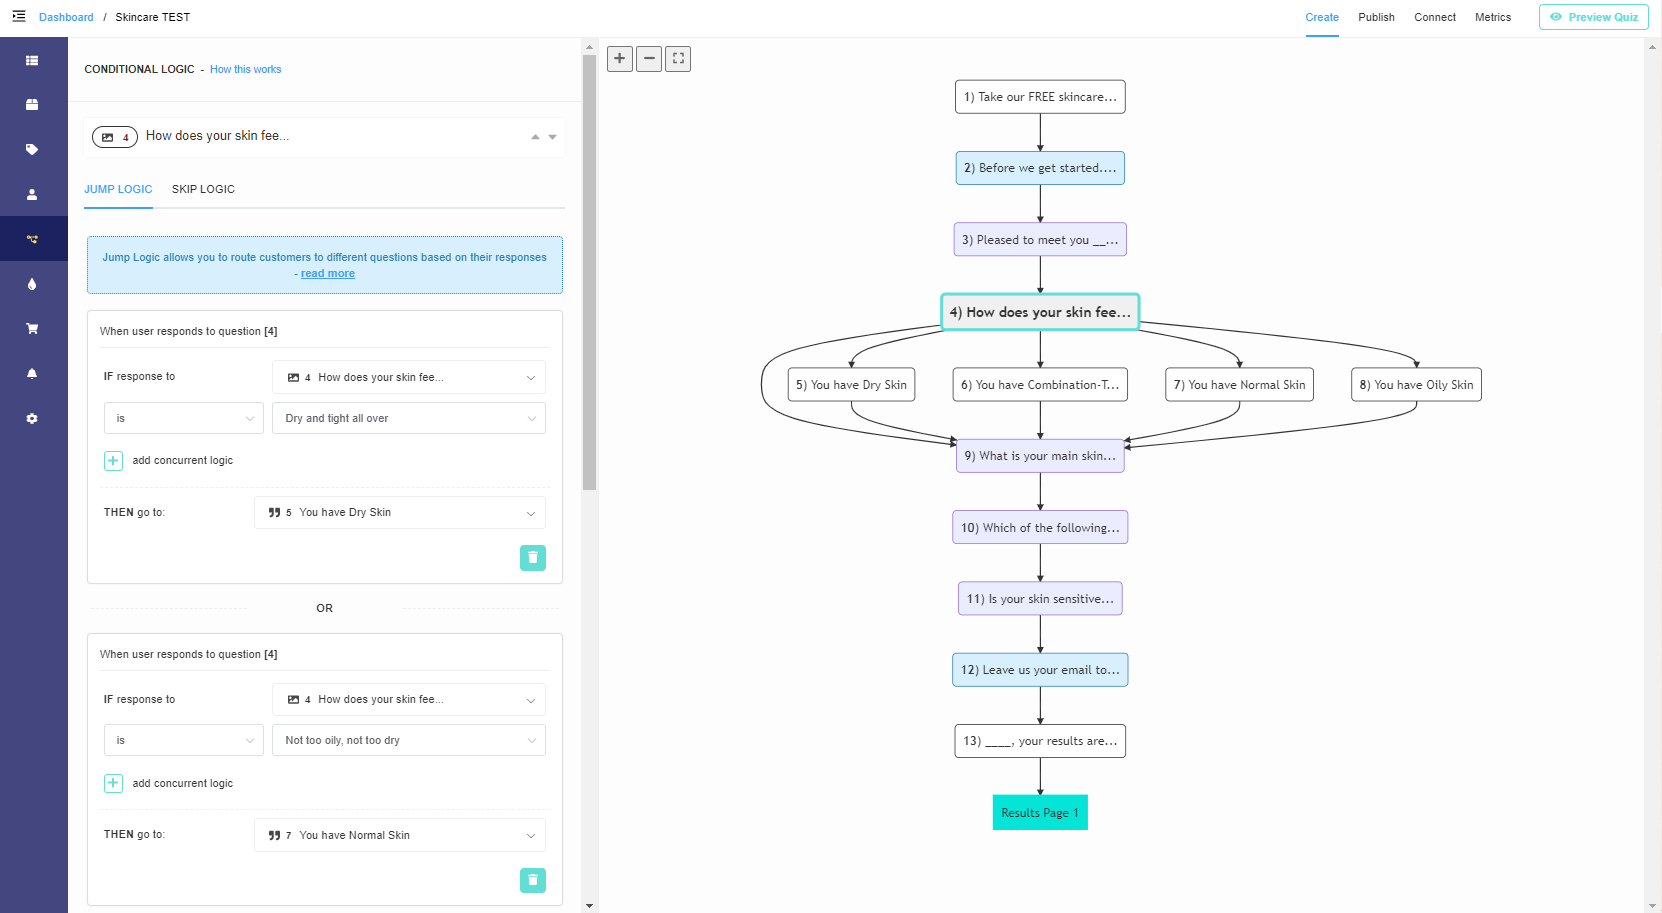
Depending on the answer to question 4, the customer will be shown a different statement regarding their skin type. Then, they will continue with the other questions in the quiz.
If you’d like to build something like this into your quiz, this article explains how to set it up step-by-step.
Skip Logic vs. Jump Logic
The new app interface gives the option to use Jump Logic and Skip Logic. You shouldn’t combine both types of logic in the same quiz.
Jump Logic allows you to create separate paths for quiz respondents based on their responses. This is done by routing customers from one question to other questions depending on what they respond.
Skip Logic determines whether a question is presented or skipped based on a customer’s responses to previous questions. The path will be the same to all customers, but the questions they see will differ based on their responses. Read more about Skip Logic here.
Understanding Conditional Logic
Conditional logic can be difficult to grasp. These resources can are useful in understanding the AND / OR logic:
Conditional Logic Example Use
In this article you’ll find out how to use IF-THEN conditional logic to show customized text to the quiz takers. The first part of the article shows how to add custom text inside your quiz. The second part explains how to show custom text on the Results page.
In this example, a skincare routine quiz is created and a custom text is displayed based on the customer’s skin type.