Custom CSS and JavaScript for Product Recommendation Quizzes
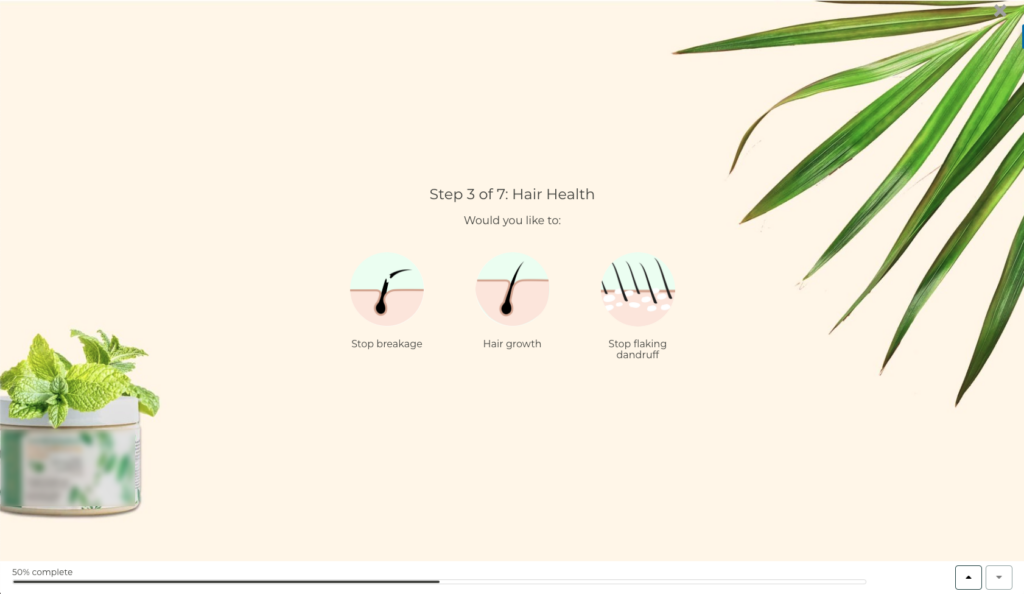
12-9-2024 App New Features Tips & TricksEvery business is unique, and so are its customers. At RevenueHunt, we understand the importance of personalization in eCommerce. Our Shop Quiz: Product Recommendation Quiz is designed to help businesses offer tailored recommendations to their customers, enhancing the shopping experience and boosting conversion rates.
While our platform offers a robust set of customization options out-of-the-box, we recognize that some businesses need that extra level of customization to truly align with their brand identity. This is where quizzes that allow custom CSS and JavaScript designs come into play.
This isn’t just about tweaking colors or moving a button around—it’s about taking control. Want your quiz to feel like it’s part of your brand’s story? Or maybe you’re ready to experiment with new interactive features that go beyond the standard options? Whether you’re a seasoned coder or just dipping your toes into customization, this guide will walk you through the essentials.
No one said your quiz had to look or behave like anyone else’s. Why not push the boundaries and see what you can create?
Why Customize Your Quiz with CSS and JavaScript?
Customizing your Shop Quiz: Product Recommendation Quiz with CSS and JavaScript allows you to:
🏷️ Maintain Brand Consistency: Ensure the quiz matches your brand’s look and feel.
💪 Enhance User Experience: Improve the quiz interface to make it more user-friendly.
✨ Add Unique Functionalities: Introduce new features that are not available by default.
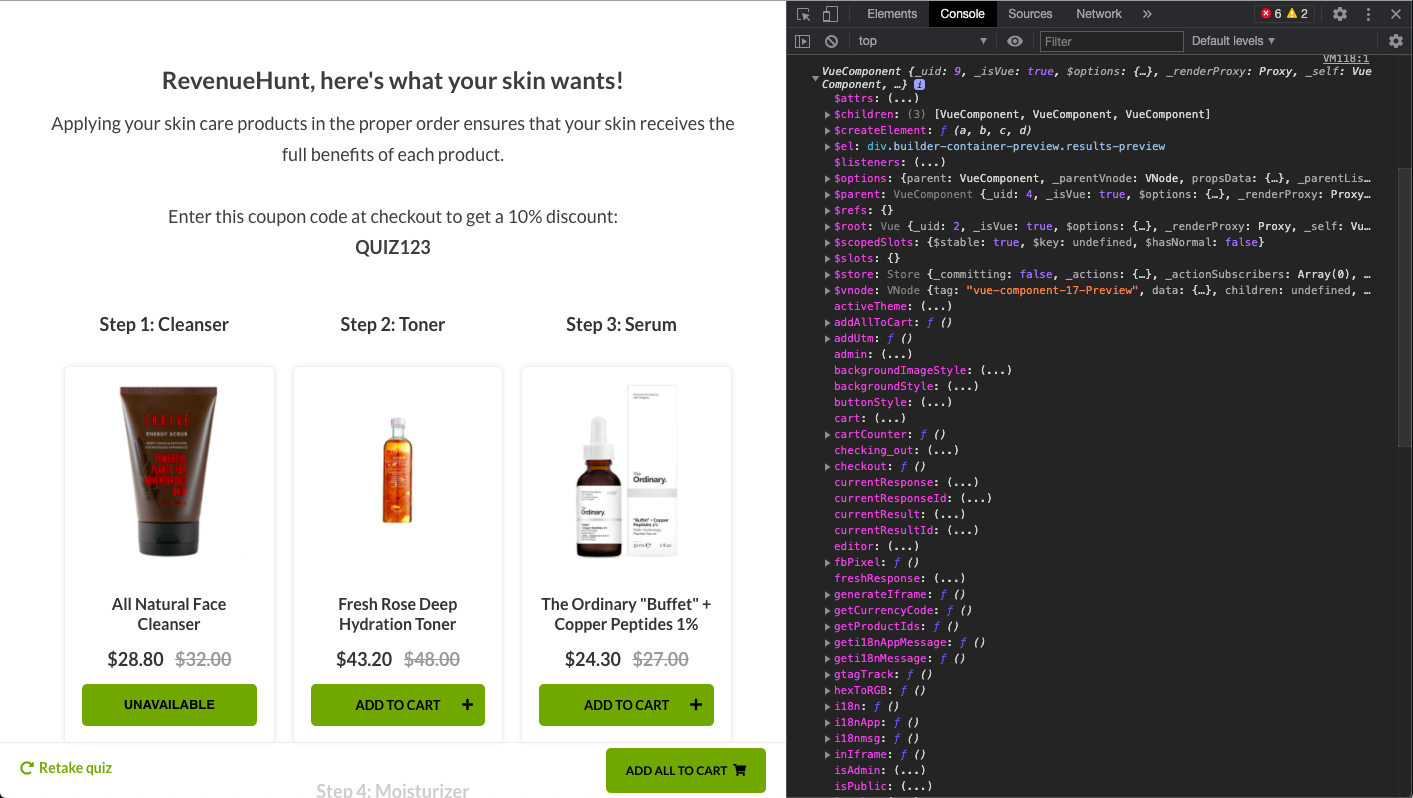
🎨 Styling with CSS
Custom CSS is a powerful way to change the visual style of your quiz. Here are some basic steps to get you started:
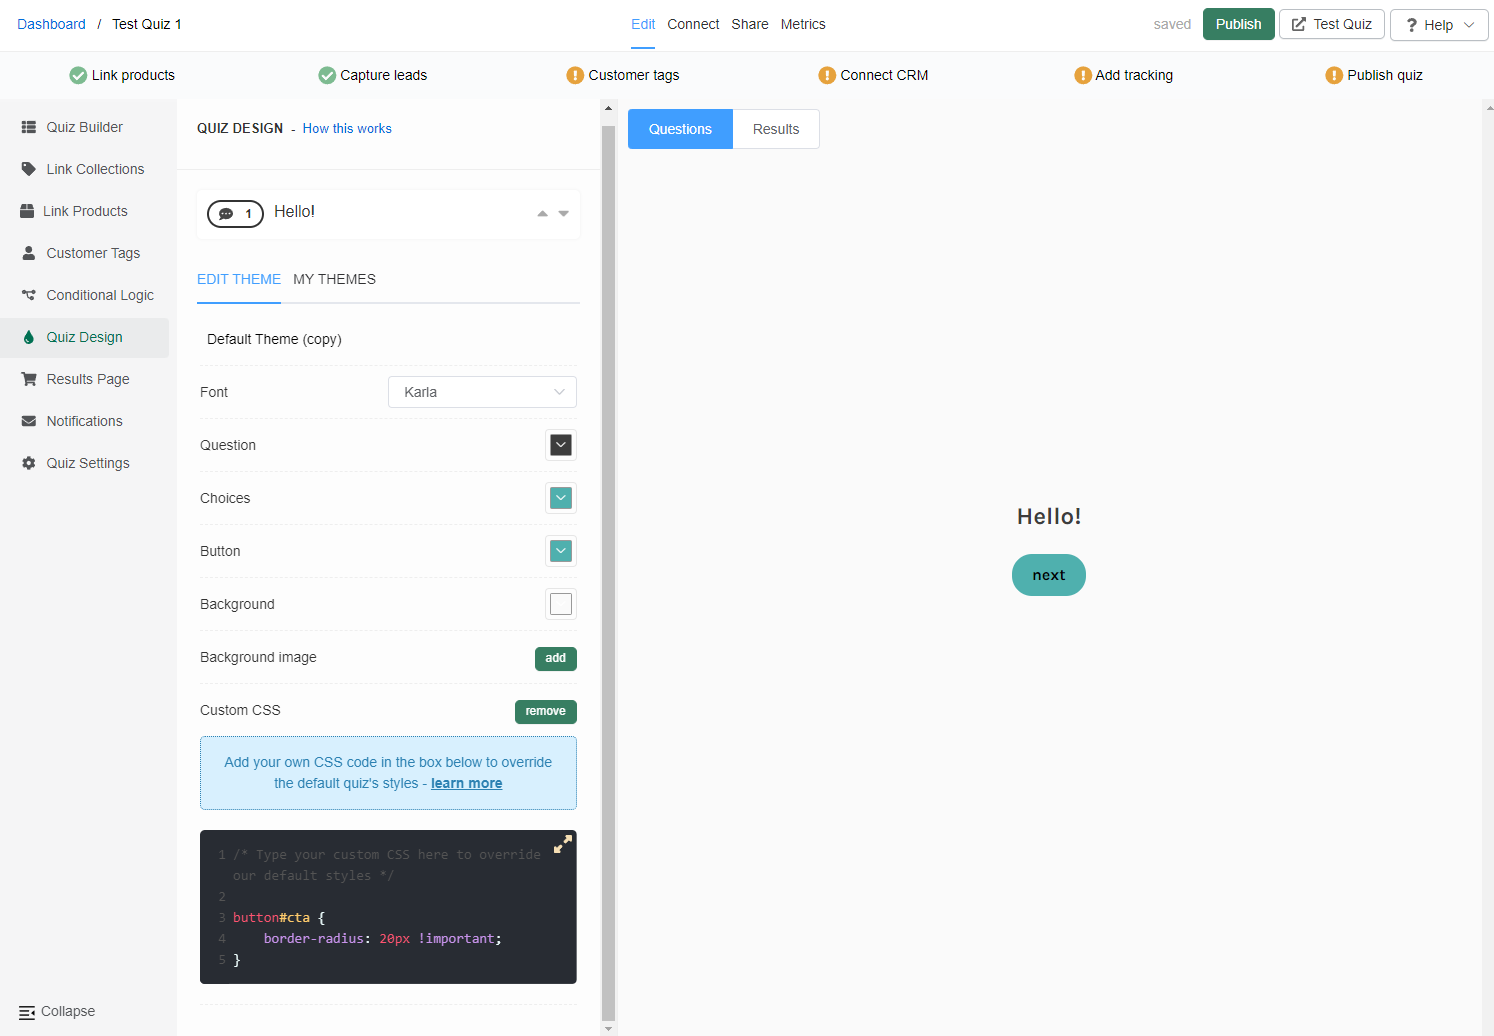
Step 1: Accessing the Custom CSS Editor
To open the custom CSS editor follow these steps:
- Open the Quiz Builder on your Shop Quiz: Product Recommendation Quiz.
- Navigate to the Quiz Design section.
- Scroll down to the Custom CSS section and click on
Addto open the CSS console where you can input your CSS code.
Step 2: Basic Customizations
In the CSS editor, you can insert any custom styling rules to adjust the quiz appearance. You can modify elements of the quiz or the results page such as fonts, colors, and layouts.
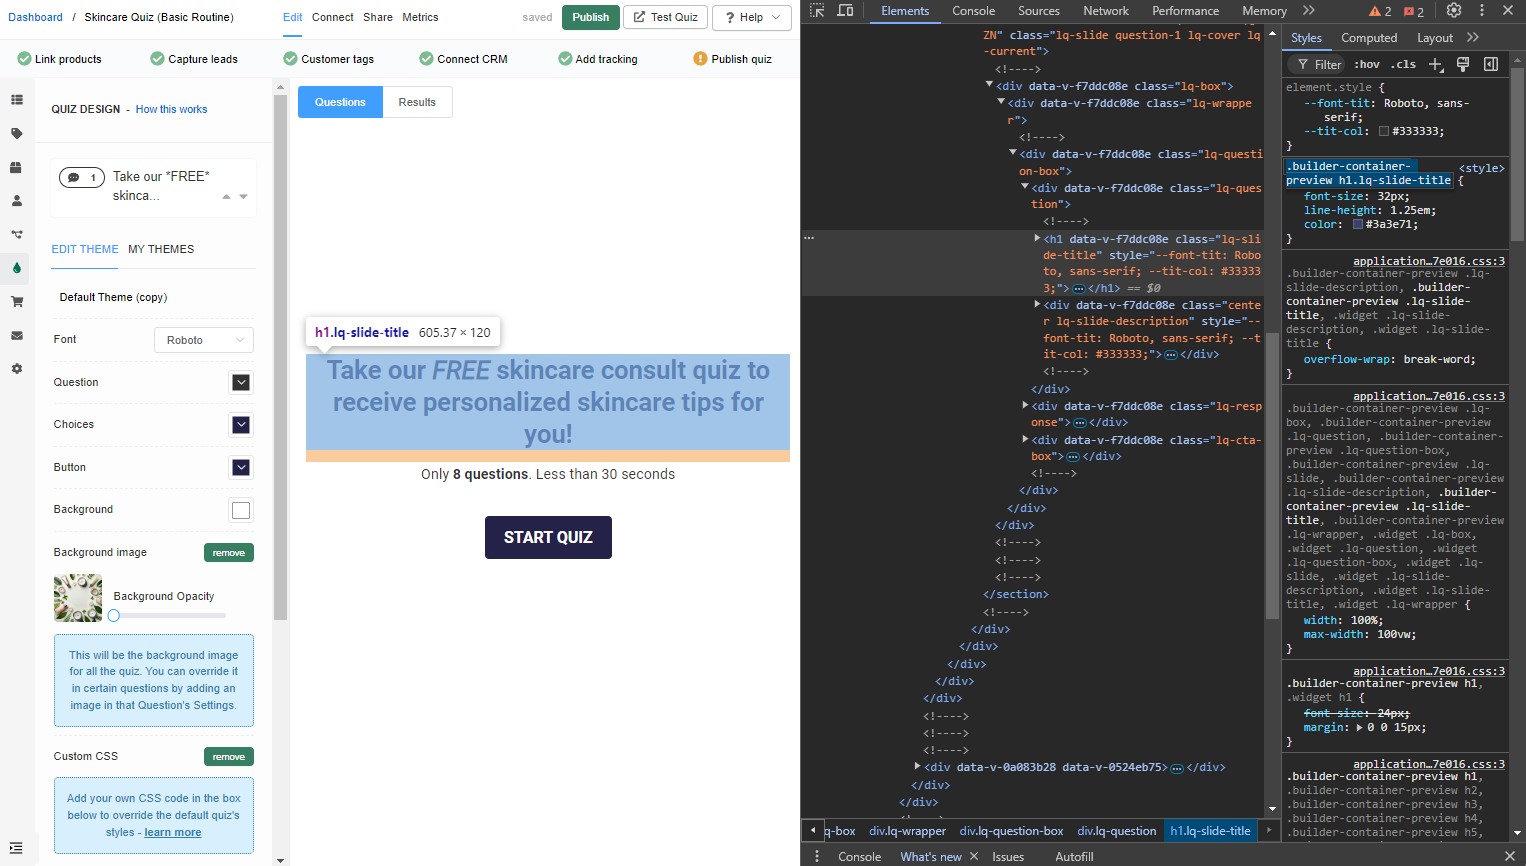
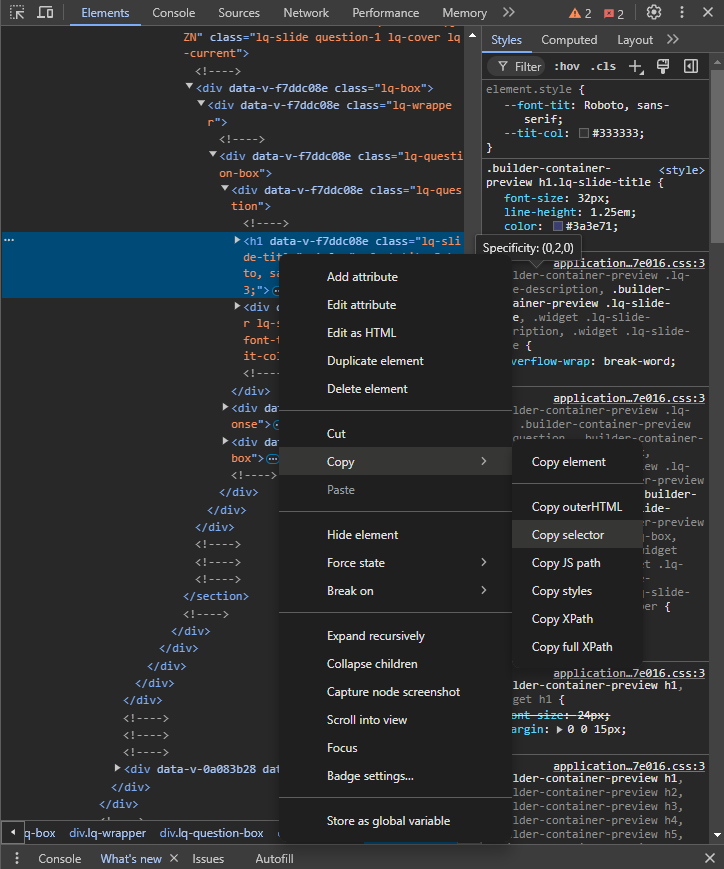
How do I find CSS selectors of quiz elements?
To find the correct CSS selector for any quiz element, simply right-click the element on your browser and select Inspect. This will open the browser’s Developer Tools, where you can view the HTML and locate the exact selector to target.
Here are some sample CSS codes you can use in your quiz:
| Action | Code |
|---|---|
| Change the background color |
.lq-quiz {
  background-color: #f0f0f0;
}
|
| Modify the font style and size |
.lq-quiz h1 {
  font-family: 'Arial, sans-serif';
  font-size: 18px;
}
|
| Uploading a Google Font |
@import url('https://fonts.googleapis.com/css2?family=Quicksand&display=swap');

.quicksand-bold {
  font-family: "Quicksand", sans-serif;
  font-optical-sizing: auto;
  font-weight: 400;
  font-style: normal;
}

h1, h2, h3, h4, h5, h6, p, button, div{
  font-family: 'Quicksand', sans-serif;
}
|
| Style the buttons |
#cta {
  background-color: #333;
  color: #ffffff;
  border-radius: 5px;
}
|
💡 Tip: Use Markdown for Text Styling
You don’t always need custom CSS to style your quiz. You can use Markdown language to format text within the quiz for basic styling such as headings, bold, italics, links, images, and videos.
Step 3: Advanced CSS Customizations
For more complex design customizations, you may want to target specific quiz elements using advanced CSS selectors, pseudo-classes, or even animations.
Add specificity to your CSS rules
You can add specificity to your CSS rules, so that they are applied only to the quiz or a certain question. For example:
#quiz p {color: red;}will change the color of all the paragraphs in the quiz to red.
#question-AbC7Zde p {color: red;}
will change the color of a paragraph to red ONLY for question AbC7Zde, where AbC7Zde is the question ID. You can find a specific question ID in Quiz Builder > Question setttings.
Here are some examples of advanced CSS customizations you can apply to your quiz:
| Action | Code |
|---|---|
| Change Picture Choices to Icons |
/* Change Picture Choices to Icons */

.lq-images li, .widget .lq-images li {
  max-width: none !important;
}

.lq-choices .lq-img, .widget .lq-choices .lq-img {
  width: 48px !important;
  height: 48px !important;
  padding-top: 0 !important;
  background-size: 48px !important;
  background-position: left;
  margin-top: 4px;
  margin-right: 8px;
  margin-bottom: 2px;
}

.lq-picture-choice .lq-letter {
  display: none;
}

.lq-picture-choice li div {
  width: calc(100% - 65px) !important;
  margin-top: 12px;
}

@media (pointer: fine) {
  .lq-picture-choice li:hover {
    background-color: #333 !important;
  }

  .lq-picture-choice li:hover div {
    color: #fff !important;
  }

  .lq-picture-choice li:hover .lq-img {
    content: "";
    width: 100%;
    height: 100%;
    background-color: black;
    filter: invert(100%);
    -webkit-filter: invert(100%);
  }
}

.lq-images li, .widget .lq-images li {
  width: calc(100% - 8px) !important;
}

@media (min-width: 768px) {
  .builder-container-preview .lq-images li, .widget .lq-images li {
    width: calc(50% - 8px) !important;
  }
}
|
| Hide Product Variants |
/* this hides the product variants */
.no-variants-dropdown {
  display: none;
}

.lq-variants-dropdown {
  display: none;
}

.lq-results .el-input, .lq-results .el-input__inner {
  display: none;
}
|
Step 4: Customization Examples
To enhance the appearance of your quiz, here are a few real creative customization ideas:
</> Adding Custom Features with JavaScript
JavaScript enables you to incorporate interactivity and dynamic content into your quiz.
By using custom JavaScript, you can implement custom behaviors, such as adding specific images, text, or logic based on user responses. It also allows you to display personalized product recommendations and redirect users to particular pages on your store.
Additionally, you can integrate tracking codes, such as Google Analytics or Facebook Pixel, to monitor interactions with specific quiz questions, offering valuable insights into user behavior.
Step 1: Accessing the Custom JavaScript Editor
You can add custom JavaScirpt to the quiz results page and the quiz questions.
Results Page
- Navigate to the Results Page Settings in the Quiz Builder.
- Select Advanced Settings.
- Scroll down to find the Custom JavaScript section and click
add. - This is your canvas for crafting and deploying custom scripts that can modify the quiz’s behavior based on user interactions and results.
Quiz Questions
- Navigate to the Quiz Builder.
- Open question settings.
- Scroll down to find the Custom JavaScript section and click
add. - This is your canvas for crafting and deploying custom scripts that can modify the quiz’s behavior based on user interactions and results.
Step 2: Using the Console.log(prq) function
To begin, let’s log the quiz response object to the console:
This line of code will display the available Vue.js functions and properties within the prq scope in your browser’s console, allowing you to inspect the quiz data in real-time.
The prq object is your gateway to customizing the quiz experience. You can use it to fetch specific slide values, such as a question’s response, by calling prq.getSlideValue(slideId).
For participant information, methods like prq.leadEmail(), prq.leadPhone(), and prq.leadName() allow you to retrieve user details easily.
On the results page, you can customize product suggestions using prq.recommendedProducts() or highlight the top choice with prq.mostVotedProduct().
Step 3: Sample JavaScript Customizations
For complex functionalities, such as managing quiz flow or integrating third-party tools (e.g., analytics platforms), you can create custom scripts that interact with quiz events. Here are a few examples of JavaScript customizations you can add:
| Action | Code |
|---|---|
| Display an alert when a user selects an answer |
document.querySelectorAll('.quiz-answer').forEach(answer => {
  answer.addEventListener('click', () => {
    alert('Answer selected: ' + answer.textContent);
  });
});
|
| Integrate with Analytics |
document.querySelectorAll('.quiz-answer').forEach(answer => {
  answer.addEventListener('click', () => {
    // Example: Send answer data to Google Analytics
    gtag('event', 'quiz_answer', {
      'event_category': 'Quiz',
      'event_label': answer.textContent,
      'value': 1
    });
  });
});
|
| Insert calculations (BMI example) |
*/ // get the element var element = document.getElementById("body_mass_index_calculation"); // get the values of the slides var weight = prq.getSlideValue("rgiq0oE"); var height = prq.getSlideValue("0Mi2qLN"); // Alternative way to get slide values: /* var slide_weight = prq.quiz.attributes.slides.data.find(s => s.id === "rgiq0oE"); var slide_height = prq.quiz.attributes.slides.data.find(s => s.id === "0Mi2qLN"); var weight = slide_weight.attributes.values[0]; var height = slide_height.attributes.values[0]; */ // calculate the Body Mass Index var bmi = weight / (height * height); // insert the calculation on the element in the result page element.innerHTML = bmi.toFixed(2); // You can also load jQuery this way.
|
Step 4: Advanced JavaScript Customizations – Callback Function
You can use a callback function for custom integrations with Shop Quiz: Product Recommendation Quiz. Whether you’re aiming to build your own results page, add unique code, display custom product recommendations, or direct users to specific pages on your store, callback functions offer a versatile solution.
🙋🏻 What’s a Callback Function?
A callback function is a piece of JavaScript code that executes in response to an event – in this case, the completion of a quiz. You add this callback function to your website and a listener that will be triggered when the quiz is completed. Then you will have access to all the data from quiz responses.
Implementing the Callback Function
To begin, insert the following code into your store’s theme, ideally just before the closing </head> tag:
This simple example utilizes a console.log() function to output the JSON containing all the quiz response data.
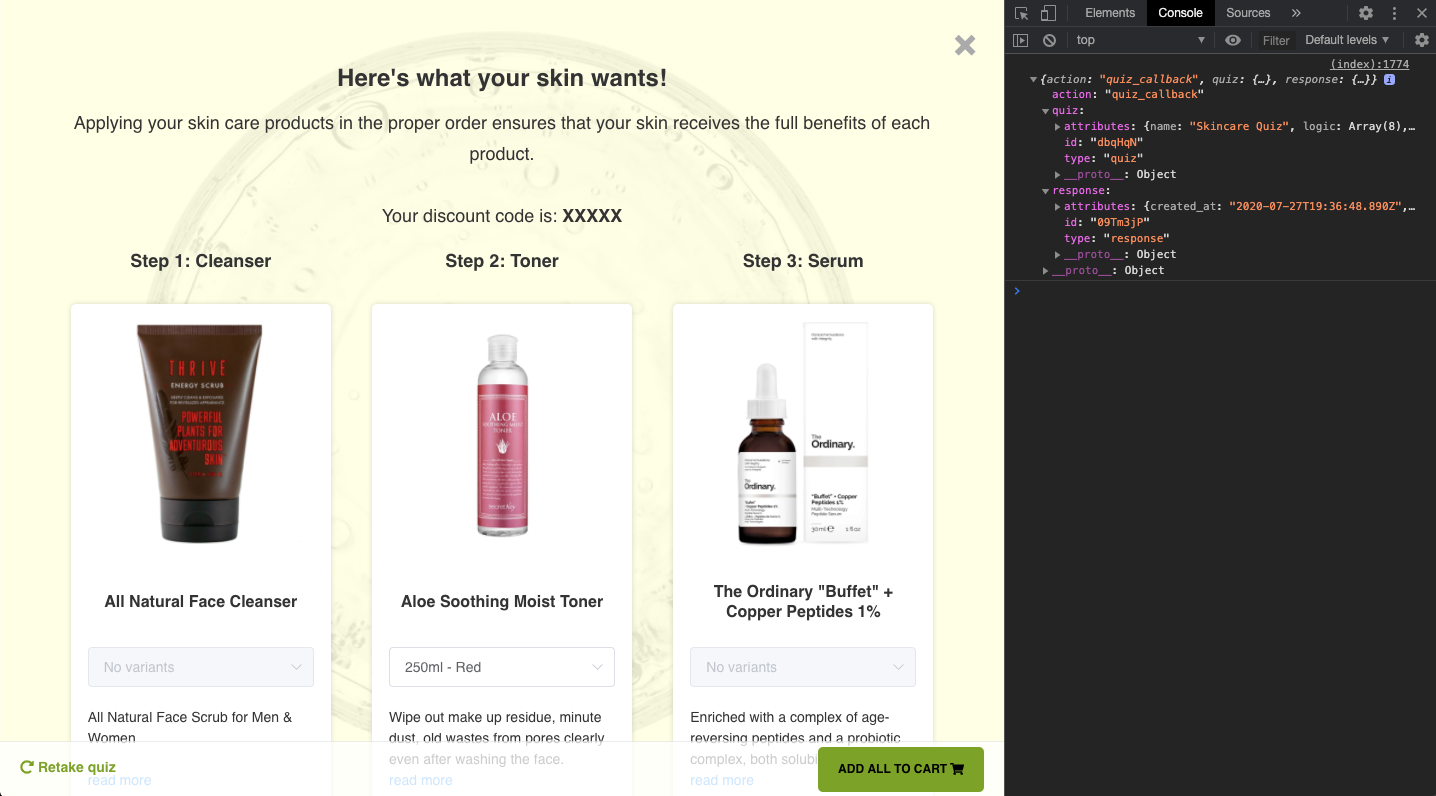
By tapping into the quiz responses, developers can access a wealth of information including individual answers, customer tags, and recommended products. This data is delivered in a JSON format via a JavaScript Callback Function, enabling you to add it directly to your website.
With the quiz response JSON, you can access details such as:
- All the questions asked during the quiz.
- The customer’s responses.
- Customer tags assigned based on the answers.
- Products recommended by the quiz.
- The layout and logic of the results page blocks.
Developers can use this data to perform actions beyond logging it. For example, you can trigger specific actions like adding a product to the cart based on quiz results by using a custom function such as prqAddOneToCartCallback(event);. This allows for deeper integrations and personalized customer interactions based on their quiz experience.
Best Practices
Customizing your Product Recommendation Quiz with custom CSS and JavaScript opens up a world of possibilities for creating a unique and engaging user experience.
☑️ Use Browser DevTools: Utilize browser Developer Tools to inspect elements and debug CSS/JavaScript in real-time. This helps in identifying issues and testing changes quickly.
☑️ Use Version Control: Commit your custom CSS and JavaScript changes to different quiz versions. This helps track changes and collaborate with other developers effectively.
☑️ Optimize for Performance: Minimize and compress your CSS and JavaScript files. Avoid excessive DOM manipulations and optimize animations for better performance.
☑️ Test Across Browsers: Test your customizations on multiple browsers and devices to ensure compatibility and a consistent user experience.
☑️ Document Your Code: Comment your CSS and JavaScript code to explain complex logic or styles. This helps others (and your future self) understand your work.
Final Word
By following the guidelines and examples provided in this article, you can tailor the quiz to perfectly match your brand and meet your business goals.
At the end of the day, customizing your quiz with CSS and JavaScript isn’t just about functionality—it’s about bringing your brand’s personality to life. You have the tools to create something that not only works but feels uniquely yours. Whether you’re tweaking styles or adding some clever interactivity, the possibilities are wide open.
So go ahead, experiment, and make your quiz as bold, sleek, or playful as you want. The only limit is your imagination. And remember, if you ever need a nudge in the right direction, we’re here to help you turn those ideas into reality. Now, it’s your turn—what will you create?
Feel free to reach out to our team for any specific customization queries or to share your unique customizations with us. We love seeing how our clients creatively use our tools to enhance their customer experience!
💡 Tip: For more detailed guides, visit the following: