Custom JavaScript Code
JavaScript on the Results Page
Even though we have a lot of settings to make it very easy to change the look and feel and the content of the Results Page, there are times that you want to harness the power of the Product Recommendation Quiz but want to:
- add custom behavior, texts or logic
- display custom product recommendations
- forward to any particular page on your store
We made it very easy for developers to tap into the quiz response and get all the information they need: individual answers to questions, triggered tags and recommended products.
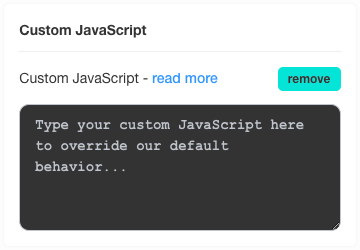
To add your Custom JS Code, click on the Results Page Settings > Advanced Settings and scroll down to the Custom JavaScript section:
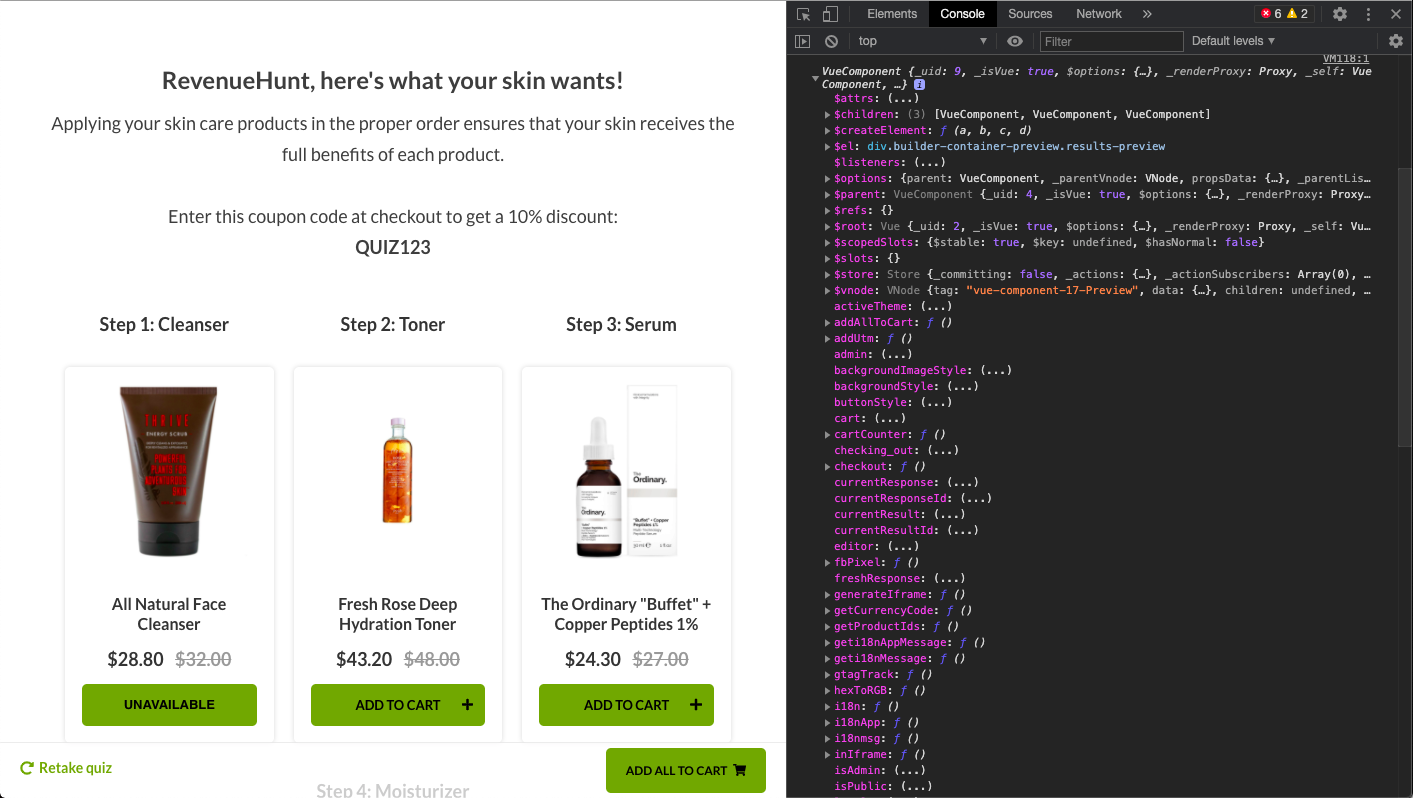
Try adding the following code:
console.log(prq);Now, when you complete the quiz and go to the Results Page, your browser’s console will show you a preview of all the Vue.js functions and properties that are available in the prq scope:
Other interesting properties and functions
/* List of all the quiz slides/questions (including the responded values) */
prq.quizSlides();

/* get the slide/question value by passing the slide ID  */
prq.getSlideValue(slideId);

/* get the lead's email  */
prq.leadEmail();

/* get the lead's phone  */
prq.leadPhone();

/* get the lead's name  */
prq.leadName();

/* List contents of the results page, blocks, products, etc. */
prq.resultsPage();

/* List recommended products, sorted by number of votes */
prq.recommendedProducts();

/* Show most voted product */
prq.mostVotedProduct();

/* adds all the products to cart automatically */
prq.addAllToCart();

/* proceeds to cart/checkout automatically */
prq.checkout();

/* set specific discount code \*/
prq.setDiscountCode('10-OFF');

/* get the response permalink url */
prq.getResponsePermalink();

/* retake quiz */
prq.retakeQuiz();

/* close quiz */
prq.closeQuiz();

/* open quiz popup */
window.openQuizPopup('dbqHqN');
dbqHqN is the quiz ID
Trigger the prq functions from an element in the results page
You can do it two ways: Create an element in the result page and add the onclick functionality later via the Custom Javascript
<!-- In Result page in a HTML block -->
<!-- add a HTML element such as -->
<a id="special_retake_quiz">Click here to retake the quiz</a>
/* In the Custom Javascript section */
// get the element
var element = document.getElementById("special_retake_quiz");
// add the onclick function to the element
element.onclick = function() {
prq.retakeQuiz();
}Or you can create the element in the Custom Javascript section with an onclick event first and then inject it in the results page.
/* In the Custom Javascript section */
// create the element
var element = document.createElement("a");
element.innerHTML = "Click here to retake the quiz"

// add the onclick function to the element
element.onclick = function() {
    prq.retakeQuiz();
}

// get element that we are going to append in the result
// in this case at the end of the first block
var destination_element = document.querySelectorAll(".lq-block")[0];
destination_element.appendChild(element);
Insert calculations
You can display the information you have gathered throughout the quiz and mash it up however you want. For example you could create a body mass index calculator the following way.
<!-- In Result page in a HTML block -->
<!-- add an HTML element such as -->
<div id="body_mass_index_calculation"></div>
/* In the Custom Javascript section */
// get the element
var element = document.getElementById("body_mass_index_calculation");

// get the values of the slides
var weight = prq.getSlideValue("rgiq0oE");
var height = prq.getSlideValue("0Mi2qLN");

// instead of using prq.getSlideValue you could do the same with this code:
/*
var slide_weight = prq.quiz.attributes.slides.data.find(s => s.id === "rgiq0oE");
var slide_height = prq.quiz.attributes.slides.data.find(s => s.id === "0Mi2qLN");

var weight = slide_weight.attributes.values[0];
var height = slide_height.attributes.values[0];
*/

// calculate the Body Mass Index
var bmi = weight / (height * height);

// insert the calculation on the element in the result page
element.innerHTML = bmi.toFixed(2);
You can also load jQuery this way.
Multiple-choice questions: select all, select none
This code may require adjustments by a developer! Use it as an example only.It is possible to make the quiz multiple choice questions select all preceding answers and none of the answers with custom JavaScript code. You will be able to use it as long as there is only one choice that contains the word “All” and one that contains the word “None”. It doesn’t matter the order or the question number:
// Initializes an object to hold the current slide's state, ensuring it doesn't overwrite if already exists.
var prq = prq || {
  currentSlide: {
    values: [], // An array to store the values (identifiers) of selected choices.
  },
};

// Selects all elements with class `.lq-choice` as the choices available on the current slide/view.
const choices = document.querySelectorAll(".lq-choice");

// Retrieves the currently selected choice values from the global state.
var values = prq.currentSlide.values;

// Iterates over each choice and attaches a click event listener to handle selection/deselection.
choices.forEach((selector) => {
  selector.addEventListener("click", function () {
    refresh(this.id); // Calls the refresh function on click, passing the clicked choice's ID.
  });
});

// Defines the logic to update choice selections based on user interaction.
function refresh(id) {
  var choice = document.getElementById(id); // Retrieves the DOM element for the clicked choice.

  // Logic to deselect a choice if it's already selected.
  if (valuesIncludes(values, choice)) {
    values = removeChoice(values, choice);
  }
  // Logic to select all choices except "none" when "all" is clicked.
  else if (isAll(choice)) {
    const cs = [...choices].filter((c) => !isNone(c));
    values = cs.map((c) => choiceId(c));
  }
  // Logic to handle "none" selection, deselecting all other choices or selecting none only.
  else if (isNone(choice)) {
    if (valuesIncludes(values, choice)) {
      values = [];
    } else {
      const cs = [...choices].filter((c) => !isNone(c));
      values = [choiceId(choice)];
    }
  }
  // General logic for ticking a choice and unticking "none".
  else {
    addChoice(values, choice);
    values = removeChoice(values, choiceNone(choices));
  }

  // Updates the UI to reflect the current selection state.
  choices.forEach((c) =>
    values.includes(choiceId(c))
      ? c.classList.add("lq-selected")
      : c.classList.remove("lq-selected")
  );
}

// Helper function to add a choice's ID to the selection.
function addChoice(values, choice) {
  values.push(choiceId(choice));
}

// Helper function to remove a choice's ID from the selection.
function removeChoice(values, choice) {
  return values.filter((v) => v !== choiceId(choice));
}

// Returns the "none" choice element.
function choiceNone(choices) {
  return [...choices].find((c) => isNone(c));
}

// Unused in the given code but presumably intended to return the "all" choice element.
function choiceAll(choices) {
  return [...choices].find((c) => isAll(c));
}

// Extracts and returns the ID part of a choice's DOM ID.
function choiceId(choice) {
  return choice.id.split("-")[1];
}

// Determines if a choice is meant to select all options.
function isAll(c) {
  return c.innerHTML.toLowerCase().includes("all");
}

// Determines if a choice represents a "none" selection.
function isNone(c) {
  return c.innerHTML.toLowerCase().includes("none");
}

// Checks if the current selection includes a specific choice's ID.
function valuesIncludes(values, c) {
  return values.includes(choiceId(c));
}
Add a privacy and marketing checkbox
You can add a privacy and security checkbox to your email question.
// Defines a string containing HTML for a checkbox input and accompanying text. The text includes a statement
// about agreeing to a Privacy Policy and receiving emails. The 'onclick' attribute of the checkbox calls a function
// named 'toggleCheckbox' when the checkbox is clicked.
var legalText = `

  I have read the Privacy Policy and agree to receive informational and promotional emails
`;

// Creates a new 'div' element intended to contain the legalText.
var newNode = document.createElement("div");
// Sets the innerHTML of the newly created 'div' to the legalText, thereby inserting the checkbox and the text into the 'div'.
newNode.innerHTML = legalText;
// Assigns an ID to the newly created 'div' for potential reference.
newNode.id = "newNode";

// Locates the parent node of an existing element in the document with the ID 'focus'. This is where the newNode will be inserted.
var groupNode = document.getElementById("focus").parentNode;
// Retrieves the reference to the 'focus' element itself, to use it as a reference point for inserting the newNode.
var inputNode = document.getElementById("focus");

// Checks if an element with the ID 'checkbox-legal' already exists in the document to avoid duplicates.
if (document.getElementById('checkbox-legal') == null) {
  // Inserts the newNode before the 'focus' element within its parent, effectively adding the legal checkbox
  // and text to the document in the specified location.
  groupNode.insertBefore(newNode, inputNode);
}

// Defines the 'toggleCheckbox' function on the window object, which will be called when the legal checkbox is clicked.
window.toggleCheckbox = function(){
  // Retrieves the state of the checkbox (checked or unchecked).
  var acceptedLegal = document.getElementById('checkbox-legal').checked;
  // If the checkbox is checked, it enables a button with the ID 'cta'. If unchecked, the button is disabled.
  if(acceptedLegal){
    document.getElementById("cta").disabled = false;
  }else{
    document.getElementById("cta").disabled = true;
  }
};

// Initially disables the 'cta' button until the legal checkbox is checked.
document.getElementById("cta").disabled = true;
Add to other slides to remove the checkbox
// Checks if an element with the ID 'checkbox-legal' exists in the document.
if (document.getElementById('checkbox-legal') != null) {
  // Retrieves the element with the ID 'checkbox-legal'.
  var e = document.getElementById('checkbox-legal');
  // Retrieves the element with the ID 'newNode'.
  var nodeID = document.getElementById('newNode');

  // Removes the 'newNode' element from the document by calling 'removeChild' on its parent element.
  // This effectively removes the container div that was added in the previous code snippet, which contains the legal text and checkbox.
  nodeID.parentElement.removeChild(nodeID);

  // Removes the 'checkbox-legal' element from the document by calling 'removeChild' on its parent element.
  // This line appears to be redundant in the context of the initial code snippet provided because the 'checkbox-legal' element is inside the 'newNode',
  // and removing 'newNode' also removes all of its child elements, including 'checkbox-legal'.
  e.parentElement.removeChild(e);
};
Arrange products into “You may also like..” on the Results Page
With custom CSS code and JavaScript it is possible to show one main product and 2-3 extra porduct underneath as “You may also like…”. This code applies to a single product block of at least 2 products.
Code to be added to the CSS console
/* Targets the first child element with the class '.lq-product' */
.lq-product:first-child {
  margin: 0 25% 0% !important; /* Sets the margin of this element. The top and bottom margins are 0, while the left and right margins are set to 25% of the parent element's width. The use of '!important' makes this rule take precedence over other conflicting rules. */
}

/* A media query that applies styles based on the maximum width of the viewport. */
@media (max-width: 725px) {
  /* Targets the first child element with the class '.lq-product' only when the viewport width is 725px or less. */
  .lq-product:first-child {
    margin: 0 5% 0% !important; /* Adjusts the margin for smaller screens. The left and right margins are reduced to 5%, making the element take more horizontal space compared to larger screens. */
  }
}

/* Defines styles for elements with the class '.txtCSS'. */
.txtCSS {
  font-size: 1.25em; /* Sets the font size to 1.25 times the size of the font used by the parent element. */
  margin: 35px 0; /* Sets the top and bottom margins to 35px, with no margin on the left and right. */
  color: var(--tit-col); /* Sets the text color using a CSS variable named '--tit-col'. This allows for easy theme customization and ensures consistency across elements using the same variable. */
}
Code to be added to the JavaScript console
// Retrieves the first element in the document with the class name 'lq-product'.
var myDiv = document.getElementsByClassName("lq-product")[0];

// Creates a new 'div' element.
var txt = document.createElement("div");

// Adds the class 'txtCSS' to the newly created 'div'. This class is supposed to define certain styling properties like font size, margin, and color as described in the CSS provided earlier.
txt.className += "txtCSS";
// Assigns an ID 'likeTxt' to the new 'div', allowing it to be uniquely identified within the document.
txt.id = "likeTxt";

// Sets the text content of the new 'div' to "You may also like…", which serves as a heading or introduction to additional content or recommendations.
txt.innerText = "You may also like…";

// Checks if an element with the ID 'likeTxt' already exists in the document to avoid duplicate insertions.
if (document.getElementById("likeTxt") == null) {
  // Inserts the new 'div' right after the first '.lq-product' element within its parent container.
  // This places the suggestion text in a contextually relevant position, likely near other product listings or content.
  myDiv.parentNode.insertBefore(txt, myDiv.nextSibling);
}
Redirect to translated product URL
Our plugin doesn’t support mulit-language stores, as only the main product (in the orginal language) can be synced with the Product Recommendation Quiz app. Here’s more informaiton about multi-language quizzes.
However, if you want, you can create a quiz in a different language. Then, instead of adding a product to cart, you can point customers to the translated product page. By default, the customer will be redirected to the original product URL, but you can force an automatic URL change via JavaScript. For example, you can tell the Results Page to automatically change all the links from this:
https://www.example.com/products/productA
to this:
https://www.example.com/en/products/productA
This way your customers will be automatically redirected to the translated product page.
Here’s a code that you can use to point customers to an English translation of a product:
let shopURL = "https://www.example.com";

var links = document.querySelectorAll(".lq-product a");

for (let i = 0; i < links.length; i++) {
var href = links[i].href;
links[i].href = href.replace(shopURL,shopURL+"/en");
}
Make sure to replace the https://www.example.com with your store URL and change the shopURL+"/en" to the languge code you have set up in your store (for example, shopURL+"/fr" for French).
JavaScript in Quiz Builder (Questions)
Even though we have a lot of settings to make it very easy to change the look and feel and the content of the quiz, there are times that you want to harness the power of the Product Recommendation Quiz but want to:
- add custom behavior, images, texts or logic
- forward to any particular page on your store
- add tracking codes to specific questions (Google Analytics, Facebook Pixel)
To add your Custom JS Code, go to the Quiz Builder -> Question -> Question Settings (little wrench icon) and scroll down to the Custom JavaScript section:
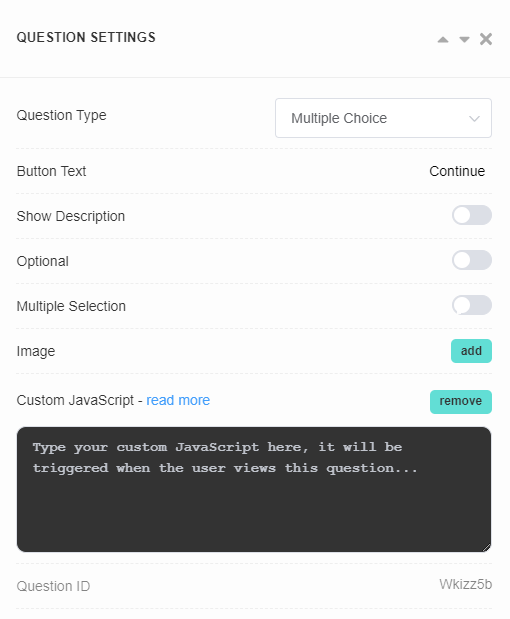
Click “add” to start typing your code.
Tip: Below the Custom JavaScript setting, you can find a unique question ID.