Sending leads to your Klaviyo account
Apart from giving your customers a personalized product recommendation, you can connect your quiz to your Klaviyo account so that the quiz results are sent automatically to your mailing list, so you can segment them based on their responses and follow up with targeted campaigns.
Connecting the quiz to Klaviyo
Go to your quiz and click on the “Connect” tab on the top of the screen. This will open a tab where you can connect your quiz with multiple third-party services.
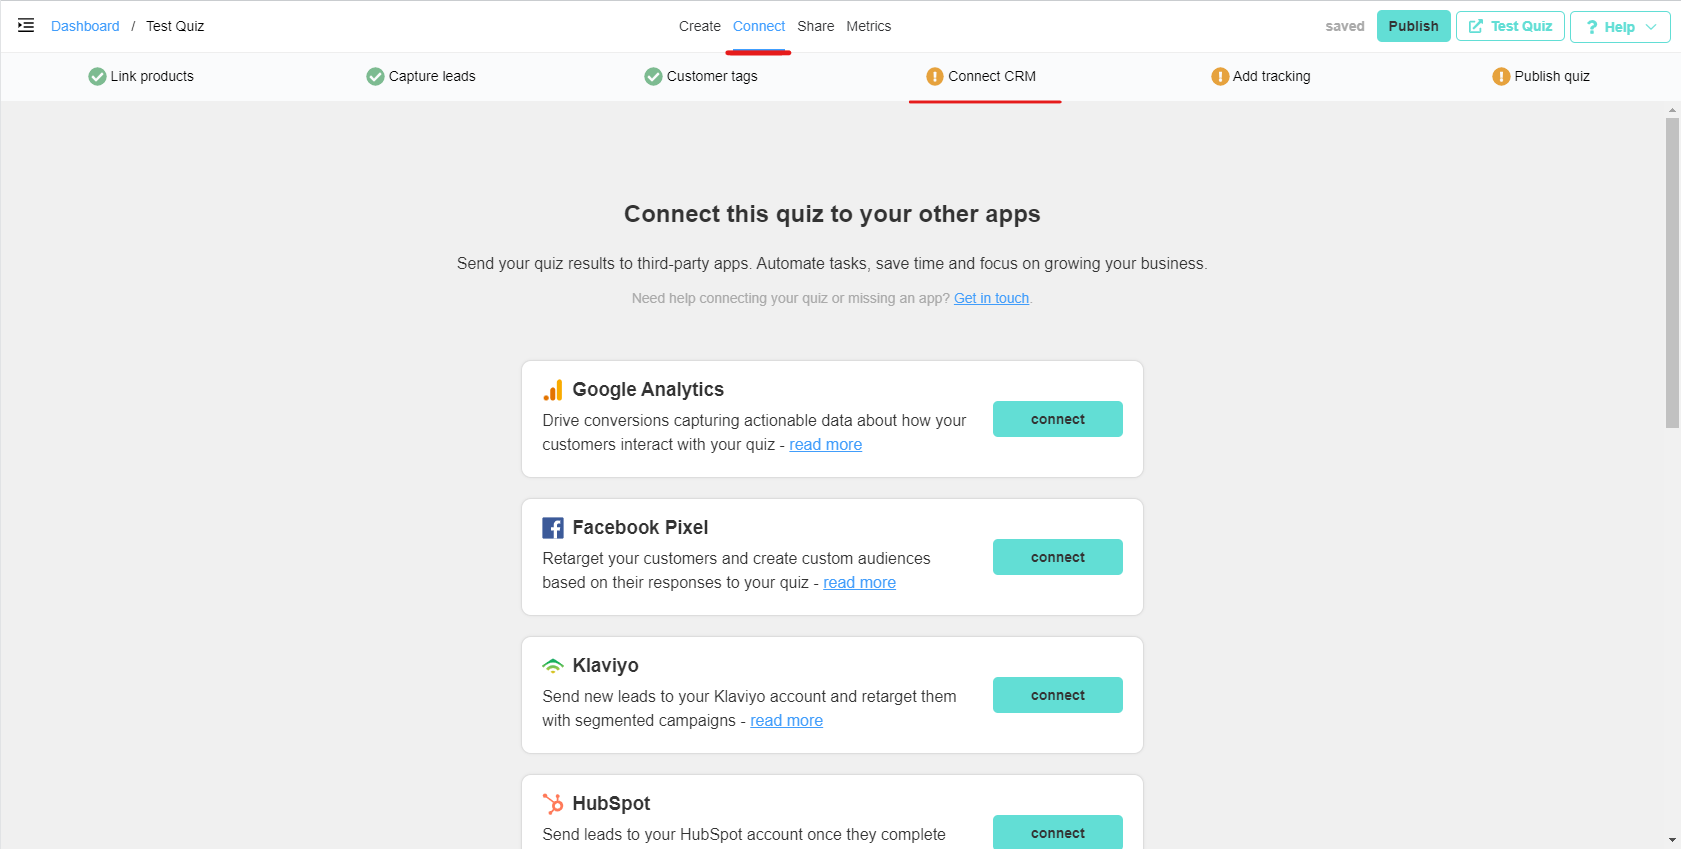
Then click on the “Connect” button in the Klaviyo section. This will open a popup.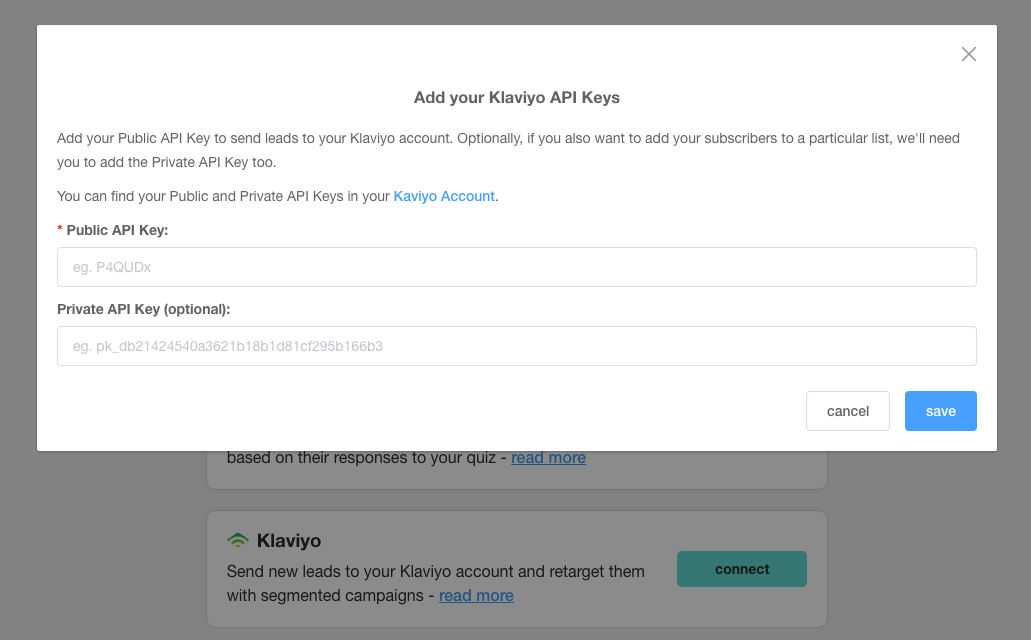
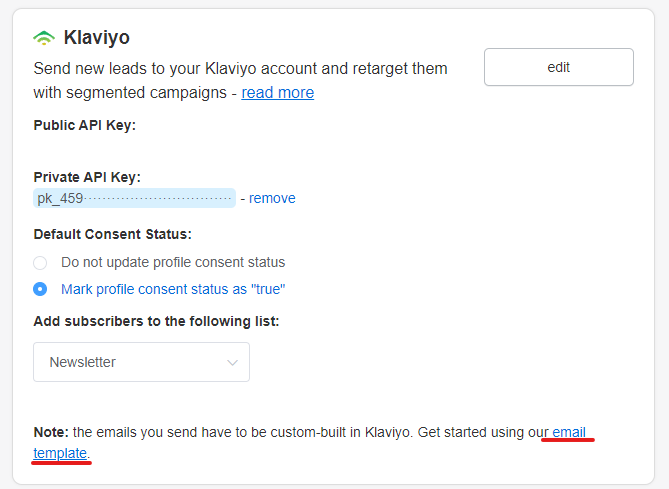
There you’ll have to provide your Klaviyo Public API Key / Site ID and (optionally) a Private API Key (to add contacts to a particular list in Klaviyo).
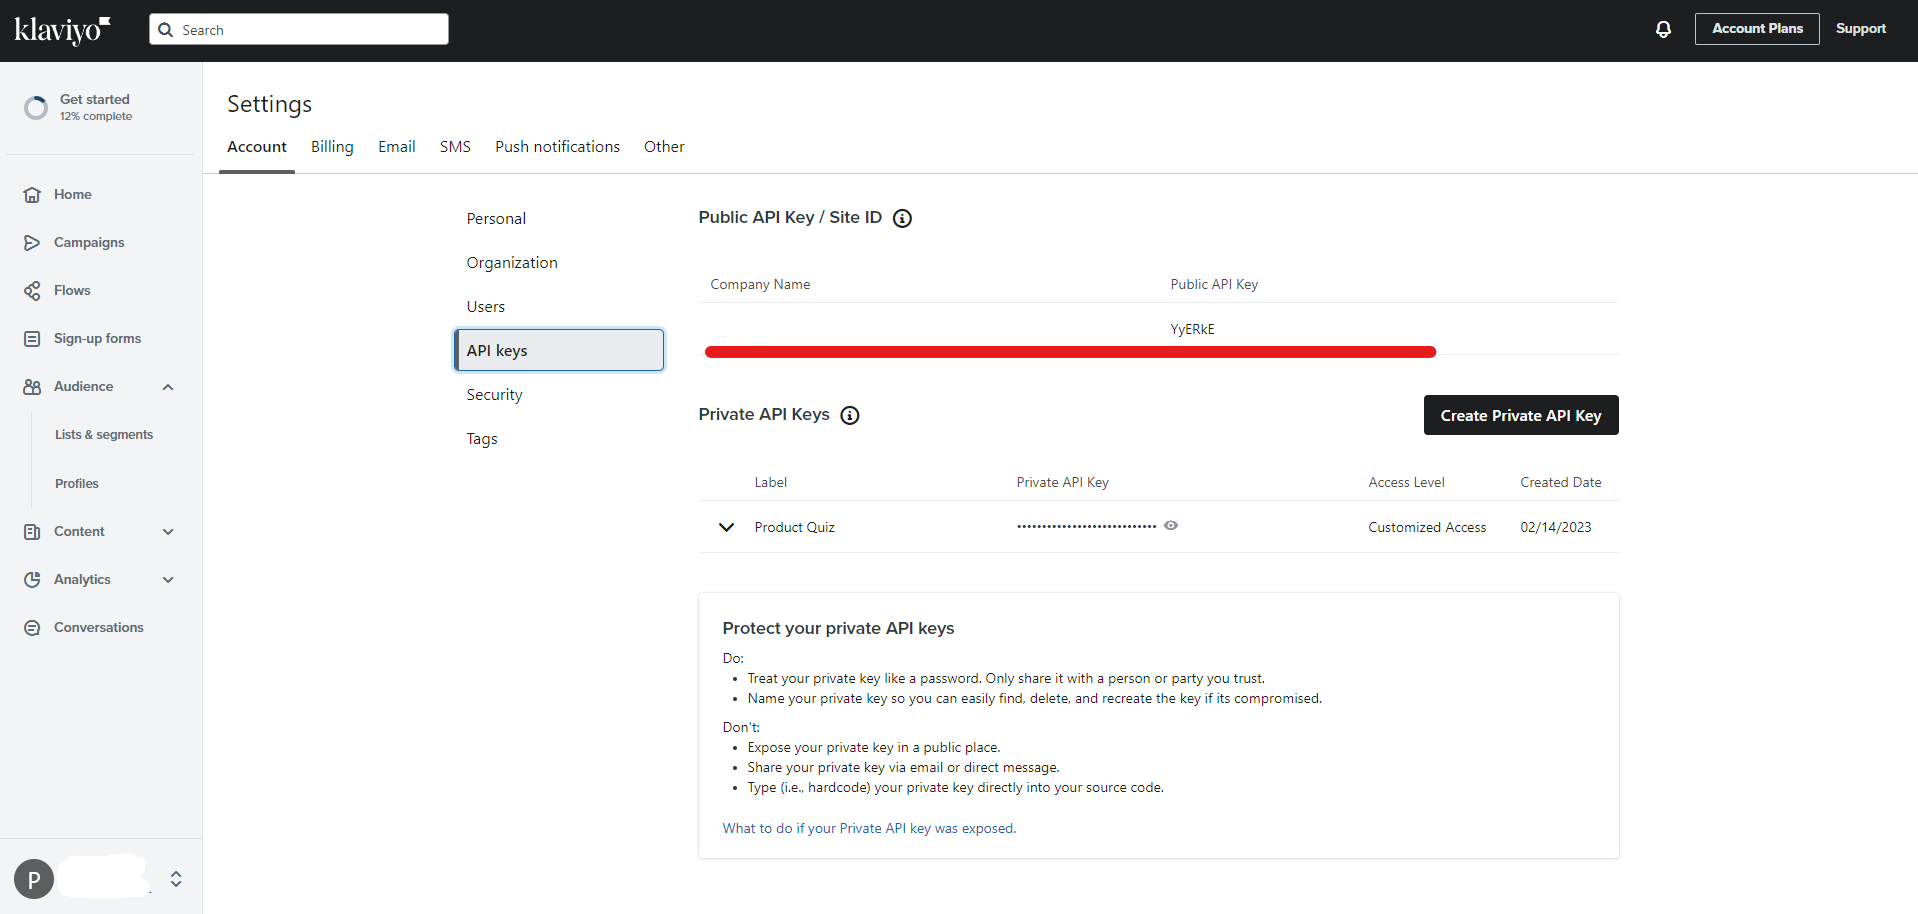
Public API Key
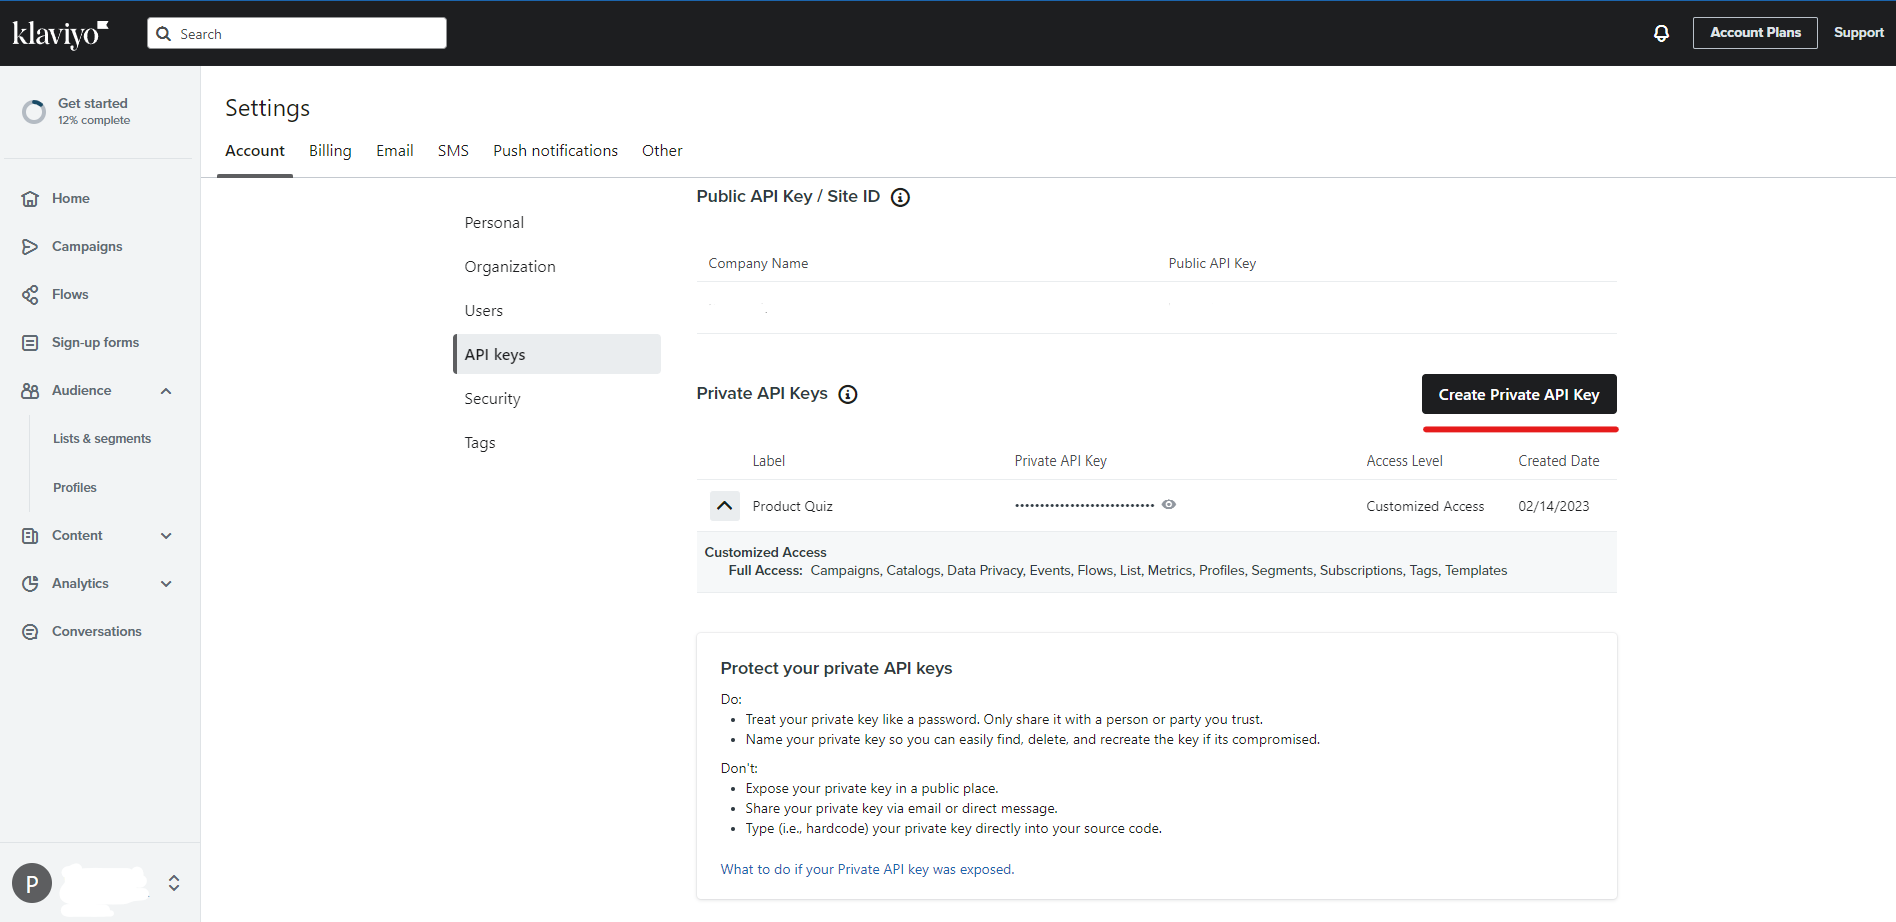
You can get your Klaviyo Public API Key here:
Then, choose whether you want the profiles from the quiz to be automatically marked as profiles that consented to receive marketing materials or not.

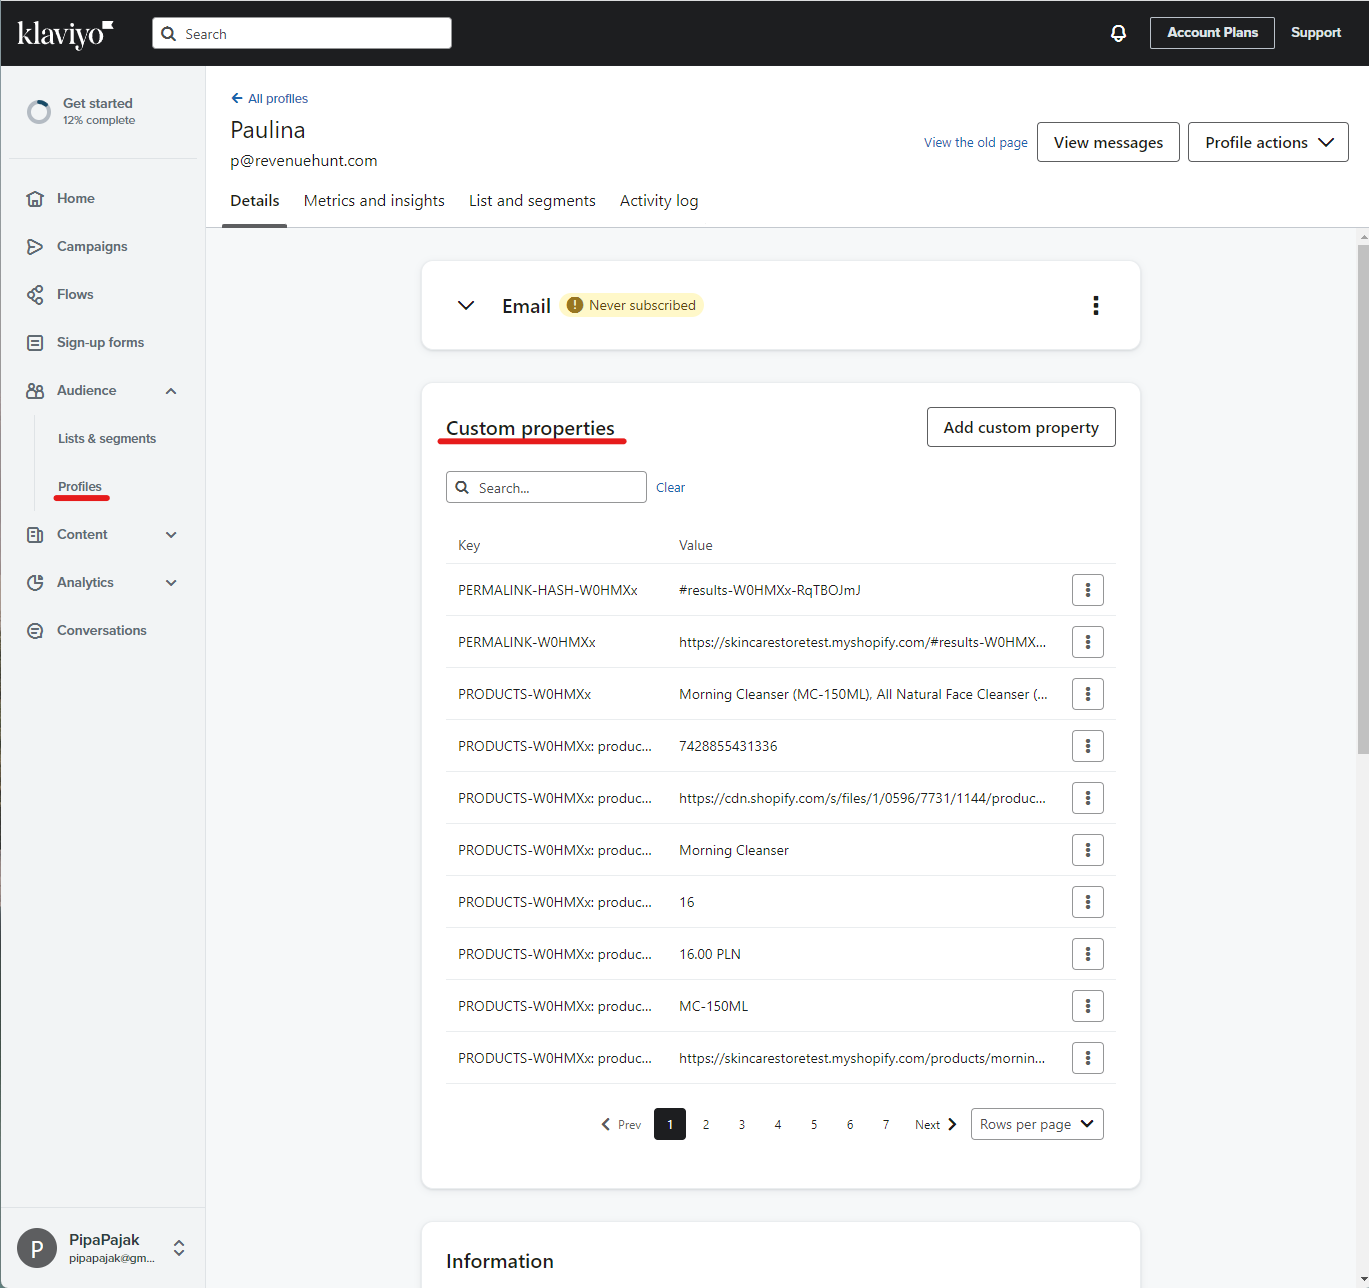
Once this is done, every time your customers take the quiz, their contact details along with all of their responses and product recommendations will be sent to your Klaviyo account. They’ll appear as “custom properties” in your customers’ profiles. These custom properties can be used in your Klaviyo email templates to customize them.
Mind that sometimes Klaviyo takes a few minutes to process the new leads, so they might take a while to appear on your account.
Some special characters, like national language accents (è,é,ê etc.), are not supported by Kalviyo. If your texts contain these characters the quiz data may not be sent correctly.
Adding quiz contacts to a Klaviyo list
It is possible but there may be a better way: instead of adding them to a general list you can create dynamic segments based on your customers’ responses to send them hyper-targeted campaigns.
Highly segmented campaigns return more than 3X the revenue per recipient as unsegmented campaigns.
With Klaviyo you can create segments to filter your leads and assign email flows to each segment. Here’s more information on how to create and use segments on Klaviyo.
It is possible to add quiz contact automatically to a particular list. To do that, on the Kalviyo -> Connect tab, you’ll have to provide a Private API Key created in Klaviyo. Then, you’ll be able to choose which List the contact should be added to.
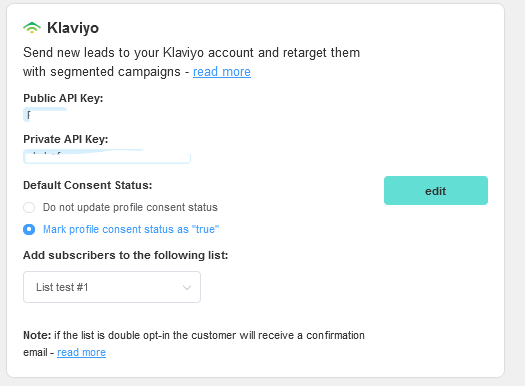
WARNING: We’ve had many reports of Klaviyo not sending the opt-in email to Lists that are double opt-in. It’s recommended to keep your list single opt-in and make the profile consent status as “true”, otherwise contacts may not be added correctly. You can also set up a Klaviyo email flow instead.
Private API Key
You can get your Klaviyo Private API Key here. Click “Create Private API Key” > Full Access Key or Customized > select Full Access:
Alternatively, you can add contacts to a list manually, but we strongly recommend you go with the dynamic segments alternative.
Sending follow up emails via Klaviyo
DEVELOPERS ONLY
It’s possible to send the product recommendations via Klaviyo, although this is not something that’s a one-click install. It should be built by someone with technical knowledge and experience in Klaviyo. Below you’ll find some basic instructions that can be forwarded to a developer.
Once the quiz is connected to Klaviyo (and the data is sent there), it’s out of our app’s scope, and any particular questions on how to set up the flows and how to build the email templates should be directed to Klaviyo.
The process of setting this up consists of 4 steps:
Step 1: Connect your quiz to Klaviyo
Check the top of this article to learn how to set this up.
Step 2: Create a segment in Klaviyo
This segment will include ONLY quiz takers.
Take the quiz and insert a test email. A new profile should appear in your Klaviyo account.
You can create a segment based on custom properties that only exist in profiles that took the quiz. In your case, you’ll have to only include profiles that have the following property set: PERMALINK-{{quiz_id}} and add a rule that creates an exception for marketing consent.
It should look something like this:

How to set up the PERMALINK property:
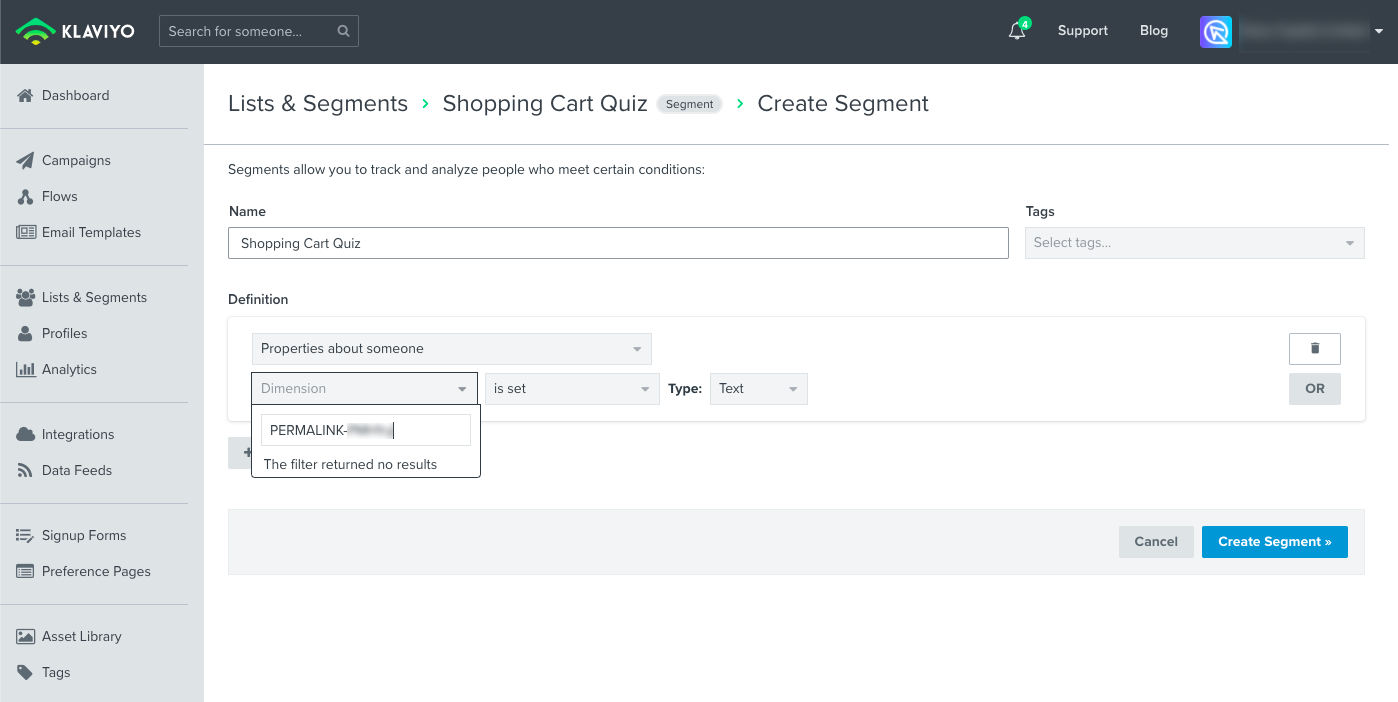
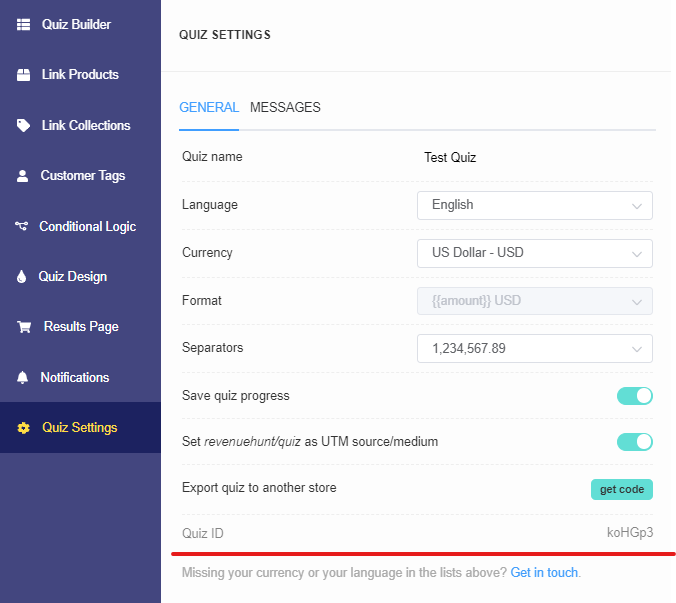
Your quiz_id can be found in the Product Recommendation Quiz app under Quiz Settings
or in Klaviyo, as the first profile property (Permalink-xxxxx).
Step 3: Create a segment triggered email flow
You’ll have to create a flow that gets triggered when someone gets added to the segment we created in the previous step. Here’s how to do it:
Step 4: Create the email template
This is the trickiest part, the emails you send have to be custom-built in Klaviyo.
By going to Connect > Klaviyo you can download a sample HTML email template adjusted to your quiz.
Copy the code and add it to your email flow as a new HTML template:

You can then preview it as one of your segment subscribers:
Remember to save the template and confirm with “done”.
If you need to modify that template to match your brand’s style guide, you’ll need a developer because email templates in Klaviyo are built using HTML, CSS and the Django templating system.
We send all the responses to the quiz and the recommended products along with the contact information to the customer’s Klaviyo profile. This information will appear in the customer’s profile as “custom properties”.
If you need to add any additional information to the email template, your developer can do so by pulling the appropriate custom properties from the user profile.
Here are some other email templates that you can use as a reference:
- Basic Slots Template (4-Step Skincare Routine) – take this quiz & enter your email to see a demo.
- Advanced Slots Template (Morning & Night Routine) – take this quiz & enter your email to see a demo.
- Products List Template (Coffee Recommendations) – take this quiz & enter your email to see a demo.
* Bear in mind that these templates (unlike the one generated from the Connect > Klaviyo tba) won’t work as is. They were created for a sample quiz. Your developer will have to modify the custom properties to match the ones that are passed from the quiz to your Klaviyo account. The quiz ID is different, so are other property names.
How to include custom properties in email templates
DEVELOPERS ONLY – Go to your Klaviyo account, navigate to the Email Templates list and create a new basic template.
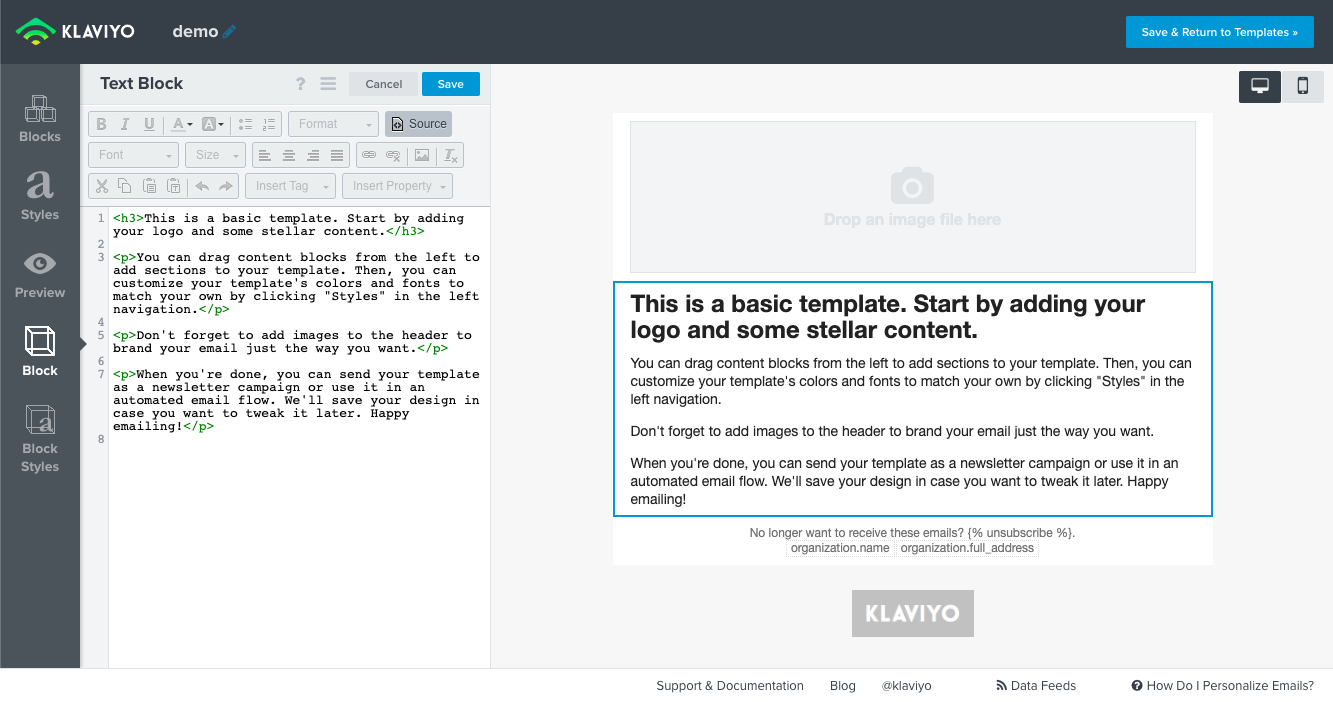
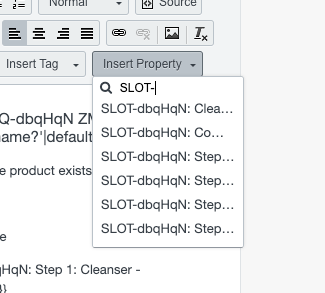
A first approach will be to stay in the WYSIWYG Editor to make it easy to include custom properties them in the template:
Then switch to the “source” mode to view the HTML code:
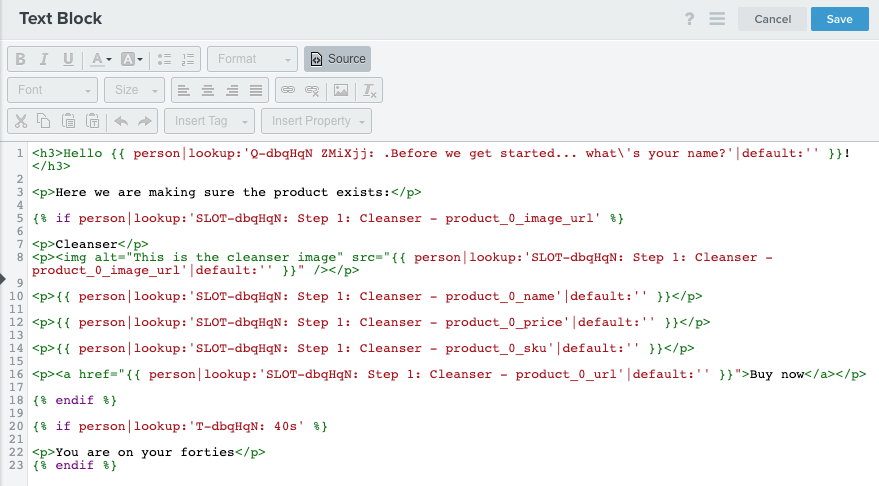
In this example, we’re using our quiz ID dbqHqN, which you’ll need to replace for your quiz ID. Here is the code for reference:
<h3>Hello {{ person|lookup:'Q-dbqHqN ZMiXjj: .Before we get started... what\'s your name?'|default:'' }}!</h3>
<p>Here we are making sure the product exists:</p>
{% if person|lookup:'SLOT-dbqHqN: Step 1: Cleanser - product_0_image_url' %}
<p>Cleanser</p>
<p><img alt="This is the cleanser image" src="{{ person|lookup:'SLOT-dbqHqN: Step 1: Cleanser - product_0_image_url'|default:'' }}" /></p>
<p>{{ person|lookup:'SLOT-dbqHqN: Step 1: Cleanser - product_0_name'|default:'' }}</p>
<p>{{ person|lookup:'SLOT-dbqHqN: Step 1: Cleanser - product_0_price'|default:'' }}</p>
<p>{{ person|lookup:'SLOT-dbqHqN: Step 1: Cleanser - product_0_sku'|default:'' }}</p>
<p><a href="{{ person|lookup:'SLOT-dbqHqN: Step 1: Cleanser - product_0_url'|default:'' }}">Buy now</a></p>
{% endif %}
{% if person|lookup:'T-dbqHqN: 40s' %}
<p>You are in your forties</p>
{% endif %}
As you can see, you can not only include custom properties that are passed from the quiz to your Klaviyo account, but you can also use IF-ELSE conditional statements to show/hide content based on the customer’s responses to the quiz.
Note that when looping through the products, the count starts in 0 (zero), so for example, if you were to display the name of 3 products in a slot you’d have to do it like this:
<p>{{ person|lookup:'SLOT-dbqHqN - product_0_name'|default:'' }}</p>
<p>{{ person|lookup:'SLOT-dbqHqN - product_1_name'|default:'' }}</p>
<p>{{ person|lookup:'SLOT-dbqHqN - product_2_name'|default:'' }}</p>
Here is a reference of the logic you can use in the Klaviyo (Django) templating system:
https://docs.djangoproject.com/en/1.8/ref/templates/builtins/
Pull product information directly from Shopify
There’s a feature in Klaviyo that allows to pull the product information directly from Shopify by providing the id.
This way you don’t need to use the “description” or “image_url” that is provided by revenuehunt, but can pull it directly from Shopify by providing the origin_id of the product.
More information about this function can be found here.