Sending results to your customers via email
The e-mail notifications feature lets you receive an e-mail every time your potential customers complete your quiz gives their contact details so you can follow up with them if needed.
Additionally, you can configure your quiz to send the quiz results to your customers’ inbox so they can come back later to finish the purchase if they haven’t made up their minds yet.
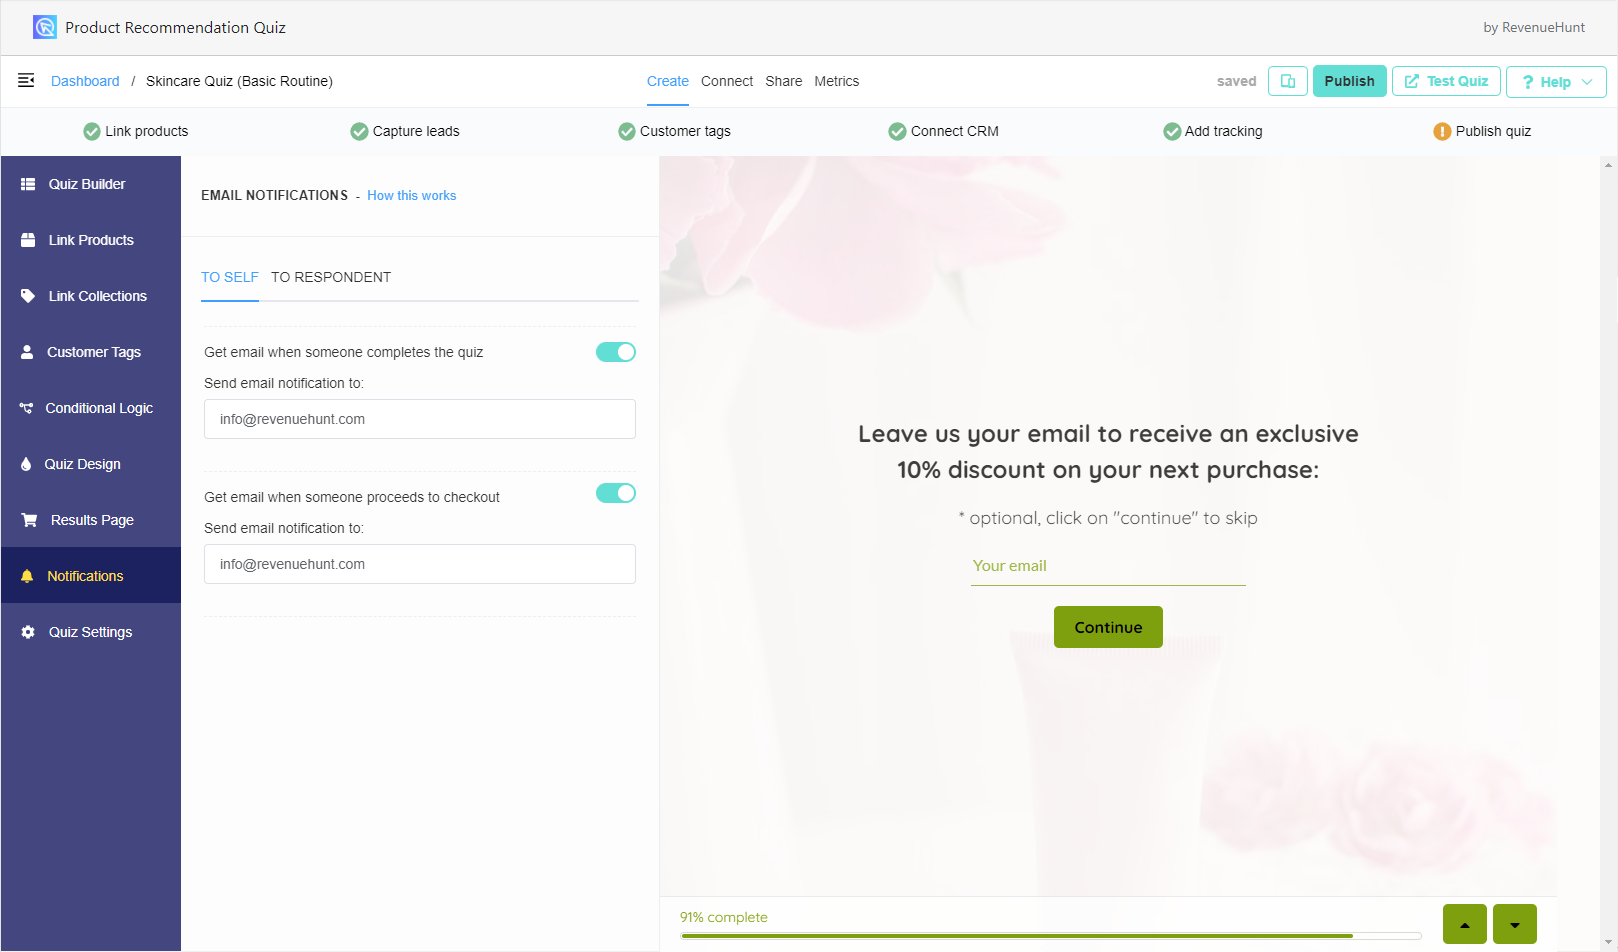
To Self
To activate this feature, go to your quiz and navigate to the “Notifications > TO SELF” tab. You can receive an email every time someone completes the quiz and/or every time someone proceeds to the cart or checkout.
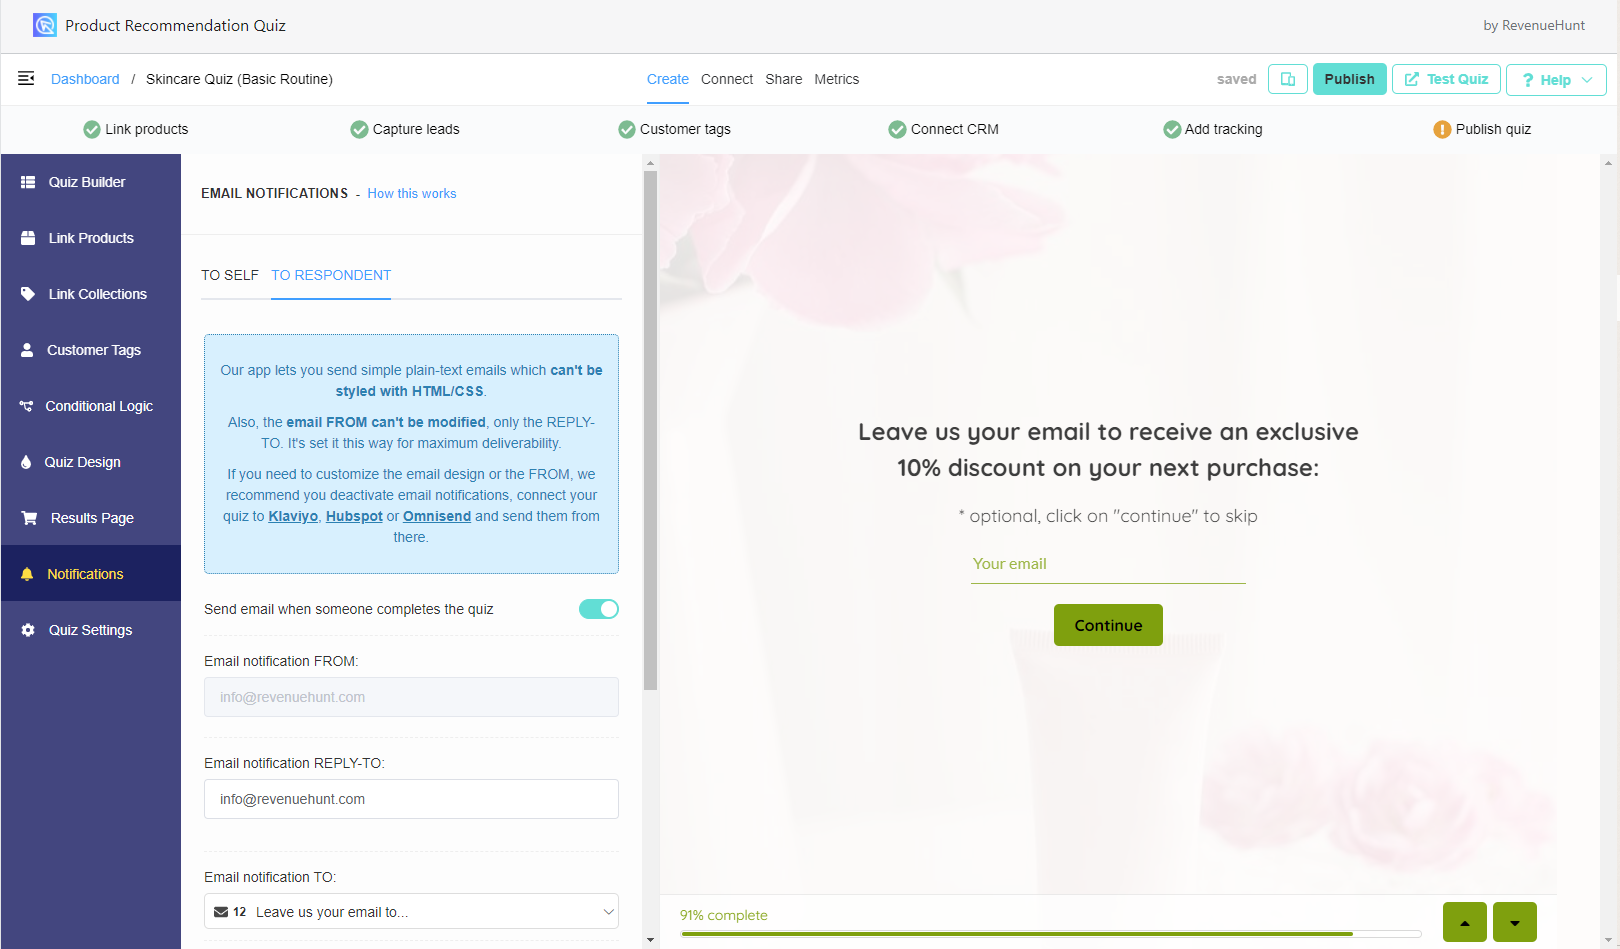
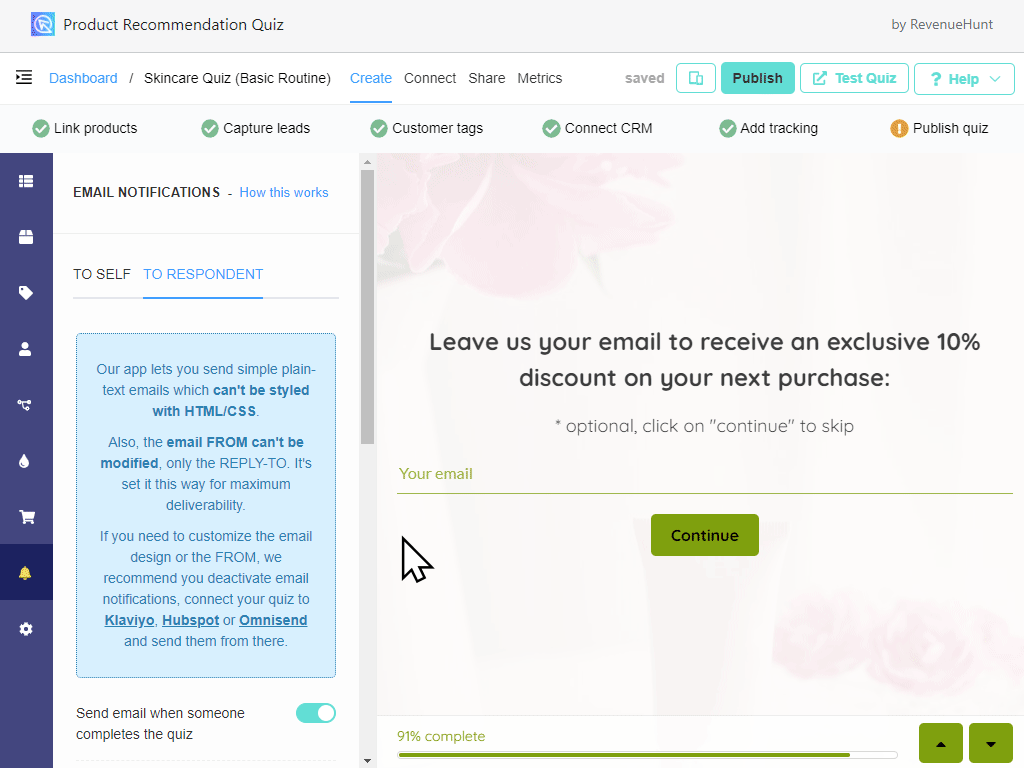
To Respondent
In the “Notifications > TO RESPONDENT” tab you can configure the email your customers will receive. You need to have an email question in your quiz to activate the email notifications to quiz respondents.
This way you’ll recover a high percentage of abandoned carts.
You can customize the email subject and message, recall the responses to the quiz’s questions (use “@” to recall information), and even include a discount or coupon code for your customers to redeem when they proceed to checkout.
Connecting to your SMTP Server
SMTP stands for Simple Mail Transfer Protocol. SMTP is a connection protocol which enables third-party apps (e.g. Product Recommendation Quiz) to send emails through your email server.
When you connect Product Recommendation Quiz to your SMTP Server, the follow-up emails with the quiz results that are sent to your customers won’t be sent from our [email protected] email account, they’ll be sent from your email account.
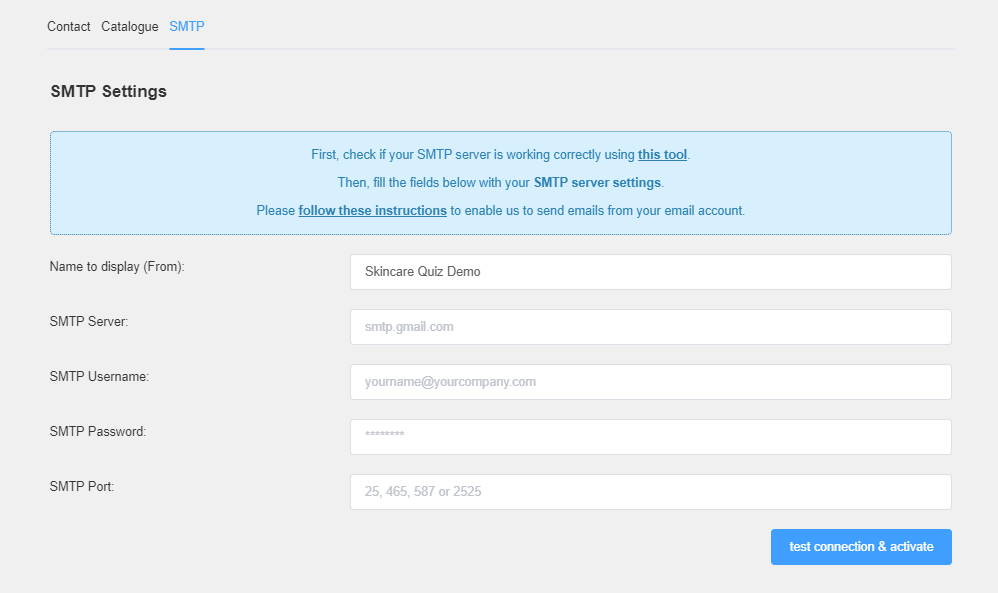
In order to set this up, go to your quiz and navigate to the Dashboard and open Settings.

Then, click on the SMTP tab. Fill the fields with your SMTP server settings and click on “test connection & activate”:
We highly suggest checking your SMTP settings with the help of a third party tool such as:
https://www.smtper.net/ — https://www.gmass.co/smtp-test
or any other SMTP test site. If your settings work as intended there, they should work on our end, too. If you’re having issues, please get in touch with your developer / SMTP provider.
Whitelisting our server for Outlook Office 365 users
If you’re using an office365.com SMTP service by default they may be blocking our server from sending emails on your behalf. In that case you may need to contact them and whitelist the following IP address:
- Sign into Office 365 and click “Admin”, then under “Admin Centers”, click “Exchange”
- Under the “Protection” list, choose “Connection Filter”
- Click the “Edit” button which looks like a pencil
- Choose “Connection Filtering” on the left side menu
- Click the plus “+” symbol and add an IP range from the list below and click “OK”
- Repeat step 5 until the IP ranges below have been entered
- Check the “Enable Safe List” checkbox
- Finally, click “Save”
Enabling SMTP connections on Google Workspace
If you’re using Google Workspace tools (e.g. Gmail) to manage your business, you’ll need to take an extra step in order to enable SMTP connections to your email account.
Navigate to your Google Account settings, then to the Security screen. Check if 2-Step Verification (also known as 2-Factor Authentication) is enabled:
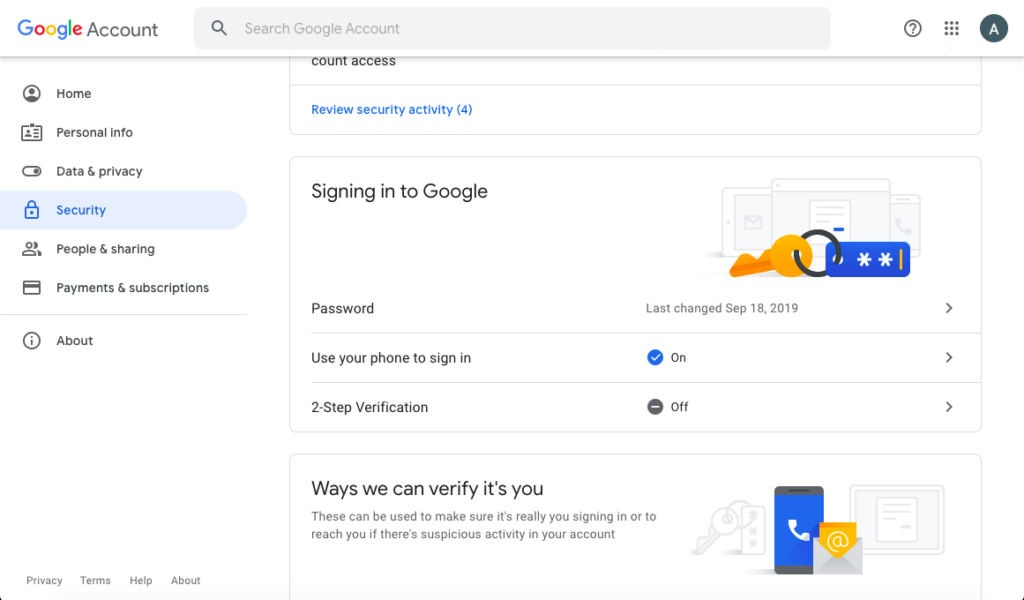
If it’s not enabled, follow these steps to do it first:
https://support.google.com/accounts/answer/185839
Once 2-Step Verification is active, the App Passwords option will be available in your account:
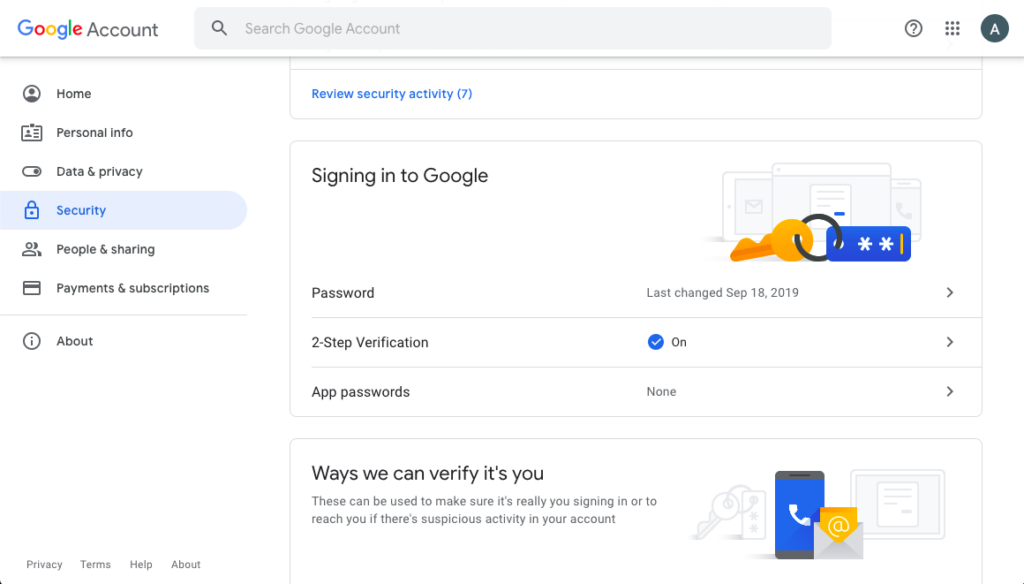
Click on the App Passwords option (or follow this link):
https://myaccount.google.com/apppasswords
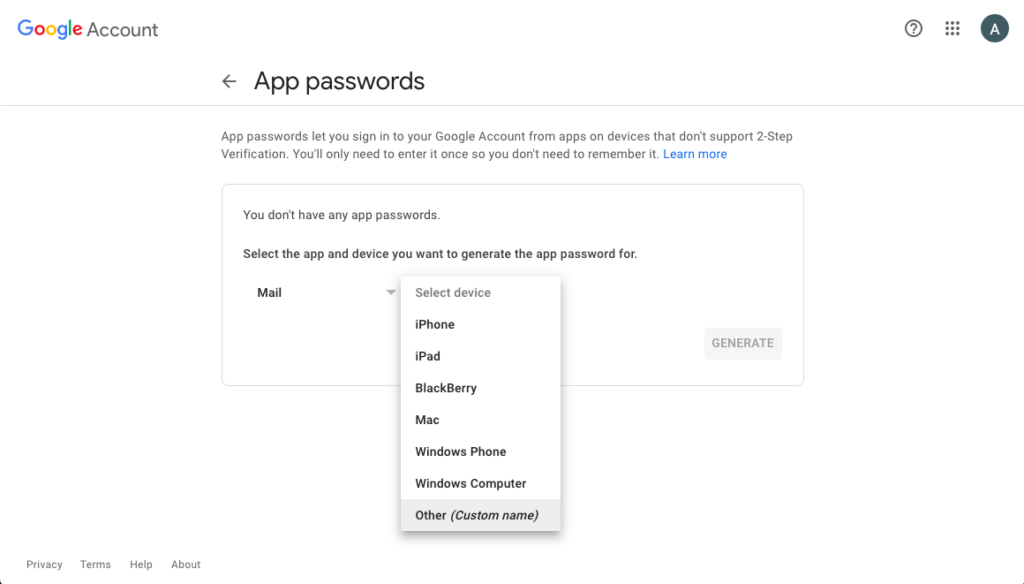
In this step, we’ll create a unique password for Product Recommendation Quiz to authenticate. Select “Mail” for the app option and “Other” for the device option. Then click on “GENERATE”:
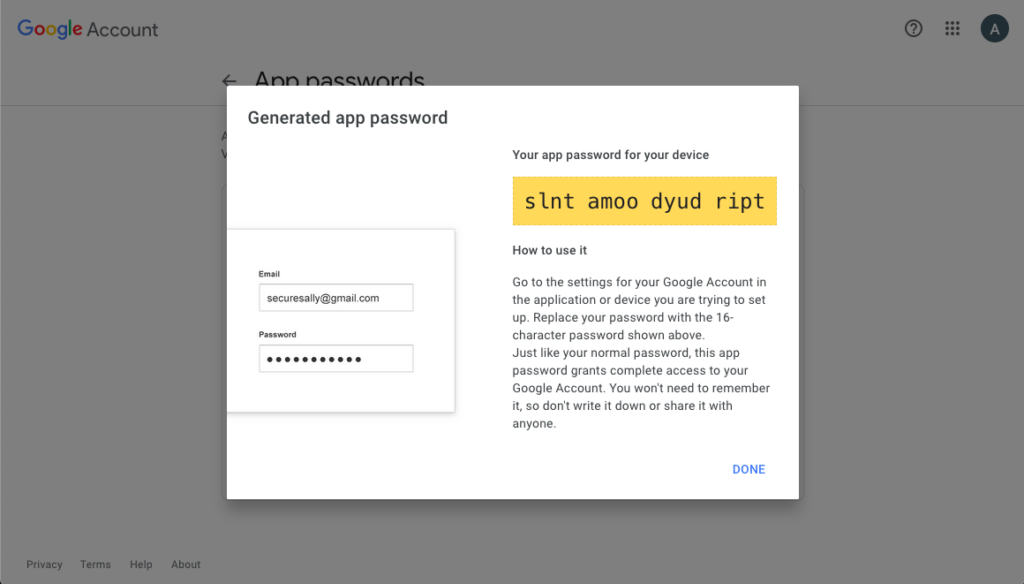
Copy the generated password, you’ll need it in the next step:
Log in to Product Recommendation Quiz, go to your quiz and navigate to the Notifications tab. Then, click on the SMTP tab. Fill the fields with the following SMTP server settings and click on “test connection & activate”:
SMTP Server: smtp.gmail.com
SMTP Username: your Gmail account ([email protected])
SMTP Password: the app password you generated previously
SMTP Port: 587 or 465 (try both, see which one works)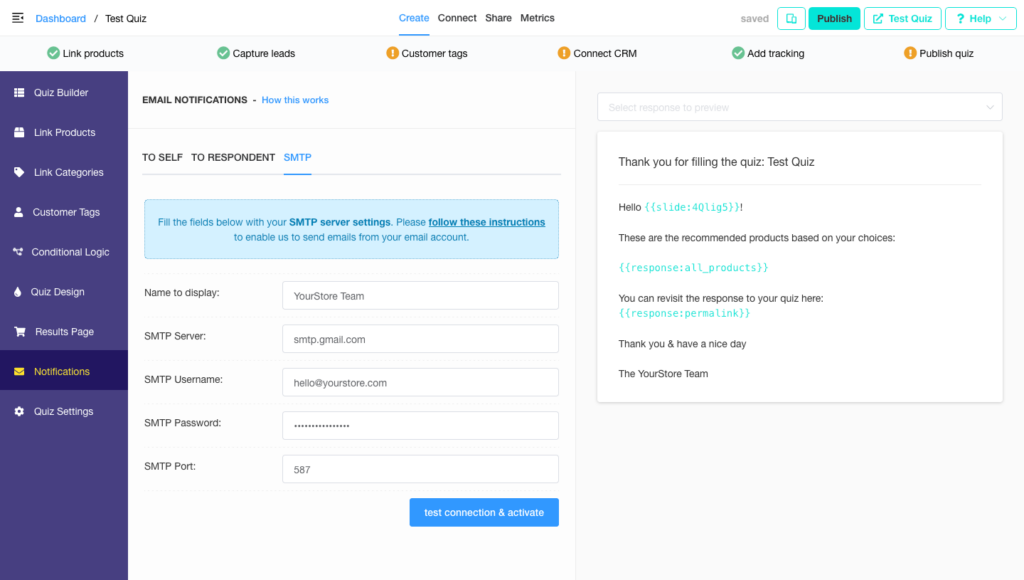
You should see a “success” message if everything is set up correctly.
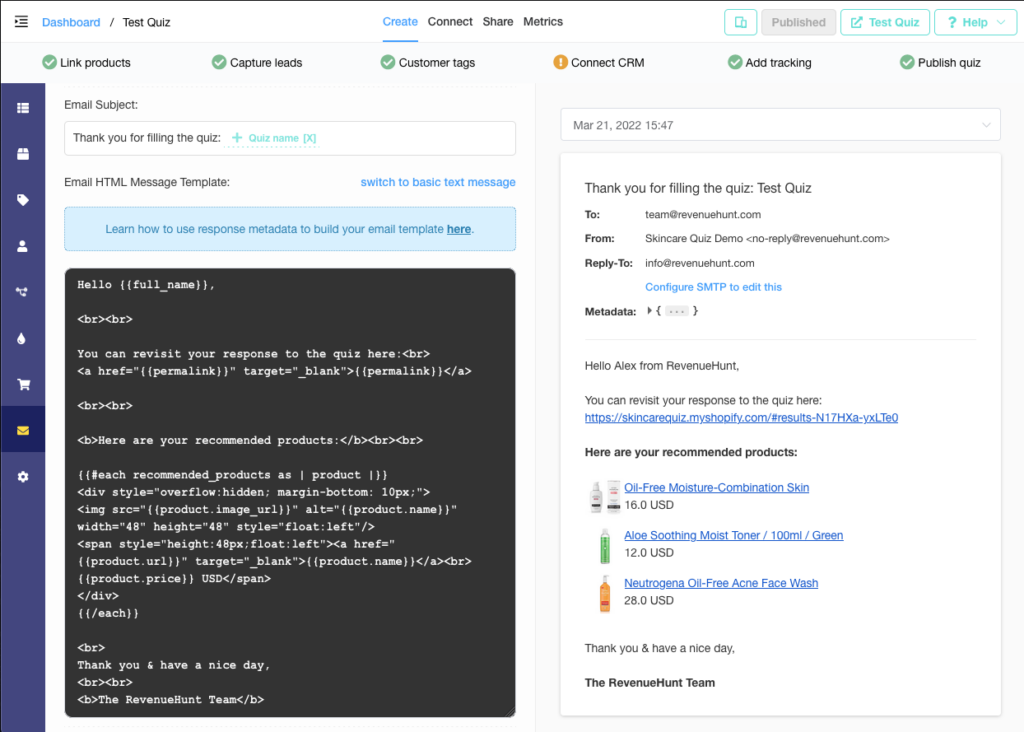
Sending custom HTML follow-up emails
If you want to customize the follow-up emails which are sent to your customers after they take the quiz, you can do so by activating the Advanced HTML Message feature. To activate it, navigate to the Quiz > Notifications > To Respondent section and click on the “switch to advanced HTML message” link.
This will display a code editor where you can create your HTML email template:
Note that HTML emails are not rendered the same in different email clients and that you should add styles inline, not as classes. Also, note that you can’t add JavaScript code since it won’t be executed by email clients.
How to use Handlebars template system
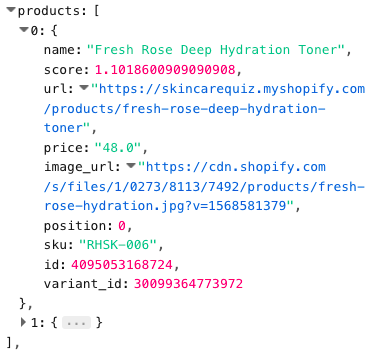
Each quiz response has metadata which can be used in your emails to personalize them. You can see the metadata from the quiz response here:

For example, if you want to display the respondent’s name, you can add the {{first_name}} handlebar.
In the above example, the following code:
<p>Hello {{first_name}},</p>
Should render:
Hello Alex,
The most recommended products are included in the metadata JSON inside the products property:
Here’s more information on how to use handlebars in your HTML email template:
https://handlebarsjs.com/guide/builtin-helpers.html and https://github.com/helpers/handlebars-helpers
Note: the format of the helpers used in the Notifications is a bit different than the one on GitHub. For example, a truncate(“product.name”, 7) helper should be used in the template as {{truncate product.name 7}}.
One property not listed in the above article is the {{#eq}} ... {{/eq}} property. It allows you to enter specific metadata.
For example,
{{#eq block.type "SlotsBlock"}} ... {{/eq}}allows you to enter all the slot blocks.
{{#eq block.id “A4TeY9”}} … {{/eq}}
allows you to enter a specific block. In this expample, a block with ID A4TeY9.
List the recommended products
If you want to loop through the most recommended products, you can do so like this:
{{#each products as | product |}}
<div style="overflow:hidden; margin-bottom: 10px;">
<img src="{{product.image_url}}" alt="{{product.name}}" width="48" height="48" style="float:left; margin-right: 10px;"/>
<span style="height:48px;float:left">
<a href="{{product.url}}" target="_blank">{{product.name}}</a>
<br>{{product.price}} USD</span>
</div>
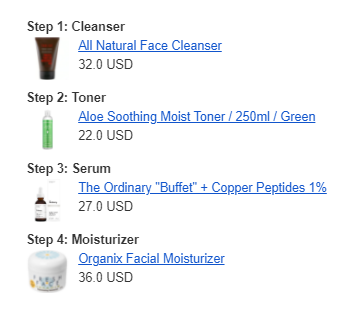
{{/each}}The above code should render something like this:

List recommended products with Slot Titles
If you want to list the most recommended product with Slot titles, you can do so like this:
{{#each blocks as |block|}}
{{#eq block.type "SlotsBlock"}}
{{#each block.slots as |slot|}}
<b>{{slot.title}}</b><br>
{{#each products as |product|}}
<div style="overflow:hidden; margin-bottom: 10px;">
<img src="{{product.image_url}}" alt="{{product.name}}" width="48" height="48" style="float:left; margin-right: 10px;"/>
<span style="height:48px;float:left">
<a href="{{product.url}}" target="_blank">{{product.name}}</a>
<br>{{product.price}} USD</span>
</div>
{{/each}}
{{/each}}
{{/eq}}
{{#eq block.type "ProductsBlock"}}
{{#each block.products as |product|}}
<div style="overflow:hidden; margin-bottom: 10px;">
<img src="{{product.image_url}}" alt="{{product.name}}" width="48" height="48" style="float:left; margin-right: 10px;"/>
<span style="height:48px;float:left">
<a href="{{product.url}}" target="_blank">{{product.name}}</a>
<br>{{product.price}} USD</span>
</div>
{{/each}}
{{/eq}}
{{/each}}
The above code should render something like this:
List recommended products separated by Slot Blocks
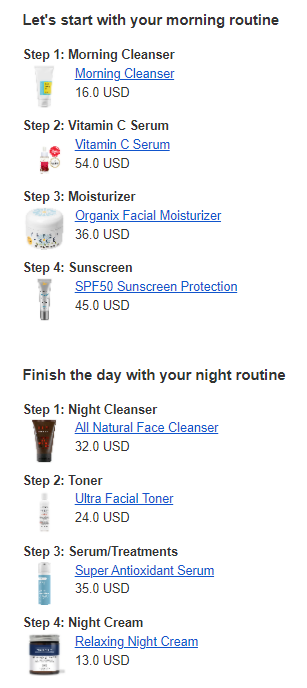
If you want to recommend a Morning and Night slot routine separately you can use the following code:
<h3>Let’s start with your morning routine</h3>
{{#each blocks as |block|}}
{{#eq block.id "A4TeY9"}}
{{#each block.slots as |slot|}}
<b>{{slot.title}}</b><br>
{{#each products as |product|}}
<div style="overflow:hidden; margin-bottom: 10px;">
<img src="{{product.image_url}}" alt="{{product.name}}" width="48" height="48" style="float:left; margin-right: 10px;"/>
<span style="height:48px;float:left">
<a href="{{product.url}}" target="_blank">{{product.name}}</a>
<br>{{product.price}} USD</span>
</div>
{{/each}}
{{/each}}
{{/eq}}
{{/each}}
<br>
<h3>Finish the day with your night routine</h3>
{{#each blocks as |block|}}
{{#eq block.id "PPT2PG"}}
{{#each block.slots as |slot|}}
<b>{{slot.title}}</b><br>
{{#each products as |product|}}
<div style="overflow:hidden; margin-bottom: 10px;">
<img src="{{product.image_url}}" alt="{{product.name}}" width="48" height="48" style="float:left; margin-right: 10px;"/>
<span style="height:48px;float:left">
<a href="{{product.url}}" target="_blank">{{product.name}}</a>
<br>{{product.price}} USD</span>
</div>
{{/each}}
{{/each}}
{{/eq}}
{{/each}}
Make sure to change the block IDs (“A4TeY9” and “PPT2PG”) to the ones in your quiz.
The above code should render something like this:
Email Templates
To download an email template, click the link below and past it in the Notifications -> To Respondent -> Advanced HTML template section.
- Advanced Slots Template (Morning & Night Routine) – take this quiz & enter your email to see a demo.
- Products List Template (Coffee Recommendations) – take this quiz & enter your email to see a demo.