Logic: how to show or hide content based on quiz answers
In this article, you’ll find out how to use IF-THEN conditional logic to show customized text to the quiz takers. The first part of the article shows how to add custom text inside your quiz with Jump Logic. The second part explains how to show custom text on the Results page. The third part shows how to achieve the same effect with Skip Logic.
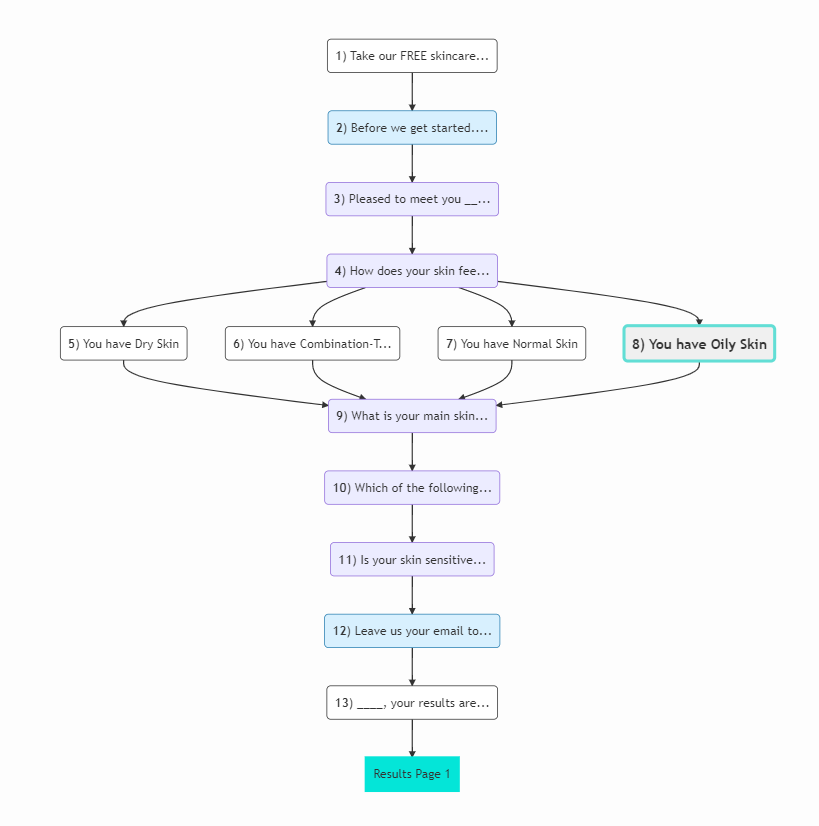
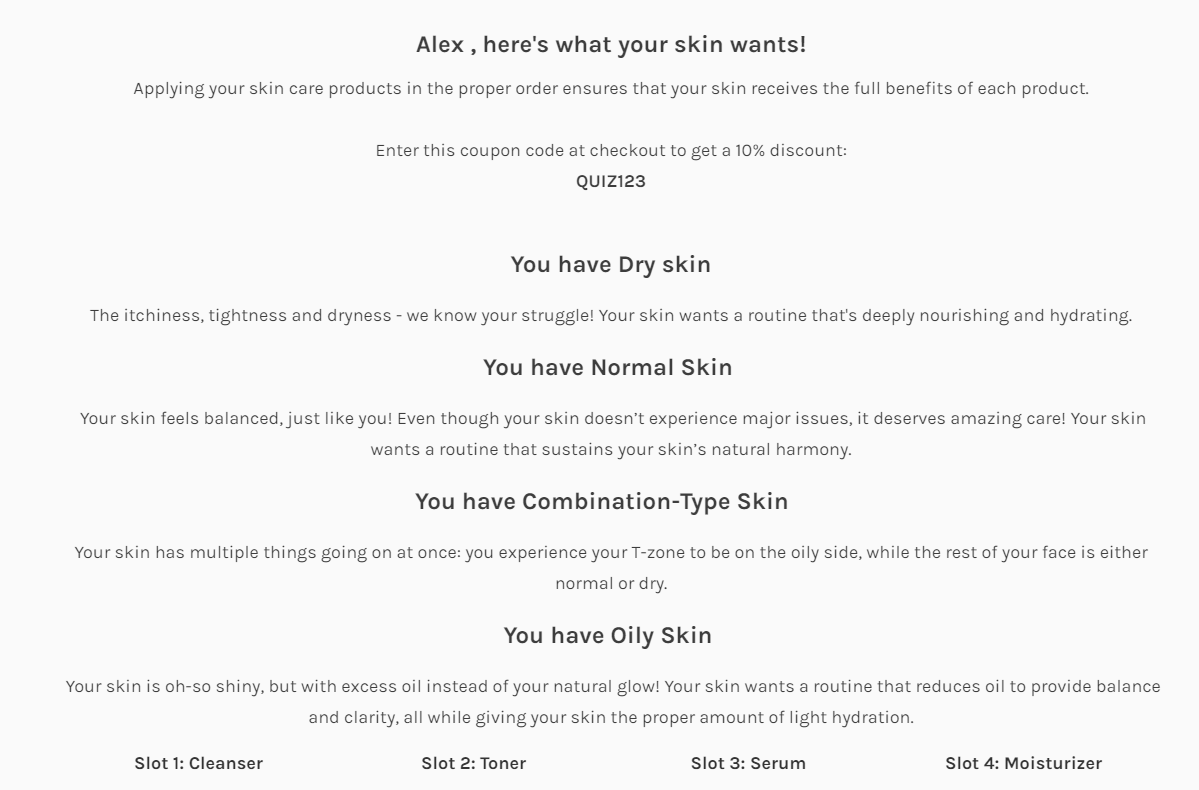
In this example, a skincare routine quiz is created and a custom text is displayed based on the customer’s skin type.
Jump Logic: How to show custom text in the quiz
Step 1: Create quiz
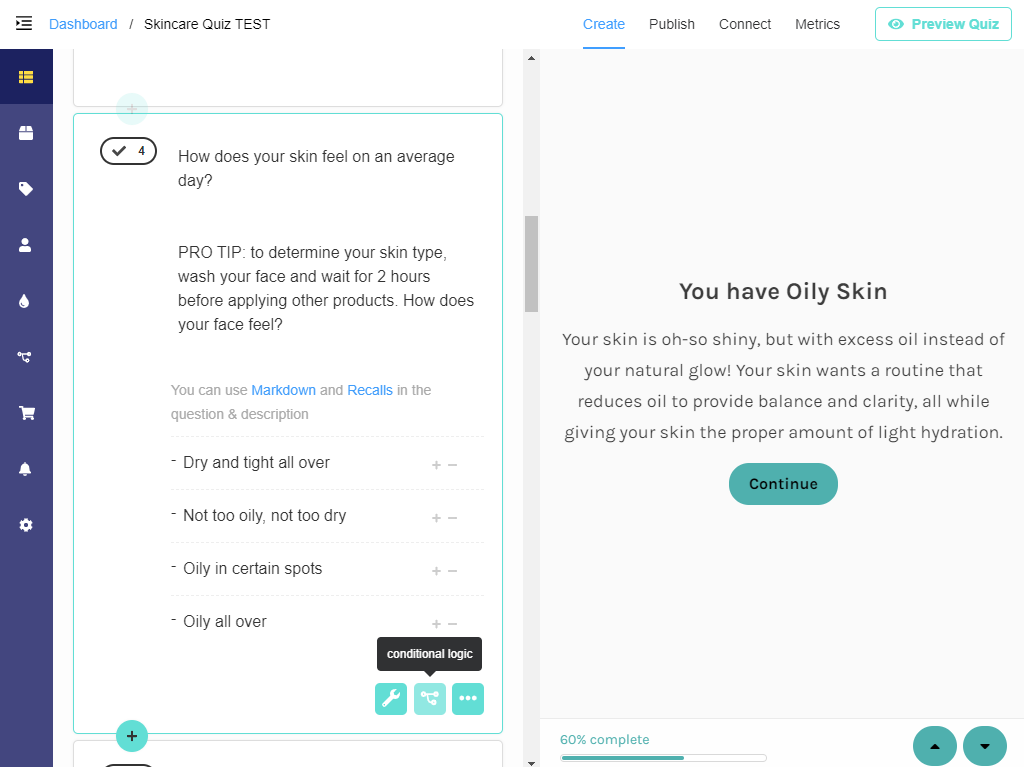
First, you’ll have to add a question asking the customer about their skin type. In this example, we’ll determine whether the user has Dry, Normal, Oily, or Combination-type skin. Go to your Quiz Builder and add a Multiple choice question.
Tip: Use the description box to help customers determine what their skin type may be. You can activate it in Question Settings -> Show Description.
Step 2: Create statement questions
Depending on what the customer chooses, a different text should appear describing the specific skin type and its challenges.
| You have Dry Skin The itchiness, tightness and dryness – we know your struggle! Your skin wants a routine that’s deeply nourishing and hydrating. |
You have Normal Skin Your skin feels balanced, just like you! Even though your skin doesn’t experience major issues, it deserves amazing care! Your skin wants a routine that sustains your skin’s natural harmony. |
| You have Oily Skin Your skin is oh-so shiny, but with excess oil instead of your natural glow! Your skin wants a routine that reduces oil to provide balance and clarity, all while giving your skin the proper amount of light hydration. |
You have Combination-Type Skin Your skin has multiple things going on at once: you experience your T-zone to be on the oily side, while the rest of your face is either normal or dry. |
To add a statement to your quiz click the plus sign and select “Statement” from the list.
To add a description go to Quiz Settings -> Show Description.
Replicate the process by adding statements for Normal, Oily and Combination-type skin.
Step 3: Add Jump Logic
Once you have all four statement questions, it’s time to set up the logic.
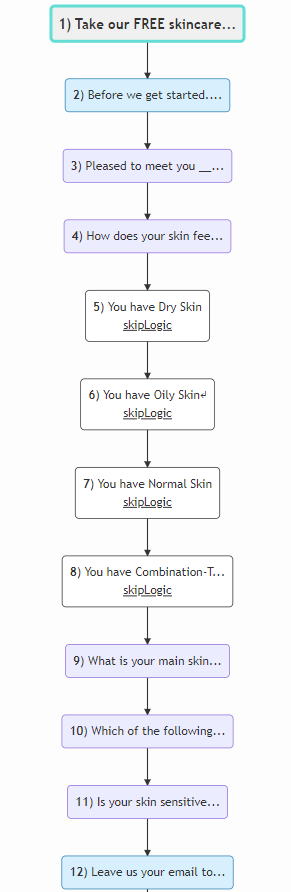
If we don’t add jump logic to the quiz, our statement questions will just appear one after the other, regardless of the choice we made.
To add jump logic, you should go back to the skin type question and select “conditional logic“.
Next, you should add a series of IF-THEN statements that will point the customer to the correct text, separated by an OR logic.

Here’s an example of the logic which redirects the customer to the Dry skin statement:
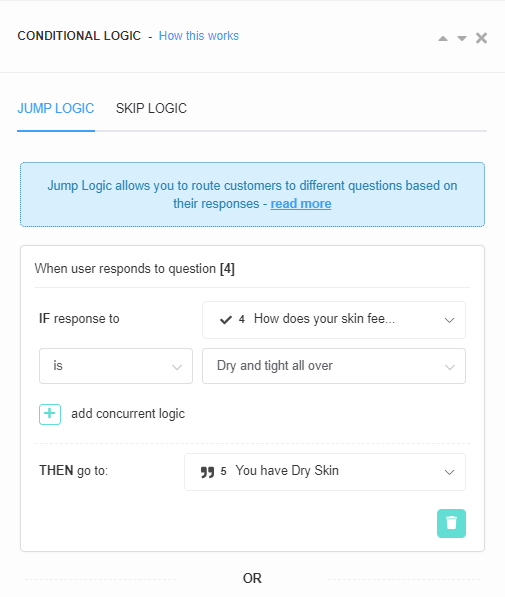
Once all the statements are linked with logic to the skin type question, you should point each statement to the next question in the quiz. This is done by going to the statement -> conditional logic -> jump logic -> Always jump to -> next question.
That’s it! You’ve just added personalized text to your quiz with simple jump logic.
Step 5: Test the quiz
Next, you should Preview the quiz to check if everything is set up correctly. Click on “Preview Quiz” in the top-right menu.
If you would like to know more about using Jump Logic, check this article.
Block Logic: How to show custom text on the Results Page
Step 1: Create quiz
First, you’ll have to add a question asking the customer about their skin type. In this example, we’ll determine whether the user has Dry, Normal, Oily, or Combination-type skin. Go to your Quiz Builder and add a Multiple choice question.
Tip: Use the description box to help customers determine what their skin type may be. You can activate it in Question Settings -> Show Description.
Step 2: Edit the Results Page
Depending on what the customer chooses, a different text should appear on the Results page describing the specific skin type and its challenges.
| You have Dry Skin The itchiness, tightness and dryness – we know your struggle! Your skin wants a routine that’s deeply nourishing and hydrating. |
You have Normal Skin Your skin feels balanced, just like you! Even though your skin doesn’t experience major issues, it deserves amazing care! Your skin wants a routine that sustains your skin’s natural harmony. |
| You have Oily Skin Your skin is oh-so shiny, but with excess oil instead of your natural glow! Your skin wants a routine that reduces oil to provide balance and clarity, all while giving your skin the proper amount of light hydration. |
You have Combination-Type Skin Your skin has multiple things going on at once: you experience your T-zone to be on the oily side, while the rest of your face is either normal or dry. |
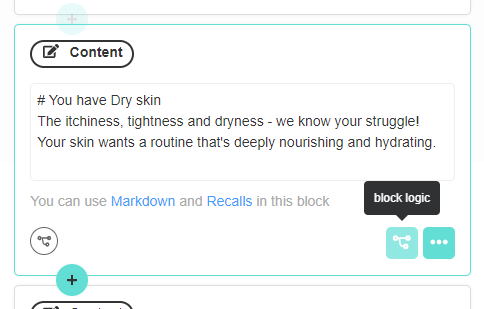
Go to the Results Page and add a new content block.
To add a content block click the plus sign and select “Content Block” from the list.
Tip: Make the heading stand out with markdown language. “#” sign before a sentence can make it bold.
Replicate the process by adding content blocks for Normal, Oily and Combination-type skin.
Step 3: Add Block Logic
Once you have all four content blocks, it’s time to set up the logic.
If we don’t add Block Logic to the quiz, our blocks will just appear one after the other on the Results Page, regardless of the choice we made.
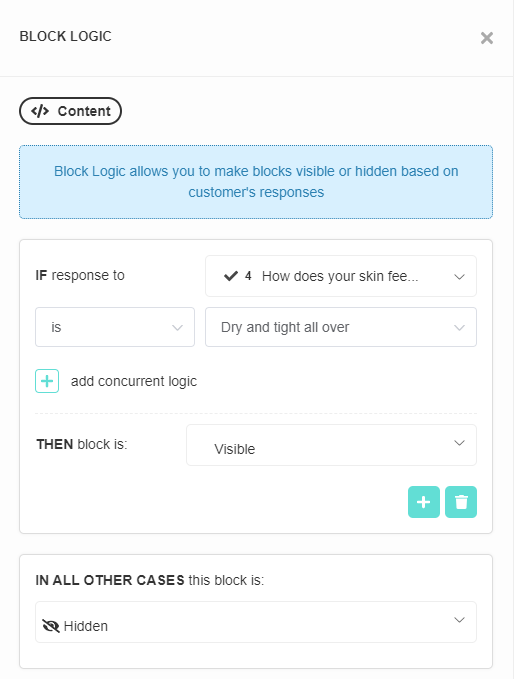
To add Block Logic, select a content block and click on “block logic“.
Next, click “add block logic” and add a IF-THEN statement that will determine when the content block should be visible or hidden.
Here’s an example of the logic applied to the Dry skin content block:
Replicate the process by adding IF-THEN-VISIBLE/HIDDEN block logic to content blocks for Normal, Oily and Combination-type skin.
That’s it! You created personalized text which will appear on the Results page depending on the skintype chosen.
Step 4: Test the quiz
Next, you should Preview the quiz to check if everything is set up correctly. Click on “Preview Quiz” in the top-right menu.
If you would like to know more about using Jump Logic, check this article.
Click here to learn how to build dynamic Results Pages.
Skip Logic: How to show custom text in the quiz
Step 1: Create quiz
First, you’ll have to add a question asking the customer about their skin type. In this example, we’ll determine whether the user has Dry, Normal, Oily, or Combination-type skin. Go to your Quiz Builder and add a Multiple choice question.
Tip: Use the description box to help customers determine what their skin type may be. You can activate it in Question Settings -> Show Description.
Step 2: Create statement questions
Depending on what the customer chooses, a different text should appear describing the specific skin type and its challenges.
| You have Dry Skin The itchiness, tightness and dryness – we know your struggle! Your skin wants a routine that’s deeply nourishing and hydrating. |
You have Normal Skin Your skin feels balanced, just like you! Even though your skin doesn’t experience major issues, it deserves amazing care! Your skin wants a routine that sustains your skin’s natural harmony. |
| You have Oily Skin Your skin is oh-so shiny, but with excess oil instead of your natural glow! Your skin wants a routine that reduces oil to provide balance and clarity, all while giving your skin the proper amount of light hydration. |
You have Combination-Type Skin Your skin has multiple things going on at once: you experience your T-zone to be on the oily side, while the rest of your face is either normal or dry. |
To add a statement to your quiz click the plus sign and select “Statement” from the list.
To add a description go to Quiz Settings -> Show Description.
Replicate the process by adding statements for Normal, Oily and Combination-type skin.
Step 3: Add Skip Logic
Once you have all four statement questions, it’s time to set up the logic.
If we don’t add skip logic to the quiz, our statement questions will just appear one after the other, regardless of the choice we made.
To add skip logic, you should go back to the skin type question and select “conditional logic“.
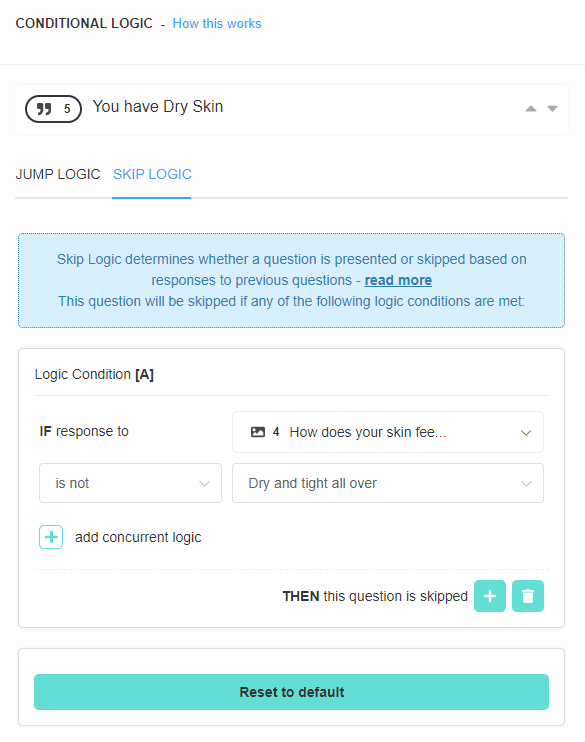
Next, you should navigate to the SKIP LOGIC section and add a skip logic rule to each statement. Like this:
Here’s an example of skip logic that should be applied to the Dry Skin statement:
Once all the statements are set up with skip logic based on the skin type question, you’re all set.
That’s it! You’ve just added personalized text to your quiz with simple skip logic.
Step 5: Test the quiz
Next, you should Preview the quiz to check if everything is set up correctly. Click on “Preview Quiz” in the top-right menu.
If you would like to know more about using Skip Logic, check this article.